
I Am... Velveeta Mac and Cheese
Homemade Velveeta cheese sauce with tender mac is what mac and cheese dreams are made of. If you’re looking for the creamy mac and cheese of your childhood, this is it. These days we have fancy mac and cheese with gruyere and breadcrumbs and all that, but do you ever dream of just easy plain mac and cheese, like the box kind, but without the powdered cheese and that mushy pasta? Enter this Velveeta mac and cheese. It's the perfect side dish for holidays, BBQs, and cookouts.
Have you ever seen a prettier mac and cheese?
This mac and cheese is a people pleaser! I mean, right now the only people I’ve been serving it to are myself and Mike, but boy oh boy does it hit the spot, especially after coming in from a crisp and cold walk. Super hearty and heartwarming, so cheesy and so easy. This super easy homemade recipe is made on the stovetop and can be enjoyed as is, or baked. I like it straight from the stovetop into a bowl, with a spoon because it’s the ultimate in cozy. I love this mac and cheese because it works as both a main and a side. I’ll serve it up with a salad as a main or as the most amazing side at Thanksgiving. Velveeta mac and cheese can do it all!Why Velveeta cheese?
Velveeta is the absolutely best nostalgic cheese. It’s the cheese I grew up eating and it makes for the SMOOTHEST cheese sauce ever. It’s makes mac and cheese gooey, cheesy, creamy, and so good. Velveeta shells and cheese is the ultimate taste memory that brings me right back to all the good things about being a kid.What other cheeses can I use?
The reason why this particular Velveeta mac and cheese is amazing is because it uses the super smooth power of Velveeta but also has the extra added bonus of 1/2 cup of shredded cheddar. You can’t skip out on the Velveeta, but you can switch out the cheddar for your favorite cheese! Try:- cheddar - this is the classic, but you can switch it up by choosing between sharp, mild, or medium. Sharp cheddar has the strongest cheddar taste, medium is in the middle, and mild is subtle and milky.
- mozzarella - extra gooey and stringy mac and cheese with pizza feels.
- parmesan - complex and full of umami with lovely nutty notes for a little bit of a more elevated mac and cheese.
- gruyere - smooth and velvety and full of flavor. Gruyere is nutty and earthy and using it in mac and cheese will remind you of fondue.
- smoked gouda - super creamy and melty with delicious smoked flavors. A campfire-ish mac and cheese for those cozy feels.
- fontina - a super melty cheese that is buttery and just a little nutty.
- cream cheese - this is a dark horse but it’ll add even MORE smoothness and creaminess. It’s especially good in crock pot mac and cheese.
How to make Velveeta mac and cheese
- Cook the pasta. Bring a large pot of salted water to a boil and cook your mac (or pasta of choice) according to the package directions, then drain well.
- Make a roux. While the mac is cooking, make a roux by melting butter in a saucepan. When it’s melted, add in the flour and spices and stir until everything comes together.
- Add the milk. Pour the milk in slowly, stirring so the sauce is smooth and creamy. When you’re done adding in the milk, let the sauce come to a simmer so it thickens up.
- Melt the cheese. Add the Velveeta – it’ll melt easier if you cube it up – and stir until until the sauce is creamy.
- Stir in the mac. Add the drained mac, mix everything up and enjoy!
Stovetop Velveeta mac and cheese
To be honest, my favorite kind of mac and cheese is stove top mac and cheese because I don’t want to wait for baked! I just prepare the Velveeta mac and cheese and eat it straight from the pot.Baked Velveeta mac and cheese
Sometimes mac and cheese with a crispy baked top can’t be beat. If you’re a baked mac and cheese lover, just pop the mac and cheese into a casserole dish, top with some extra cheese and bread crumbs and bake at 350°F for about 20-30 minutes, or until the top turns golden, crispy, and crunchy.Instant Pot Velveeta mac and cheese
- Add 2 cups (8 ounces) uncooked macaroni, 1 3/4 cups water, 2 tbsp butter, and 1/2 tsp each of garlic powder, onion powder, and dry mustard powder to the Instant Pot insert and stir well.
- Cook on high pressure for 4 minutes then quick release and carefully open the lid. Stir in 1/2 lb cubed Velveeta, 1/2 cup of shredded cheddar, and 1/2 cup milk until the cheese melts and coats all the mac.
Crockpot Velveeta mac and cheese
- Add 2 cups (8 ounces) uncooked macaroni, 2 cups milk, 1/2 lb cubed Velveeta cheese, 1/2 cup shredded cheddar, 2 tbsp butter, 1/2 tsp each of garlic powder, onion powder, and dry mustard powder to the Crock Pot and stir well.
- Set on low for 1.5 hours with the lid on, stirring occasionally.
- Test for doneness at the 1 hour mark and add milk, 1/4 cup at a time if the cheese sauce starts to get too thick.
The right pasta shape
Elbow mac is THE shape for mac and cheese, but sometimes you want something a little more adult. Try these if you're (somehow) bored of the classic smile shape:- Penne - fun fact: penne was intended to look like a fountain pen's nibs. Penne comes smooth and ridged, but the ridged ones are the best for picking up sauce.
- Ziti - ziti are like straightened out macaroni and they're the closest modern version of the original maccheroni noodle. Be sure not to rinse these pasta between cooking and saucing or the sauce won't stick as well.
- Rigatoni - rigatoni sometimes feels like the overlooked shape for mac and cheese but it's actually one of the best. The large diameter of tube picks up cheese both on the inside and out, and the ridges pick up even more cheesy flavor than elbow mac could. It's the most adult shape, to be honest.
- Gemelli - gemelli means twins and they're like the DNA shape in pasta form. They're two tubes, twisted around each other.
- Casarecce - from the top view these look like little S's. Because of the shape, they seem to have two layers when you bite down and have a firm and satisfying chew you just don't get with a single layer pasta.
- Bucati corti - These are like little telephone cords, cut into 2 inch lengths. They're a super yummy shape to eat and the nooks and crannies carry a lot of extra cheesy sauce.
- Cavatappi - also known as Scooby Doo pasta, these are fun spirals that bounce when you pick them up. They're like the giant version of bucati corti.
Mac and cheese variations
- Pumpkin mac and cheese - stir in 1/2 cup of pumpkin puree
- Green chile mac and cheese - stir in 1 small can of chopped green chiles
- Cheeseburger mac and cheese - stir in 1 lb of seasoned browned ground beef, 1/2 cup diced onion, 1/4 cup tomato paste
- Taco mac and cheese - stir in 1 lb of seasoned browned ground beef, 2 tablespoons of taco seasoning, and 2 chopped tomatoes. Top with Mexican 4 cheese blend.
- Bacon mac and cheese - sprinkle on crispy bacon
- Tuna mac and cheese - stir in 2 cans of drained tuna and 1 cup of frozen green peas
- Green mac and cheese - stir in 2 tablespoons pesto, and 2 cups cooked chopped broccoli
How to make a double portion of Velveeta mac and cheese
If you need to make even MORE Velveeta mac and cheese, there’s a handy recipe scaler that you can use below. Just change the “serves 4” to how many you need to serve. Just make sure that you use the ounce measure for the pasta because the scaler only changes the ounce amount for the pasta.Make ahead Velveeta mac and cheese
You can absolute make this mac and cheese ahead of time and then either bake it in the oven with breadcrumbs on top or reheat it on the stove with a splash of milk, stirring until it becomes loose and gooey. It comes together super quickly but I totally understand how making things ahead for dinner parties and big events makes things easy. I think it heats up perfectly the next day and some how tastes even better?Can you freeze mac and cheese?
Yes! you can either store it in the fridge tightly covered for a week, or freeze in an air-tight container or heavy duty freezer bag for up to 1-2 months. Don’t forget to label and date it!How to reheat mac and cheese
Pop it in the microwave, covered and loosen with a bit of milk if needed. You can also cover it with foil and bake it in a low oven (325°F) until hot, about 20 minutes. Stir in a bit of milk after warmed through if needed.What to serve with mac and cheese
A little bit fancier
If you love mac and cheese and want to expand your horizons, give Tini’s Mac and Cheese a try! xoxo StephVelveeta Mac and Cheese
If you’re looking for the creamy mac and cheese of your childhood, this is it.
- 8 oz macaroni (about 2 cups dry, or other small pasta of choice)
- 2 tbsp butter
- 2 tbsp flour
- 1/2 tsp garlic powder
- 1/2 tsp onion powder
- 1/2 tsp dry mustard powder
- 1.5 cups milk (of choice)
- 1/2 lb Velveeta cheese (cubed)
- 1/2 cup shredded cheddar
Cook the macaroni in a large pat of salted water according to the package directions and drain well. In a large saucepan, melt the butter over medium heat. When melted, stir in the flour, garlic powder, onion powder, and dry mustard, until smooth and incorporated.
Pour the milk into the pan in a thin stream while whisking, until smooth. Keep on medium heat, stirring occasionally, until the sauce bubbles and thickens, 3-5 minutes.
Add the cubed Velveeta and shredded cheddar and stir until melted and creamy.
Add in the drained macaroni, mixing until evenly coated, taste and season with salt and pepper. Enjoy!
To bake: Scoop the mac and cheese into a oven safe casserole dish, top with 1/4 cup of shredded cheddar and 1/4 cup panko breadcrumbs or crushed ritz crackers and bake at 350°F until the cheese melts and is golden and crisp, 20-30 minutes.

I Am... Beef Tenderloin with a Giant Sauce Board
You should treat yourself. It’s been a rough year and you need something luxurious. This year you need a beautifully rosy, fork-tender, juicy beef tenderloin! You’re probably thinking, aren’t beef tenderloins giant and serve 8-10 people? The answer is yes. But there are also center cut tenderloins that are mini and serve just 4. That’s perfect for you, your other, and LEFTOVERS. Or maybe just a really, really hearty meal. Either way, if you’re looking to make a large beef tenderloin or a slightly smaller one, here are all the tips and tricks for making the best roast beef in your life, aka roast beef tenderloin. Note: this year beef tenderloin is expected to be really expensive and hard to come by for a lot of different reasons, so if you traditionally plan one for the holidays, it might be worth asking a butcher about it now, or consider switching to a slightly more accessible but still fancy cut like our prime rib roast or even pork tenderloin.
What is beef tenderloin?
Beef tenderloin, also known as eye fillet or filet is cut from the loin. The tenderloin is found underneath the ribs, close to the backbone. This part of the cow does very little work which is why is is the tenderest part of beef. Cooked properly, it’s got a melt-in-your-mouth buttery texture and is extremely juicy and delicious. It naturally comes in a nice round-cylinder shape with no bones which means it’s really easy to carve into medallions and serve.Is beef tenderloin the same as filet mignon?
Tenderloin and filet mignon come from the same part of beef and even have the same shape and size, but technically, they’re not the same cut. Filet mignon is part of beef tenderloin but tenderloin is not filet mignon. It gets pretty in-depth, but all you need to know is that filet mignon are cut from a certain part of tenderloin and when you buy a whole tenderloin, some parts are the filet mignon and some parts are just going to be tenderloin. Is this really important though? I say no, just tell yourself and your guests that you’re serving them up filet mignon steaks ;)Where is the best place to buy beef tenderloin?
Not going to lie, beef tenderloin is probably one of the most expensive pieces of meat out there. If you’re looking for the most affordable beef tenderloins, go to Costco. They sell beef tenderloins that are a fair bit cheaper than say, Whole Foods. That being said, the tenderloins at Costco – just like everything else there – are giant, so keep that in mind. If you’re looking for a smaller, center cut tenderloin, visit your local butcher where you’ll be able to find a tenderloin that’s about 3.5-4 pounds compared to the 6-10 pound giants at Costco.Should I buy a trimmed or untrimmed beef tenderloin?
When buying beef tenderloin you’ll notice that they come in trimmed and untrimmed, also sometimes called denuded. If you’re excellent and confident about your knife skills you can save yourself some money and get an untrimmed tenderloin. Personally, we always go for trimmed because part of the beauty of a tenderloin is the nice cylindrical shape and nothing beats the years of experience a butcher has trimming tenderloins into perfect pieces.How big of a beef tenderloin should I buy?
Generously, go for 3/4 lb of tenderloin per person. If you’re having a large amount of sides, 1/2 lb should be more than enough.The best way to cook beef tenderloin
The best way to cook beef tenderloin is to start in a high oven to sear and brown the outside, then turn the oven low so that the inside cooks at a very slow and low rate. It’s a brilliantly simple foolproof method that ensures you don’t mess up a very expensive piece of meat. The outside ends up with a nicely browned crust and the insides are ultra-tender and perfectly pink.How to cook beef tenderloin
- Heat your oven to 475°F. We’re going to start by blasting the tenderloin with super high heat.
- Pat the tenderloin very dry and salt generously while the oven is preheating,
- Tie the tenderloin in 1 inch intervals to ensure that it’s compact and evenly sized throughout. Make sure you dip your butcher string in some oil so it doesn’t stick to the roast.
- Rub the loin all over with oil and coat with crushed peppercorns. Insert an oven probe into the thickest part of the tenderloin.
- Roast at 475°F for 15 minutes then turn the oven down to 200°F and roast until the inside reaches your desired temperature.
- Remove, let rest, slice, and enjoy the deliciousness.
How to tie beef tenderloin
Beef tenderloins are nice and round in the middles, but unless you get a smaller, center cut tenderloin, you’ll find that the edges are tapered. We want to wrap these up and tie them so that everything is compact and round, ensuring that the edges don’t get overcooked.To tie your beef tenderloin:
- Cut some butchers string into 12 inch lengths.
- Soak the strings in oil.
- Tuck the tapered ends underneath themselves to create the same thickness throughout the tenderloin.
- Use the oiled strings to tie the tenderloin in 1 inch intervals.
Beef tenderloin ingredients
We’re keeping this beef tenderloin super simple so we can let the beef shine. All you need is: whole beef tenderloin, neutral oil, salt, whole crushed peppercorns.Beef tenderloin sauces
I love a naked salt and pepper tenderloin with all of its elegant simplicity, but sometimes I want to be punched in the face with flavor too. So here are six different sauces you can pair with your beef tenderloin. We did a choose your own adventure sauce board and it was awesome to go from simply seasoned to trying a different sauce on each bite! Each sauce recipe will make about 1 cup sauce.① Classic Creamy Peppercorn
Add 1/4 cup brandy or cognac to a pan and reduce slightly over medium heat. Stir in 1/2 cup no sodium beef broth and 1/3 cup cream. Add 1-2 tsp crushed whole peppercorns and simmer, stirring occasionally, until thickened to your liking. Season with salt to taste.② Mustard Cream Sauce
Add 1/4 cup white wine to a pan and reduce slightly over medium heat. Stir in 2 tbsp dijon mustard and 3/4 cup heavy cream. Bring to a gentle simmer, stirring occasionally, until thickened to your liking. Season with lots of freshly cracked black pepper and salt to taste.③ Garlic Soy Chimichurri
Combine 2 tbsp toasted sesame oil, 2 tbsp rice vinegar, 1 tsp soy sauce, 2 cloves crushed garlic, and 1/4 cup chopped cilantro in a small bowl and let sit for 10 minutes for the flavors to meld.④ Garlic Herb Butter
Melt 1/2 cup butter with 4 cloves crushed garlic in small pan over low heat. Remove from the heat and stir in 2 tbsp chopped fresh herbs (rosemary, sage, thyme) and season with salt and freshly ground pepper to taste.⑤ Sichuan Peppercorn
Combine 2 tbsp Sichuan chili oil, 2 tbsp soy sauce, 2 tbsp toasted sesame oil, 1 tbsp black vinegar, 2 cloves crushed garlic, 2 thinly sliced scallions, and 1 tbsp chopped cilantro to a small bowl and let sit for 10 minutes for the flavors to meld.⑥ Wasabi Cream Sauce
Combine 2 tbsp sour cream, 2 tbsp mayonnaise, 1/2-1 tbsp wasabi and 2 thinly sliced scallions in a small bowl and let sit for 10 minutes for the flavors to meld.⑦ Red Wine Shallot
Add 1 tbsp butter and 1 thinly sliced shallot to a pan and sauté over medium low heat. Sprinkle on 1 tbsp flour and cook lightly. Slowly stream in 3/4 cup stock and 1/4 cup red wine while whisking. Simmer and thicken, season with salt and pepper to taste.Pro tips when cooking beef tenderloin
- Dry the surface throughly. Patting the skin dry with paper towels will dry out the surface which will help the tenderloin brown when it’s in the oven. Moisture is the enemy of browning.
- Salt so that the surface of the skin is dry. Ditto on salting - salt draws out moisture so the surface can brown more evenly. Be generous because the inside of the meat won’t be seasoned. Make it rain salt! But not too much because overly salty meat is a travesty
- Tie the tenderloin. Tenderloins have tapered tips that need to be tucked and tied so they cook evenly. Use a meat probe. A meat probe will ensure the middle of your tenderloin is a juicy, rosy ruby pink.
- Let it rest! Let the meat rest before slicing into it.
- Don’t forget about carry over cooking. Pull your tenderloin when it reaches just a couple of degrees under the temperature you’re aiming for. While you’re resting, the internal temperature will rise by a few degrees because of carry over heat. Ours rose by 12ºF while resting.
The importance of a meat thermometer
A meat thermometer is essential when cooking a big piece of meat. You spent a large chunk of your paycheck on this, so let’s not do the whole squishing your thumb/touching your earlobe. Do yourself a favor and get an oven probe; one that beeps when the target temp is hit. They can be really cheap, extremely expensive wireless app driven, or something in between. If you have an instant read or thermocouple style thermometer , be sure to check often so the tenderloin doesn’t go over temp.Roast beef cooking temps
For a quick and easy reference, roast beef is roughly done at:- Rare: 125ºF
- Medium-rare: 135ºF
- Medium: 145ºF
- Medium-well: 155ºF
- Well done: ??♀️
Why isn’t my beef tenderloin pink?
Oops, you probably left it in the oven too long. But fear not! If when you slice into your tenderloin right away and it’s not as pink as you like, just wait. Roast beef becomes more pink and rosy after you cut it and the juices are exposed to the air. On that note, most of the tenderloin recipes on the internet show a super bloody rare middle. If you want your tenderloin to be on the very pink side, pull it out of the oven at 115°F and the carryover heat should bring it to 120°F for the super pink look. Also, the majority of tenderloin recipes you see are very small center cut tenderloins, 3-4 pounds, which take much less time to cook, so if you’re looking for a very pink middle, make sure you keep an eye on the time and use a meat probe.How to neatly slice roast beef
You’ve invested time and money into your glorious beef tenderloin, don’t hack at it and get those weird saw marks! To get the cleanest, nicest slice:- Get your biggest knife. You’ll need the length. Give it a sharpen and wash it off. When was the last time you sharpened your knife?!
- Hold the beef tenderloin on a cutting board with your non-dominant hand. Position the very tip of the knife, at a 30° angle on the edge of the tenderloin that is closest to your body.
- Push the knife away from your body, almost perpendicular to the cutting board. Use the whole length of your knife so that the heel of your knife is now at the opposite edge of the tenderloin, the side farthest away from you. The knife should slide right into the tenderloin, about 1/3 to half of the way down.
- Pull the knife back towards your body, giving it a bit of pressure so that the tip of the knife is now where it started, at the end of the tenderloin closet to you. You should be about another 1/3 or so of the way down through the tenderloin.
- Finally, push the knife away from you one last time and you should have a nice clean slice. Keep your motions smooth and gentle and let the sharpness of your knife do the work.
How to store leftover beef tenderloin
Wrap it up tightly and store in an air tight container in the fridge. Beef tenderloin should keep for 3-4 days.How to reheat beef tenderloin
If you have leftovers, this is how to reheat beef tenderloin: Place slices covered, in a low 200°F oven, for 20-30 minutes or until warmed through. OR microwave it in 30 second increments. Believe it or not, the inside will still be red and juicy. If it’s not hot after the first 30 seconds, continue to microwave in 15 second intervals.What to serve with beef tenderloin
POTATOES! It’s always the answer:
- Roasted Potatoes: Crisp, Fluffy, and Potato-y
- Instant Pot Mashed Potatoes
- Potato Snack: 64° Eggs, 72° Potatoes, Toast
- Crispy Duck Fat Oven Roasted Potatoes
Greens are good too:
- Easy Roasted Air Fryer Asparagus
- Crispy Air Fryer Roasted Brussels Sprouts
- Crispy Air Fryer Roasted Broccoli
And bread-y carbs because bread:
Beef Tenderloin
The best roast beef tenderloin!
- Meat thermometer with probe
- 1 beef tenderloin (trimmed, about 5-6 lbs)
- neutral oil
- salt
- 1/2 cup peppercorns (crushed)
Pat the tenderloin dry with paper towels. Season with salt. Soak some butcher string in oil then tie the tenderloin every 1 inch or so, being sure to tuck in the tails so that the tenderloin is an even thickness throughout.
Rub the tenderloin with oil and coat in crushed peppercorns. Heat the oven to 475°F.
Place the tenderloin on an oiled roasting rack over a rimmed baking sheet and insert a meat probe set for your desired doneness. When the oven is hot, place the tenderloin in the oven and roast at 475°for 20 minutes.
Turn the heat down to 200°F and roast until the center is 120°-125°F for rare to medium rare, about 2-2.5 hours, depending on size.
Once the meat reaches your desired temperature, remove from the oven, tent with foil and let rest for minimum 10 minutes. Slice into 1 inch pieces, arrange on a platter, and enjoy.
Sauce Ideas:
Classic Creamy Peppercorn
Add 1/4 cup brandy or cognac to a pan and reduce slightly over medium heat. Stir in 1/2 cup no sodium beef broth and 1/3 cup cream. Add 1-2 tsp crushed whole peppercorns and simmer, stirring occasionally, until thickened to your liking. Season with salt to taste.
Mustard Cream Sauce
Add 1/4 cup white wine to a pan and reduce slightly over medium heat. Stir in 2 tbsp dijon mustard and 3/4 cup heavy cream. Bring to a gentle simmer, stirring occasionally, until thickened to your liking. Season with lots of freshly cracked black pepper and salt to taste.
Garlic Soy Chimichurri
Combine 2 tbsp toasted sesame oil, 2 tbsp rice vinegar, 1 tsp soy sauce, 2 cloves crushed garlic, and 1/4 cup chopped cilantro in a small bowl and let sit for 10 minutes for the flavors to meld.
Garlic Herb Butter
Melt 1/2 cup butter with 4 cloves crushed garlic in small pan over low heat. Remove from the heat and stir in 2 tbsp chopped fresh herbs (rosemary, sage, thyme) and season with salt and freshly ground pepper to taste.
Sichuan Peppercorn
Combine 2 tbsp Sichuan chili oil, 2 tbsp soy sauce, 2 tbsp toasted sesame oil, 1 tbsp black vinegar, 2 cloves crushed garlic, 2 thinly sliced scallions, and 1 tbsp chopped cilantro to a small bowl and let sit for 10 minutes for the flavors to meld.
Wasabi Cream Sauce
Combine 2 tbsp sour cream, 2 tbsp mayonnaise, 1/2-1 tbsp wasabi and 2 thinly sliced scallions in a small bowl and let sit for 10 minutes for the flavors to meld.
Red Wine Shallot
Add 1 tbsp butter and 1 thinly sliced shallot to a pan and sauté over medium low heat. Sprinkle on 1 tbsp flour and cook lightly. Slowly stream in 3/4 cup stock and 1/4 cup red wine while whisking. Simmer and thicken, season with salt and pepper to taste.

I Am... 75 Best Thanksgiving Side Dishes
Thanksgiving is just around the corner and *all* about the sides. I love Thanksgiving side dishes with a passion, but how exactly do you decide what you’re going to make?
The Six Essential Thanksgiving Side Dishes
Everyone knows the feeling of getting sucked into a research hole on the internet. There are so many sites with massive lists of side dishes out there. But, if you’re anything like me, you get choice paralysis. There is definitely too much of a good thing. So, here are my six (yes, only six!) favorite Thanksgiving sides. I hope one of them makes it on to your Thanksgiving menu.Tini's Mac and Cheese
This viral mac and cheese is a lot of work but totally worth it. It sounds so over the top but really, isn't that what Thanksgiving is all about? [wprm-recipe-roundup-item id="42985"]The Ultimate Green Bean Casserole
Let’s start off with this one because, green equals health. This is the mushroom-iest green bean casserole you’ll ever have. I love how the beans are crisp, snappy, and so fresh, all thanks thanks to an ice bath that leaves them an almost absurd shade of green. The mushroom sauce has a quadruple dose of umami thanks to mushrooms, soy sauce, fish sauce, and parm. Store bought crispy onions finish the whole thing off. Honestly, I can eat just these and call it a meal. [wprm-recipe-roundup-item id="35659"]Velveeta Mac and Cheese
Who doesn’t love mac and cheese? Velveeta mac forever and ever because it’s a creamy, dreamy classic. I mean, just look at that bowl. It’s got the the cheese! Glossy, smooth, and simply delicious. It’s the best and will forever be on our Thanksgiving menu. [wprm-recipe-roundup-item id="34521"]Soft and Fluffy Dinner Rolls
Some people might think that making your own homemade rolls is overkill, especially considering stuffing is an essential. I say, give me all that carb on carb action. Thanksgiving is just once a year and homemade squishy buns are so dreamy. It’s a pro move to brush garlic butter on top after they come out of the oven. [wprm-recipe-roundup-item link="https://peak-again.today/soft-and-fluffy-dinner-roll-recipe/" newtab="0" name="" summary=""]The Best Mashed Potatoes
I’m a mashed potato connoisseur. Mike once did a double blind taste test for me with varying potato varieties and recipes and I was able to identify every singe one. This is my go-to recipe for mashed potatoes. It’s smooth and creamy, buttery and fluffy. It’s truly the best. The secret is that there is no secret, just good technique. Pure potato goodness from just potatoes, garlic, butter, and milk. [wprm-recipe-roundup-item id="36567"]Mushroom Shallot Stuffing
Stuffing (or dressing, if you must) lovers unite! I love stuffing so much that I make extra so I can eat it for breakfast every single day after thanksgiving. Turkey sandwiches? No thanks, give me stuffing please! This recipe, which I love making in the crock pot so it frees up the oven, is crisp and custard-y, and full of flavor. You can make it in the oven too, but don’t skip out on toasting the bread before making the stuffing, it’s what makes it so good. [wprm-recipe-roundup-item id="35797"]Is it even Thanksgiving without Potato??
I love potatoes so much that I draw potatoes in my spare time. A potato buffet is my dream buffet.Instant Pot Mashed Potatoes
Super creamy, super Instant (Pot) mashed potatoes with garlic and cream and butter. [wprm-recipe-roundup-item id="34840"]Cheesy Potato Balls
Cheesy potato balls because even better than mashed potatoes are mashed potatoes stuffed with cheese and deep-fried with a crispy outer crust. [wprm-recipe-roundup-item link="https://peak-again.today/how-to-make-cheesy-potato-balls/" newtab="0" name="" summary=""]Air Fryer Potatoes
Crispy air fryer potatoes for those times when you want a crispy roast potato but the turkey’s in the oven. [wprm-recipe-roundup-item id="35009"]Potato salad
Potato salad because why can’t you have potato salad at Thanksgiving? This one has addictive kewpie mayo and rice vinegar in it. [wprm-recipe-roundup-item link="https://peak-again.today/perfect-picnic-potato-salad-recipe/" newtab="0" name="" summary=""]Potato Pancakes
Irish boxty potato pancakes are soft on the inside and crispy on the outside. Nothing like latkes, more plush and potato-y. [wprm-recipe-roundup-item link="https://peak-again.today/potato-pancakes-like-youve-never-seen-before-irish-boxty-recipe/" newtab="0" name="" summary=""]Jalapeño Bacon Ranch Twice Baked Potatoes
Mini little potatoes you can just keep popping into your mouth, filled with ranch, bacon, and cheese. [wprm-recipe-roundup-item link="https://peak-again.today/jalapeno-bacon-ranch-mini-twice-baked-potatoes-recipe/" newtab="0" name="" summary=""]Crispy Stovetop Roasted Reds
If your oven isn’t free, these are the potatoes for you: crunchy on the outside and deliciously creamy on the inside. [wprm-recipe-roundup-item link="https://peak-again.today/crispy-stovetop-roasted-red-potatoes-recipe/" newtab="0" name="" summary=""]Duck Fat Roast Potatoes
If you want the most flavorful roast potatoes, duck fat is what you need. Maybe the best roasties you’ll ever make. [wprm-recipe-roundup-item link="https://peak-again.today/crispy-duck-fat-oven-roasted-potatoes/" newtab="0" name="" summary=""]Smoked Gouda Potato Pancakes
Smoked gouda adds creaminess and a deep smoke flavor to these crispy little potato pancakes. [wprm-recipe-roundup-item link="https://peak-again.today/smoked-gouda-potato-pancakes/" newtab="0" name="" summary=""]Crispy Roast Potatoes and Burrata
Make your roast potatoes extra lux this Thanksgiving and serve them up with some melty creamy burrata. [wprm-recipe-roundup-item link="https://peak-again.today/crispy-roasted-potatoes-burrata/" newtab="0" name="" summary=""]Miso Butter Mashed Potatoes
White miso gives these creamy potatoes an extra warm hit of super savory umami. [wprm-recipe-roundup-item link="https://peak-again.today/miso-butter-mashed-potatoes-recipe/" newtab="0" name="" summary=""]Potato Dominos
This might be one of my favorite ways of making potatoes: thinly sliced, trimmed into rectangles, and baked. The edges turn into a crispy chip and the centers are thick and creamy. [wprm-recipe-roundup-item link="https://peak-again.today/potato-domino-recipe/" newtab="0" name="" summary=""]Japanese Roasted Sweet Potatoes
This is the purest sweet potato you’ll ever taste. Toasty, caramelized goodness. [wprm-recipe-roundup-item link="https://peak-again.today/yaki-imo-roasted-japanese-sweet-potatoes-better-roasted-chestnuts/" newtab="0" name="" summary=""]Chili Roasted Potatoes
Roasted potatoes and sweet potatoes tossed in a lime-soy dressing with a crunchy savory granola situation on top. [wprm-recipe-roundup-item link="https://peak-again.today/chili-roasted-potatoes-with-lime-and-soy-recipe/" newtab="0" name="" summary=""]Stuffings
After potatoes, stuffing is my next favorite side dish. Sometimes, when I feel like some extreme comfort food I’ll bake up a small dish of stuffing. Weird flex, I know, but damn, stuffing is the good stuff.Rosemary Challah Stuffing
Classic stuffing flavors with the power of soft and plushy challah bread. [wprm-recipe-roundup-item link="https://peak-again.today/mushroom-rosemary-thyme-challah-stuffing/" newtab="0" name="" summary=""]Mushroom and Onion Stuffing
This stuffing is made in the Instant Pot and it’s gosh darn delicious! [wprm-recipe-roundup-item link="https://peak-again.today/stuffing-lovers-unite-5-ingredient-15-minute-instant-pot-mushroom-and-onion-stuffing/" newtab="0" name="" summary=""]Crispy Stuffing Cakes
If you love the crispy bits on stuffing, these little stuffing cakes are for you. [wprm-recipe-roundup-item link="https://peak-again.today/sunday-brunch-crispy-stuffing-cakes-with-quail-eggs-recipe/" newtab="0" name="" summary=""]Lemongrass Stuffing
A little bit of herb-y lemongrass is always a good thing. Stuffing with a Vietnamese twist. [wprm-recipe-roundup-item link="https://peak-again.today/lemongrass-stuffing-recipe/" newtab="0" name="" summary=""]Herby Stuffing
Technically this isn’t stuffing, more of a herby breakfast strata, but really, what is stuffing if not bread cubes soaked with deliciousness and baked up? [wprm-recipe-roundup-item link="https://peak-again.today/sunday-brunch-make-breakfast-strata-without-recipe/" newtab="0" name="" summary=""]Acorn Squash Stuffing
Creamy acorn squash and bread cubes together forever, topped off with cheese because cheesy stuffing is a game changer. [wprm-recipe-roundup-item link="https://peak-again.today/acorn-squash-breakfast-pudding-recipe/" newtab="0" name="" summary=""]Vegetable Thanksgiving side dishes
Green things, because health. And not so green things because we’re inclusive and you don’t have to be green to be a vegetable.Honeynut Squash
Not only are they cute, they taste good too! Serve up some honeynut squash with greek yogurt and honeyed walnuts. [wprm-recipe-roundup-item id="34356"]Crispy Air Fryer Brussels Sprouts
Sweet and tender with crispy edges, almost just like deep-frying :) [wprm-recipe-roundup-item id="34801"]Cheddar Cauliflower Tots
These oven baked tots are only 5 ingredients and full of cauliflower-cheesy goodness. [wprm-recipe-roundup-item link="https://peak-again.today/cheddar-cheese-cauliflower-tots/" newtab="0" name="" summary=""]Miso Dijon Green Beans
Forget your classic green been casserole and serve up some crisp green beans tossed in a miso dijon dressing. [wprm-recipe-roundup-item link="https://peak-again.today/miso-dijon-green-bean-mushroom-salad/" newtab="0" name="" summary=""]Pan Seared Honey Garlic Sprouts
Sweet and savory honey garlic sprouts because honey garlic vegetables are basically like candy. [wprm-recipe-roundup-item link="https://peak-again.today/pan-roasted-honey-garlic-brussels-sprouts-recipe/" newtab="0" name="" summary=""]Honey Garlic Eggplant
Again, see above :) [wprm-recipe-roundup-item link="https://peak-again.today/honey-garlic-eggplant-recipe/" newtab="0" name="" summary=""]Honey Garlic Butternut Squash
Ditto, but make it squash. [wprm-recipe-roundup-item link="https://peak-again.today/honey-garlic-roasted-butternut-squash-recipe/" newtab="0" name="" summary=""]Oven Roasted Cauliflower
I love how sweet and caramelized cauliflower gets when you roast it. Hmm, I think I like sweet vegetables, gotta work on getting more of those bitter greens in my life. [wprm-recipe-roundup-item link="https://peak-again.today/roasted-cauliflower-recipe/" newtab="0" name="" summary=""]Burrata and Kale
Kale is a leafy green! One that tastes amazing when you braise it in tomato sauce and top it off with burrata. [wprm-recipe-roundup-item link="https://peak-again.today/burrata-and-kale/" newtab="0" name="" summary=""]Broccoli Tots
I love all things in tot form and these broccoli tots are just so poppable. And forkable. And delicious. [wprm-recipe-roundup-item link="https://peak-again.today/cheddar-cheese-broccoli-tots/" newtab="0" name="" summary=""]Creamy Lemon-y Zoodles
Zucchini but make it noodle-y. And add cream sauce. [wprm-recipe-roundup-item link="https://peak-again.today/keto-friendly-creamy-lemony-zoodles/" newtab="0" name="" summary=""]Air Fryer Asparagus
So fresh, so green. The air fryer makes all vegetables taste good, to be honest. [wprm-recipe-roundup-item link="https://peak-again.today/easy-roasted-air-fryer-asparagus/" newtab="0" name="" summary=""]Lemon and Dill Roasted Brussels Sprouts
Fresh and feisty oven roasted sprouts with lemon and dill. [wprm-recipe-roundup-item link="https://peak-again.today/lemon-dill-pan-roasted-brussel-sprouts/" newtab="0" name="" summary=""]Kale Chips
What do you mean kale chips aren’t a Thanksgiving side?! When you think about it, kale chips are just crispy kale and that’s a side in my books. [wprm-recipe-roundup-item link="https://peak-again.today/crispy-air-fryer-kale-chips/" newtab="0" name="" summary=""]Spicy Roasted Cauliflower
Oven roasted cauliflower but make it tangy and spicy kind of like buffalo wings, but cauliflower. [wprm-recipe-roundup-item link="https://peak-again.today/sriracha-roasted-cauliflower-recipe/" newtab="0" name="" summary=""]Pan Seared Asparagus with Miso Butter
Super simple pan-seared asparagus with rich and savory miso butter. [wprm-recipe-roundup-item link="https://peak-again.today/asparagus-with-miso-butter-recipe/" newtab="0" name="" summary=""]Air Fryer Roasted Broccoli
Perfectly crips with just the right amount of char. [wprm-recipe-roundup-item link="https://peak-again.today/how-to-make-crispy-air-fryer-roasted-broccoli/" newtab="0" name="" summary=""]Instant Pot Brussels Sprouts
If you’re more a fan of tender sprouts without the crispiness, this is the sprouts recipe for you. [wprm-recipe-roundup-item link="https://peak-again.today/easy-green-super-tender-instant-pot-garlic-butter-brussels-sprouts-recipe/" newtab="0" name="" summary=""]Bread and Biscuit Thanksgiving side dishes
Warm bread and biscuits fresh out of the oven are a treat but more so at Thanksgiving because it makes the house so warm and cozy.Milk Bread
This is the softest, most plush bread you’ll ever make. Spread some butter on and sprinkle on the flaky sea salt! [wprm-recipe-roundup-item id="33435"]Brazilian Cheese Bread
I love the chewy crisp texture of pao de queijo and bonus, it’s gluten free! [wprm-recipe-roundup-item link="https://peak-again.today/gluten-free-pao-de-queijo-brazilian-cheese-bread-recipe/" newtab="0" name="" summary=""]Moroccan Pita Bread
These little pillow puffs are so soft. Break one open and make the best turkey slider. [wprm-recipe-roundup-item link="https://peak-again.today/youre-gonna-love-batbout-pan-grilled-moroccan-pita-bread/" newtab="0" name="" summary=""]Pretzels
Pretzels are a celebration food and Thanksgiving is a celebration! [wprm-recipe-roundup-item id="34555"]Sourdough Focaccia
Fluffy crisp focaccia dimpled with olive oil and seasoned with rosemary. [wprm-recipe-roundup-item id="31520"]Sourdough
Make a loaf of sourdough: crusty, fragrant, hearty, and soul stirring. [wprm-recipe-roundup-item id="30909"]Parmesan Garlic Knots
These guys will go like hot cakes! So garlicky and so good. [wprm-recipe-roundup-item id="34896"]Everything Bagel Dinner Rolls
Soft and fluffy dinner rolls brushed with butter and everything bagel spice. [wprm-recipe-roundup-item link="https://peak-again.today/everything-bagel-dinner-rolls/" newtab="0" name="" summary=""]Challah
A easy basic challah! [wprm-recipe-roundup-item link="https://peak-again.today/challah-recipe/" newtab="0" name="" summary=""]Potato Buns
Little mini potato buns that are soft and squishy with the power of potatoes. [wprm-recipe-roundup-item link="https://peak-again.today/potato-slider-buns/" newtab="0" name="" summary=""]Buttermilk Biscuits
Use your food processor to make these biscuits: light and fluffy with crispy bottoms. [wprm-recipe-roundup-item id="30722"]Cheddar Scallion Biscuits
Sky high biscuits studded with scallions and cheddar. [wprm-recipe-roundup-item link="https://peak-again.today/extra-flaky-cheddar-scallion-biscuits/" newtab="0" name="" summary=""]Smoked Salmon and Chive Biscuits
Salty, smoky specks of salmon and punchy chives in these flaky biscuits. [wprm-recipe-roundup-item link="https://peak-again.today/smoked-salmon-and-chive-biscuits/" newtab="0" name="" summary=""]Cheddar Bay Biscuits
Soft on the inside, crispy on the outside copycat Red Lobster style biscuits. [wprm-recipe-roundup-item link="https://peak-again.today/homemade-cheddar-bay-biscuits-red-lobster-style/" newtab="0" name="" summary=""]Black Pepper Parmesan Biscuits
Quick and easy drop biscuits with pepper, parm, and chives. [wprm-recipe-roundup-item link="https://peak-again.today/small-batch-black-pepper-parmesan-chive-biscuit-recipe/" newtab="0" name="" summary=""]Salad and Salad-Adjacent Thanksgiving side dishes
I love salads with Thanksgiving dinner because they offer a fresh and tart counterpoint to all the richness. Plus they make me feel like I’m being a little healthy.Sesame Soy Broccoli Salad
I could eat just this salad and be happy! Crunchy tender broccoli, red onions, sliced almonds, and craisins. [wprm-recipe-roundup-item link="https://peak-again.today/the-best-broccoli-salad/" newtab="0" name="" summary=""]Apple Hazelnut Quinoa Salad
A nutty crunchy satisfying salad that eats like a meal. [wprm-recipe-roundup-item link="https://peak-again.today/quinoa-salad-with-hazelnuts-apple-and-dried-cranberries/" newtab="0" name="" summary=""]Cucumber Avocado Salad
Crunchy cucumbers and creamy buttery avocados. [wprm-recipe-roundup-item id="32581"]Shiitake Salad
Pan seared shiitakes with avocado and quinoa in a shallot oil dressing. [wprm-recipe-roundup-item link="https://peak-again.today/shiitake-quinoa-salad-recipe/" newtab="0" name="" summary=""]Fattoush
If you’re looking for a light salad that will bring some freshness to the table, this is it: chopped veggies, crispy pitas, and a sumac lemon dressing. [wprm-recipe-roundup-item link="https://peak-again.today/fattoush-salad-recipe/" newtab="0" name="" summary=""]Mint and Cucumber Quinoa Salad
Kind of like a Vietnamese vermicelli bowl but with quinoa. Super refreshing. [wprm-recipe-roundup-item link="https://peak-again.today/vietnamese-quinoa-salad-recipe/" newtab="0" name="" summary=""]Kabocha Celery Salad
Pumpkin because it’s fall and celery because it crunches. This is a fall celebration salad. [wprm-recipe-roundup-item link="https://peak-again.today/fall-salad-kabocha-celery-salad-recipe/" newtab="0" name="" summary=""]Smashed Cucumber and Green Bean Salad
Super refreshing and crunchy to offset the richness of Thanksgiving dinner. [wprm-recipe-roundup-item link="https://peak-again.today/miso-smashed-cucumber-green-bean-salad-recipe/" newtab="0" name="" summary=""]Papaya Pear Arugula Salad
Juicy papayas, crunchy pears, and peppery arugula in a lime mustard vinaigrette. [wprm-recipe-roundup-item link="https://peak-again.today/papaya-pear-arugula-salad-recipe/" newtab="0" name="" summary=""]Pear and Pecan Quinoa Salad
A super festive quinoa salad with all the textures and flavors in a orange honey vinaigrette. [wprm-recipe-roundup-item link="https://peak-again.today/sweet-side-dish-holiday-quinoa-recipe/" newtab="0" name="" summary=""]Mac and Cheeses are the best Thanksgiving side dishes
The preferred side dish on the East Coast. Those folks know! Creamy cheesy mac and cheese is a welcome addition to any Thanksgiving spread.One Pot Creamy Pumpkin Mac and Cheese
Pumpkin mac and cheese at Thanksgiving is just the right thing to do. [wprm-recipe-roundup-item link="https://peak-again.today/one-pot-creamy-pumpkin-mac-and-cheese-recipe/" newtab="0" name="" summary=""]Spicy Green Chile Mac and Cheese
Just in case you need a little spice in your life. [wprm-recipe-roundup-item id="29059"]Mac and Cheese Waffles
Did you know you can waffle mac and cheese!? The edges get wonderfully crisp and crunchy and the insides are soft and cheesy. [wprm-recipe-roundup-item link="https://peak-again.today/mac-and-cheese-waffles/" newtab="0" name="" summary=""]Stovetop Jalapeño Broccoli Mac and Cheese
Spicy and creamy with bonus broccoli. [wprm-recipe-roundup-item link="https://peak-again.today/creamy-stovetop-jalapeno-broccoli-mac-and-cheese-recipe/" newtab="0" name="" summary=""]Scoobi Doo with Burrata and Tomatoes
This one isn’t really a mac and cheese but I had to include it because it has scoobi doo mac and it has burrata, which is cheese! [wprm-recipe-roundup-item link="https://peak-again.today/scoobi-doo-pasta-with-burrata-and-tomatoes/" newtab="0" name="" summary=""]Creamy Herby Garlicky Mac and Cheese
Literally the EASIEST mac and cheese you will ever make because it is just penne and Boursin cheese. [wprm-recipe-roundup-item id="29409"]
I Am... You need a nugget ice maker in your life
Have you ever dreamed of a nugget ice machine at home but are wary of the lofty promises? We have one, and you can read all about the experience of owning your very own nugget ice maker below. If you know, you know nugget ice. It’s the good ice. The adorable, chewable ice that is practically a snack in itself. I LOVE nugget ice with a passion and last year my dream came true when Mike gifted me a nugget ice machine for Christmas. A nugget ice machine has been on my radar forever. I conveniently forgot about home nugget ice makers and I must say, my Christmas gift was both a surprise and an absolute win! Christmas day was full of nugget ice and everyday after we have enthusiastically used our nugget ice maker.
What is nugget ice?
If you’re not in the know, you might be wondering, what the heck is nugget ice? Yes, it’s just ice, but really, it’s special ice! Nugget ice has air pockets giving it layers and layers. Think of nugget ice as the croissant of the ice world. The layers create pockets of air, making nugget ice fluffy and not at all dense or hard. Nugget ice is fluffy and chewy.Why is nugget ice special?
Nugget ice is not regular ice. It’s shaped, unsurprisingly, given its name, like a small nugget. Because it’s made in a machine that adds pockets of air, the nuggets are softer and chewier. The air pockets let liquid seep in, flavoring the ice so they become little chewable nuggies of whatever beverage you’re drinking. It has the ability to cool drinks fast while melting slow. The special part is the texture: crunchy on the outside and chewy on the inside.How is nugget ice made?
Nugget ice is a special process of flash freezing water while extruding it through tiny holes. Most nugget ice makers work like this:- The water passes through an extruder that has small holes
- As the water pushes through under pressure, little droplets form
- The droplets flash freeze into nuggets with air pockets naturally forming during the freezing process.
- Boom, you have nugget ice!
Homemade nugget ice
It used to be that nugget ice at home was a dream, but now, there are so many counter top nugget ice machines out there. The only way to make nugget ice at home is with a nugget ice machine.Best nugget ice machines
We absolutely love our Easyera nugget ice maker. It makes ice quickly, in about 20 minutes, it’s super easy to clean, and it’s pretty compact. Sure, it’s a little noisy, but the nature of nugget ice means that the extrusion and freezing process is always going to be a little loud. We’ve never had any issues with our nugget ice machine. There’s a self cleaning mode and it makes more than enough ice for the two of us. I love that it’s smaller than so many of the other nugget ice machines out there because it lives permanently on our countertop. The GE Profile Opal 2.0 Ultra nugget ice maker has been floating around a lot lately but it’s HUGE and apparently it’s not very easy to clean. Plus, at $629 it’s double what we paid for our nugget ice maker. We haven’t tried the ice from the Opal, so I can’t comment on the ice quality, but for the countertop size and price, I definitely think the Easyera is the way to go. Plus, call me old, but I’m not really sure why I would need a nugget ice maker with built in wifi and voice control. I spent a little time perusing amazon because let’s be honest, there’s nothing I love more than online shopping, and if I had to choose a different nugget ice machine, I think I would get the Vevor. Apparently it’s super quiet which is perfect for people who can constantly hear humming slash machine noises and it keeps the nugget ice frozen for a pretty long time. It does look a little big, but I like the stainless steel housing and it has several positive verified purchase reviews.Where do they have nugget ice?
Probably the best known place for nugget ice is Sonic Drive-In. People go to Sonic simply for their ice: both in drinks and to buy bags of nugget ice. Lots of other places have nugget ice too, if they have nugget ice machines. I’ve been to gas stations (Buc-ees) with nugget ice as well as independent soda shops. HTeaO in Texas has nugget ice (try a mix of sweet coconut and sweet almond green, it’s heaven!).Other nugget ice machines
I haven't tried these ones but I've taken the hopefully helpful step of collating the 4 bestselling machines on Amazon below, along with their iceage per day, in no particular order:- ecozy Nugget Ice Maker Countertop with Handle (33lbs/days)
- HOMEZAY Pebble Ice Maker with Soft Chewable Pellet Ice (33lbs/day)
- COSTWAY Self Dispensing Nugget Ice Maker (56lbs/day) - honestly this one looks pretty cool
- Silonn Smart Pebble Ice Machine (44lbs/day)
Nugget ice vs crushed ice
There’s no competition, it’s nugget ice every time. Crushed ice is regular ice that is crushed into small irregular chunks. It has the same consistency and hardness as regular ice. Because it’s regular ice, the melt rate of crushed ice tends to melt quickly, watering down drinks. Nugget ice minimizes dilution and has a better crunch/chew experience. Nugget ice forever and ever! xoxo steph Read More →
I Am... Honeynut Squash
Honeynuts are cousins to butternuts, but trust me when I say, they’re so much better. Do you like butternut squash but sometimes think it’s a bit too big? If so, super sweet and personal-sized honeynut squash is here to save the day! If you’ve ever seen a what looks like a tiny version of a butternut squash you’re lucky enough to have spotted a honeynut in the wild!
What is honeynut squash?
Have you guys heard of honeynut squash? I’ve seen it floating around on menus and the internet, but the first time I saw one in real life was at a farmer’s market. It felt so special – apparently I’m nerdy like that. Honeynuts are kind of rare, like a unicorn squash: they’re are on their way to being sold in all the grocery stores, but right now they’re still kind of a farmers’ market and specialty store kind of thing. 2025 edit: I see them all the time at local grocers like Whole Foods and (as mentioned in the comments) Sprouts and other places too. Honeynuts are essentially tiny butternut squashes created to be a better tasting, tinier squash. A chef (Dan Barber) met up with a squash breeder (Michael Mazourek) and asked him why he couldn’t make a smaller, tastier squash. After a couple of years, honeynuts were born. Honeynuts are not just smaller than butternuts, they’re also sweeter. You don’t need to peel the skins, and when roasted, they take on a caramel, almost malty flavor. The flesh is smooth and tender without any of the stringiness you get from larger squashes. They’re the perfect personal-size squash and are absolutely delicious. The first time I saw honeynuts, I exclaimed “wow, they’re SO CUTE!” about 16,000 times, picked through the box of honeynuts to find my forever honeynut and carefully cradled him home. I cracked him in half, scooped out his insides, roasted him to a deep golden honey color, then ate him with yogurt, pickled shallots, and honeyed walnuts. So GOOD. I felt truly blessed.How to roast honeynut squash
- Heat the oven. Heat the oven to 425°F. We’re going for high heat so that the squash can caramelize and become soft and tender.
- Halve the honeynut squash. Wash and dry the honeynuts then use a large sharp knife to cut them in half lengthwise from stem to base. Use a spoon to scoop out the seeds and pulpy insides.
- Roast. Drizzle the cut sides with a bit of oil and season generously with salt and pepper. Roast, skin side up on foil lined baking sheet for 20-30 minutes (depending on size) or until fork tender.
What does honeynut squash taste like?
If you love squash, honeynut squash tastes like the best gosh darn squash you’ll ever eat. It’s flavorful, sweet and nutty, with a hint of caramel and malt. They’re what butternut squash dream of being. Plus they have twice the amount of beta-carotene of butternut squash!Where to buy honeynut squash
Honeynut squash season is late September to early October. You’ll find honeynut squash at local farmers’ markets, Whole Foods, Trader Joe’s and sometimes even your regular grocery store. They’re very seasonal, so when you see them, pick some up! They’re getting more and more popular so you’ll probably see them popping up more and more.How to pick a good squash
Honeynut squash are orange when they’re ripe so look for a squash with no green. You want a firm squash with no soft spots and the stem attached. They’ll keep for quite some time (a couple of months in a cool dark spot) but you should eat them when they start to wrinkle because that means they’re starting to dry out.The best way to cook it
The best way to eat a honeynut is to roast it! Roasting it brings out its intense sweet flavors. Because they’re so tender, you can also cook them on the stove top, like I did in this Pan-Roasted Honeynut Squash with Creamy Garlicky Pasta.Can I eat the skin?
Yes, the skin is completely edible, just like a delicata squash. This is the best part because it means no more peeling squash!Honeynut squash vs butternut squash
The best part of honeynut is that it’s a lot easier to prep then butternut. If you hate peeling, cutting and taking the seeds out of butternuts, honeynuts are here to save the day! They’re so much more tender and have a finer texture so they slice like a dream. You can also eat their skins, which are thin and similar to the skin on delicata. Win, win, win!What can I use instead of honeynut squash?
If you can’t find honeynut squash, its closest cousin is a butternut, although butternuts aren’t as sweet and a tiny bit stringier. You can also use any other winter squash. If you love honeynut squash, try this pan roasted honeynut squash with pasta! It’s fall in a bowl: creamy, cozy, garlicky pasta with honeynuts and swiss chard. Have you guys had honeynuts? Do you want to? Tell me all your honeynut dreams!Honeynut Squash with Honeyed Walnuts
Super sweet personal-sized honeynut squash is here to save the day!
- 1 honeynut squash
- 1 shallot (thinly sliced)
- 2 tsp vinegar
- 1 tsp sugar
- 1/2 tbsp butter
- 1 tbsp honey
- 1/4 cup walnut halves
- 1/4 cup greek yogurt
- 2 tbsp cucumber (shredded)
- 1 pinch ground cumin
Heat the oven to 425°F. Carefully halve your honeynut squash and scoop out the seeds. Drizzle with a bit of oil and season generously with salt and pepper. Roast in the oven, skin side up on a foil lined baking sheet, for 25-30 minutes, or until browned and tender.
While the squash is roasting, make your side dishes if desired.
Quickly pickle your shallots: Place thinly sliced shallots in a small bowl with vinegar, sugar, and 2 tablespoons of water. Stir and let sit while you make the honeyed walnuts.
Honey roast your walnuts: In a small non-stick pan, melt your butter along with the honey over medium heat. Add the walnuts and toss with the honey and butter until it bubbles and caramelizes. Remove the nuts from the pan and let cool completely.
In a small bowl, mix together the yogurt, cucumber, and a pinch of cumin. Taste and season with salt and pepper. Swoosh onto a plate and add the squash on top. Garnish with the shallots and honeyed walnuts. Enjoy!

I Am... Easy One Pot Lasagna Soup
If you've never made lasagna soup before, you need to try this. And, if you have, this is your reminder that fall is truly here and it's time for soup! It’s perfect because... soup! Basically it’s a lasagna that you can scoop up with a spoon. I actually love making lasagna but sometimes you just have to have lasagna in under 30 minutes. For those times, this one pot weeknight lasagna soup is there for you.
What is lasagna soup?
Lasagna soup is exactly what it sounds like, lasagna in soup form. It’s all the amazing things about lasagna without the layering and time commitment. And best of all is the fact that you can eat it in a bowl with a spoon. It’s always lasagna soup season!How to make lasagna soup
- Sauté the onions. Start off by browning some onions, you don’t have to chop them fancy or anything, they’re cooked down in the soup anyway.
- Brown the meat. After the onions, brown your choice of ground meat – usually we go with a mix of beef and pork, but this time we went with all pork because it’s what we had in the fridge.
- Add the liquids. Once the meat is browned, you dump in the tomatoes, chicken stock.
- Noodle time. Once every thing is at a simmer you add the noodles. Simmer until your house fills up with amazing smells and everything until tender.
Lasagna soup ingredients
- onion and garlic - onions and garlic get cooked in olive oil until they turn into an aromatic mix that gives an amazing base layer of flavor to your soup.
- ground pork, beef, or sausage - feel free to use your favorite kind of ground meat here. You can even go with ground turkey, chicken, or crumbled tofu.
- crushed tomatoes - lasagna soup needs tomatoes and crushed is what I use, but truthfully, any canned tomatoes will work.
- chicken stock - chicken stock is going to give us the soup portion of lasagna soup. If you like your soup on the thicker side, just lower the amount of chicken stock.
- lasagna noodles - the star of the show: use mini lasagna noodles called malfada corta or break up regular lasagna noodles into smaller pieces.
- herbs - freshly chopped oregano and basil are amazing in this soup. You can also use dried if it’s all you have on hand.
- toppings - CHEESE! Mozzarella, parmesan, a dollop of ricotta, a scoop of mascarpone, cottage cheese, this bowl of soup really an excuse to pile on the cheese, so go for it!
What kind of noodles are best?
We make lasagna soup with either mini lasagna noodles called mafalda corta or broken up lasagna noodles. Either will work!Can I make it vegetarian/vegan?
Absolutely. Just skip out on the meat. You can add some crumbled up firm tofu if you want extra protein. Swap the chicken stock for veggie stock. And for vegans, use vegan cheese or sprinkle on some nutritional yeast for a bit of cheesy jazz.What kind of pasta is this
These tiny little mini lasagna noodles are actually called malfada corta and they're super easy to find at better stocked grocery stores, specialty Italian markets, and online, of course.The best way to serve lasagna soup
Serve this up in a bowl with all the cheese. We normally have a bunch of mozzarella in it – the cheese pulls you get are amazing – but this time around we only had parmesan, so it was just a teeny bit more sophisticated. Or at least as sophisticated as lasagna soup can get ;) Bonus points if you add a dollop of ricotta and some fresh basil!Tiktok lasagna soup
Lasagna soup is trending on Tiktok right now thanks to SZA and @dannylovespasta. SZA saw him making lasagna soup and asked him to drop the recipe. If you want to make his exact recipe, just like SZA did, here it is:- 1 onion, chopped
- 2 cloves garlic, minced
- 1/2 lb ground beef
- 1/2 lb Italian sausage
- 1/4 tsp chili pepper flakes
- 1/2 tsp dried oregano
- 2 tbsp tomato paste
- 2 cups marinara sauce
- 3 cups chicken broth
- 1/2 cup heavy cream
- 1/2 box lasagna noodles, broken
- 1 cup shredded mozzarella
- 1/2 cup shredded parmesan
- 1/4 cup fresh basil, chopped
- Sauté the onion and garlic in 2 tbsp olive oil over medium heat, until soft, about 2-3 minutes.
- Add the ground beef and Italian sausage and break up, cooking over medium high heat, until browned. Season with salt and pepper and stir in the oregano and chili flakes.
- Add the tomato paste and cook, over medium hight heat, stirring into the meat, until slightly caramelized, about 1-2 minutes. Add the marinara sauce, chicken broth, and heavy cream.
- Bring to a simmer and add the lasagna noodles. Cook until the lasagna noodles are al dente, according to the package directions.
- Stir in the cheeses and finish with fresh basil once the noodles are tender to your liking. Enjoy!
What to serve with lasagna soup
- Easy Parmesan Garlic Knots
- The Ultimate Kale Salad
- Roman Style Tripe in Tomato Sauce
- One Day No-Knead Focaccia
- Small Batch Sourdough Focaccia
Lasagna Soup
A simple dump and cook one pot stovetop weeknight lasagna.
- 1 tbsp olive oil
- 1 medium onion (roughly chopped)
- 2 cloves garlic (minced)
- 1 lb ground pork (or ground pork, or a 50/50 mix)
- 24 oz crushed tomatoes
- 2 qt chicken stock (no sodium preferred)
- 8 lasagna noodles (broken into small pieces, or 12oz malfalde)
- 1 tsp fresh oregano (finely chopped)
- fresh basil (chopped, and/or fresh leaf parsley)
- mozzarella cheese (to finish)
- Parmigiano Reggiano cheese (to finish)
In a large pot, heat up the oil over medium high heat. Add the onion and garlic and cook, stirring occasionally, until soft.
Add the meat, breaking into pieces.
Stir in the crushed tomatoes, chicken stock, pasta, and oregano. Bring to a boil over high heat, then reduce and simmer over medium until pasta is tender and cooked through, about 8 to 10 minutes.
Taste and season with salt and pepper. Scoop into bowls and finish with basil, mozzarella, and Parmesan. Enjoy hot!

I Am... Super Easy Smooth and Creamy Hummus Recipe
My most favorite thing to make with dried chickpeas is hummus and this hummus recipe is my go to. So creamy, so dreamy, so many feels for a humble little bean. Do you love hummus? I can (and have) eaten it by the spoonful, no edible vehicle needed. Most recipes on the internet used canned chickpeas but after tasting this hummus made from chickpeas you’ve cooked yourself, you may never go back! When you make hummus from scratch, from dried chickpeas, you get to use hot-n-freshly cooked peas meaning your hummus is warm. If you’ve never had warm hummus before, stop everything and make this hummus recipe because it is a game changer.
What is hummus?
In case you aren’t familiar with it, hummus is a delicious vegan dip/spread made from chickpeas, tahini (more on this later), lemon, garlic, and spices. It’s originally from the Middle East and is popular around the world thanks to the fact that it’s both delicious and nutritious. It has a rich and long history and you’ve probably seen it at the grocery store in little tubs but you can make it at home easily - better than store-bought. Usually it’s eaten as a dip/appetizer, drizzled with olive oil and herbs, served up with fresh pita. You’ll also find it garnished with cilantro, tomatoes, onions, and cucumbers and served up with falafel or as part of a mezze platter with a bunch of different prepared small dishes, such as tzatziki, muhammara, or baba ganoush. You can also use it as a spread in sandwiches or wraps, serve it with a bunch of fresh vegetables for scooping, dollop it on salads, eat it with eggs, or just scoop it up with a spoon (my favorite method!)What goes in hummus/hummus ingredients
Chickpeas (garbanzo beans)
Chickpeas (or garbanzo beans) are the bulk of hummus. They’re super nutritious: both high in protein and low in fat with a bunch of vitamins and fiber. You can buy them dried or in cans but we prefer dried chickpeas.Why use dried chickpeas?
I get it, it’s super convenient to pop open a can of chickpeas and make hummus. It’s fast and easy and it tastes pretty darn good too. BUT, soaking and cooking your own chickpeas is so much more flavorful and cost effective. You can add extra aromatics to the water you cook them in and they take up less space in your pantry. Win, win, win! We have a giant container of dried chickpeas in the pantry just for the express purpose of adding to coconut curry chickpea and other soups, making falafels, making Taiwanese chick-pea nuggets, and crispy cacio e pepe chickpeas.Tahini
Tahini is a paste made from toasted ground hulled sesame. It has the consistency of a nut butter and is toasty, fragrant, and super delicious. It adds a nutty creaminess to hummus and can’t be skipped. You can make it at home (recipe coming soon!) or simply buy it at the store. A jar should make several batches of hummus.Lemon Juice
You absolutely need a bit of freshly squeezed lemon juice to make your hummus sing. It adds a welcome bit of acid and freshness to contrast the richness of the tahini and chickpeas. You can tweak the lemon juice amount you add just to your liking. If you’re a lemon-head, squeeze a bit extra on!Garlic
A garlic clove (or two) adds a tiny bit of heat – because it’s added in raw – and bite. If you’re not a fan of fresh garlic, you can go with roasted which will be more sweet and mellow, but the raw garlic in hummus is what gives it an addictiveness that will make you want to eat more.Salt and Spices
Don’t forget to salt your hummus because under-salted hummus is just sad. Cumin adds a warm earthiness. You can sprinkle on a bit of smoked paprika, sumac, or a bit of aleppo at the end for a bit of jazz too if you like!Extra Virgin Olive Oil
I don’t put any olive oil in the actual hummus, but we ALWAYS finish with a nice drizzle of fruity extra virgin olive oil.Super creamy smooth hummus recipe
Now that we know what we need, here’s how to do it: 1. Soak your dried chickpeas overnight. I like to add a little bit of baking soda which helps soften the chickpeas, but it’s completely optional. 2. Cook the chickpeas. Pop the rinsed off soaked chickpeas into a pot with a LOT of water and simmer for about an hour or until the chickpeas are very soft. At this point you can add some aromatics in if you’re feeling adventurous - I kept it simple here but you can add any alliums (onions, shallots, green onions, leeks, etc). Keep them big so you can pick them out before blending. 3. Blend! Well, wait, you can also peel your chickpeas if you’re crazy about super-smooth hummus. It taste a little extra time and some people swear that that’s what makes their hummus super smooth but if you use baking soda and cook you chickpeas enough I don’t personally think it’s necessary. But if you need a little meditative time, this is when you would peel your chickpeas! Back to blending. We use a mini food processor to blend everything up. You want to start by blending the tahini, lemon juice, garlic, and a bit of ice cold water until smooth and fluffy. The ice water is what helps the tahini whip up into a smooth emulsion. Start with the tahini and lemon because it’s a lot easier to smooth out the tahini when there’s nothing else in the food processor. After your tahini lemon mix is smooth and fluffy, add your drained chickpeas and blend until completely smooth. Give it an extra minute after you think it looks done to make sure everything is super creamy. The best time to eat hummus is right after you’ve made it and it’s still warm. SO DREAMY. Pile some on a plate, make swoosh in the middle, fill it up with a puddle of extra virgin olive oil, sprinkle on some herbs or some chopped up tomatoes, cucumbers, and onions and go to town. PS - Once you master the classic hummus recipe, try this miso hummus with crispy onion furikake, it’s TO DIE FOR.Super Easy Smooth and Creamy Hummus Recipe
- 1/2 cup dried chickpeas
- 1 tsp baking soda (divided)
- 2 garlic cloves (unpeeled)
- 3 tbsp fresh lemon juice (or to taste)
- 1/3 cup tahini
- 2 tbsp ice water
- 1/8 tsp ground cumin
Place chickpeas and 1/2 teaspoon baking soda in a medium bowl and add cold water to cover by 2 inches. Cover and let sit, at room temperature overnight, until chickpeas have doubled in size. Drain and rinse.
In a large saucepan, combine the soaked chickpeas and remaining 1/2 teaspoon baking soda and add cold water to cover by at least 2 inches. Bring to a boil, skimming if needed. Reduce the heat to medium-low, partially cover, and simmer until chickpeas are tender and squish easily between your fingers, about 45–60 minutes. Drain and set aside.
While the chickpeas are cooking, place the garlic, 2 tablespoons + 2 teaspoons of the lemon juice, and tahini in a blender or food processor and pulse until smooth. With the motor running, Add the ice water, 1 tablespoon at a time (it may seize up at first) until mixture is very smooth, pale, and thick.
Add the drained chickpeas and cumin and process, scraping down the sides as needed, until very smooth, about 4 minutes. Thin with water if a looser consistency is needed. Taste and season with lemon juice, and cumin, as desired.

I Am... Dirty Soda
Icy, fizzy, and creamy, dirty soda is the perfect sweet treat to sip on when it's hot, or even when it's not. If you’re not from Utah, you’re probably thinking: what the heck is “dirty soda” and why would I ever want to drink it? But, if you’ve ever stoped by a Swig or Sodalicious, you know. Oh, you know. Dirty soda is seeing a surge in popularity thanks to Tiktok and Olivia Rodrigo and I am here for it.
What is dirty soda?
Dirty soda is fountain soda mixed with flavored syrups and cream, all served up over nugget ice. There are literally millions of recipes you can make and you can definitely find a flavor catered to you. The original version is: Diet Coke over ice, with coconut syrup, lime juice, and half and half. It’s creamy and refreshing all at the same time. Think of dirty soda as a customizable non-alcoholic fizzy cocktail.Where did dirty sodas come from?
Dirty sodas are from Utah, where there’s a large Mormon population. Because Mormons don’t drink alcohol (or coffee!), dirty sodas came about as a fun way to enjoy non-alcoholic mixed drinks.What makes it “dirty”?
It’s the cream! I am not sure why – if you know, let me know in the comments – but adding the cream is what makes it dirty. Maybe it’s because cream and soda doesn’t go together smoothly until you mix it?Wait, aren’t these just melted floats?
Remember floats? Soda topped off with a perfect scoop of vanilla ice cream? I LOVE floats, especially root beer floats. Essentially, dirty sodas are a variation of a ice cream float, but with heavy cream instead of ice cream.Can I make dirty soda at home?
Yes! It’s super easy to make dirty soda and it just takes regular grocery store ingredients. In fact, hold a dirty soda party and have a bunch of sodas and mix ins and customized to your heart’s galore. There are bunch of flavored coffee creamers these days and they work perfectly if you don’t want to buy coffee syrups.How to make dirty soda
- Ice: First, start off with a large glass of ice. Nugget ice is preferable (more on that below) but obviously most people don’t have $700 nugget ice machines at home so go with whatever ice you have.
- Syrups: To the ice, add your syrups of choice. For the classic dirty soda, we’re going to add 2 pumps of coconut syrup (1 tbsp) and 1 tbsp of fresh lime juice.
- Soda: Next, we’re going to top it off with Diet Coke.
- Cream: The cream is what makes it dirty! Pour on the heavy cream and watch as it swirls in prettily.
- Stir and enjoy. Give everything a stir and sip!
What is nugget ice?
If you’ve ever had the ice at Sonic, you’ve experienced the joy of nugget ice. I am truly obsessed with nugget ice. So much so that Mike seriously thought about buying me a nugget ice maker for me for my birthday. I love that squishy, crunchy, chewable ice. I’m not alone in my love either, nugget ice has a cult following. Sadly, I don’t have a nugget ice maker, (update: I do now! it’s this one and it works great!) but loads of ice is key in dirty sodas: it keeps them ice cold and also helps waters them down to the perfect drinkable sweetness. Nugget ice is definitely superior - the ice is chewable, and it’s somehow light and fluffy with aeration which let’s the soda soak into the ice, equalizing the ratios of the sweetness of soda. Above: sadly, not true nugget ice.What else can you use coconut syrup for?
If you’re a coconut lover like me, you probably won’t have an issue using up a bottle of coconut syrup, but if you need some ideas, here’s what you can do:- coconut lattes: make a regular latte and sweeten to taste with coconut syrup
- cold brew with coconut syrup: sweeten cold brew to taste with coconut syrup
- coconut lemonade: leave the sugar out of your favorite lemonade recipe and sweeten with coconut syrup to taste
- coconut banana smoothies: blend together 1 small frozen banans with 1/2 cup coconut milk and coconut syrup to taste
Dirty soda ideas
- DDD: Dr. Pepper + coconut syrup
- Malibu: Dr. Pepper + coconut syrup + vanilla syrup
- Naughty and Nice: Dr. Pepper + English toffee syrup + half and half
- Buttery Beer: Root beer + butterscotch syrup + vanilla cream
- Riptide: Sprite + cranberry + raspberry + fresh lime
Other fun drinks to try
- Whipped lemonade (pictured above)
- Coconut cloud smoothie
- Mango smoothie
- Blueberry ginger ale spritz
- Lemongrass mint lime spritz
- Mint mojito coffee
Dirty Soda Recipe
Think of dirty soda as a customizable non-alcoholic fizzy cocktail.
- 1 tbsp coconut syrup (~2 pumps, see notes)
- 1 tbsp lime juice
- 12 oz Diet Coke
- 2 tbsp heavy cream
- ice (as needed)
In a large glass filled with ice, layer on the coconut syrup, lime juice, Coke, and heavy cream. Stir well and enjoy!
You can sub the coconut syrup and heavy cream for 2 tbsp of coconut creamer.

I Am... Paella Recipe
Paella has bits of everything I love: rice, seafood, and most importantly socarrat: crispy crunchy toasted rice bits. Have you ever been obsessed with a dish even though you’ve never eaten it? For me, that dish was paella. It was one of those food bucket list items – I don’t remember how or why I became so obsessed with having paella from its birthplace of Valencia, but I’m pretty sure it has something to do with the fact that paella is so pretty and such an iconic dish. It’s so iconic that people around the world think of it as the quintessential Spanish dish, even though it’s actually more Valencian. I mean, Valencia is ultimately in Spain, so it’s all good to me. Many years ago, Mike and I went to Valencia and the first thing we ate was paella. We literally got off the train and went to a paella restaurant. On the way there, there were a bunch of Valencian orange trees that had some pretty tempting looking oranges but apparently the orange trees that line the streets of Valencia are not the same sweet ones that they use for juice. Anyway, the paella in Spain was as good as I imagined. So good that all of our meals in Valencia were either paella or Spanish churros dipped in chocolate. We actually ate 3 different paellas that day. The paella was all things good: juicy seasoned meats, tender-crisp beans, and the best part, saffron scented rice with crispy toasty rice bits. It was a dream come true.
What is paella?
Paella, pronounced pay-EH-yah! is a rice dish made in a shallow, wide pan over an open fire. Paella means “frying pan” in Valencian. Traditionally, paella includes short grain rice, beans, rabbit, chicken, and saffron, but nowadays there are a huge number of variations, from seafood to vegetarian. I made a mixta paella here, which is essentially a mixed paella that has meat, seafood, and vegetables.How to make paella
- Soak the saffron. This will release both color and aroma. Pop some saffron into a small bowl with hot water and set aside.
- Sear the proteins. Heat up some olive oil in your paella pan over medium high heat and give your proteins a quick sear: the chicken goes in skin side down and the chorizo gets browned. Shrimp gets a quick toss in before being removed so it doesn’t over cook.
- Sweat the aromatics. Add the onions, garlic, tomatoes, and paprika and cook, stirring, until soft and fragrant.
- Add the liquids. Carefully add chicken stock and the saffron water and bring everything to a boil. Flip the chicken skin side up so it’s pretty.
- Add the rice. Time to sprinkle in the rice! Try to add it in a thin, even layer and use a spoon to spread it out if you need to. Let everything come to a simmer and cook, uncovered until the rice absorbs almost all the liquid.
- Add the seafood. Nestle in the clams and add the shrimp back on top.
- Cook on low until the clams open up and the rice is al denote.
- Socarrat time! Turn the heat up to high for 1-2 minutes to create a crispy toasty crunchy rice crust.
- Rest and enjoy. Cover the paella with some foil and let rest for 5 minutes before enjoying.
Paella Ingredients
Rice
Because paella is truly all about the rice, the rice is the most important ingredient. Bomba rice, from Spain, is the best choice. It absorbs 3 times as much liquid than regular rice giving it 3 times as much flavor when all the liquid is absorbed. Plus cooked right, it stays firm and al dente. You can usually find bomba rice at Whole Foods or online.Smoked Spanish Paprika
Smoked paprika comes in sweet and bittersweet, go for sweet smoked Spanish paprika. It adds smokiness, aroma, and color.Protein
There’s a lot of controversy about what kind of protein goes into paella. If you’re not super concerned about authenticity you can customize your paella and put anything you want it. If you’re going with chorizo try to get a Spanish chorizo, which is dried and cured. But if you only have Mexican chorizo available, I think that’s okay too. Purists say that chorizo will overwhelm the other flavors, but we’ve had multiple paella in Valencia with (and without) chorizo, so it’s a personal choice. Other proteins you can use include chicken, pork, seafood, or really, anything you can dream of.Vegetables
Most paella has vegetables in it, especially the paella we had while we were in Valencia. Usually it’s some sort of green bean, a variety that isn’t so common here in North America. You can sub in other green beans, add peppers, asparagus, artichokes, peas, olives, beans, chickpeas, really, it’s like the proteins, go wild!Stock
A nicely seasoned stock as this is what’s going to add flavor to the insides of your bomba rice. That being said, if you’re salt adverse, I would do low sodium stock and then season afterwards. If you have the time, make a homemade seafood/shellfish or chicken stock, which makes it even easier to control the seasoning and flavor.Saffron
Saffron is what gives paella its gorgeous golden hue. The orange-red threads are earthy, floral, and add a distinct flavor. Saffron is one of the most expensive spices in the world. You only need about 1/2 teaspoon but it definitely adds to the overall flavor, so don’t skip out on it. Look for saffron threads that are deep red-orange and evenly colored. Saffron is sold in most large grocery stores and specialty food stores and of course, online.Paella pan
If you want the all important toasty rice bits, or socarrat, you’re going to need a paella pan. The width of a paella pan helps with rice distribution, ensuring that the rice cooks in a thin layer. A pan that feeds two is generally about 10-12 inches and a pan that serves eight is about 18 inches. The most popular pan sizes are 14 and 16 inches, which feed 4-6. Which size pan you get depends on how many people you plan to feed. The wider the pan, the more people it feeds. They even have pans that are 4 feet wide! Years ago, around Christmas, Mike and I were in London and we saw two giant paella pans at Covent Garden. The saffron deliciousness wafting through the chilly air was so tempting so we decided to join the huge queue for a taste. I’m sure Hola Paella (now closed forever) wasn't the most authentic paella in London, but it attracted a lot of attention and was a perfect snack to warm us up on a cold day.What if I don’t have a paella pan?
If you’re wondering, can I use a cast iron skillet to make paella, the answer is yes! As long as you’re using the right rice, you can definitely use a cast iron skillet. Cast iron skillets are somewhat wide and conduct heat well, making them great for making paella. Use the biggest and widest cast iron pan you have so you can spread your rice out.Paella in a frying pan
If you have a craving for paella and you don’t have a paella pan or a cast iron pan you can make it in a frying pan. Spanish people might look down on you, but hey, you do you! I’ve definitely made paella in a frying pan in a pinch and it tastes good. You can use a non-stick or regular frying pan but if you’re using non-stick, make sure you don’t go too high on the heat. It really shouldn’t be a problem, especially with paella since you don’t use a huge amount of high heat anyway - keep it to medium high. If you’re looking for socarrat in a regular frying pan, my tip is keep it on low heat for a long time, until the moisture cooks out and you get crispy bottoms. If you are going to try this in a frying pan, I recommend halving it because the recipe as per below will not fit in your standard 12 inch frying pan.What rice should I use?
Paella should be made with Bomba or Calasparra rice, medium grain rices grown in Spain. Spanish rice is chubby and round, ideal for absorbing large amounts of liquid while still staying somewhat firm. You want your rice kernels stay separate and not creamy or mushy. The rice really is the best part of a paella. I can eat loads and loads of that smoky, saffron flavoured rice and I have. I made a giant pan for Mike, myself and a good friend thinking there would definitely be leftovers (I used a pan that serves 6-8), but the three of us polished it off in one sitting. We totally fell into simultaneous food comas afterwards, but it was worth it. The best part was that there was more than enough socarrat to go around.What is socarrat?
Socarrat is the essential layer of crispy crunchy toasted rice at the bottom of the pan when you cook your paella just right. Most people consider it the best parts. It’s caramelized and toasty and nutty and has all the flavors of paella concentrated.Paella FAQ
What are the different kinds of paella?
- Valencian: The classic Valencia version with rabbit, chicken, lima beans, long beans, snails, and rosemary.
- Seafood/paella de marisco: A seafood version with no meat. It tends to be a bit more liquidy because seafood releases a lot of delicious juices. It usually has prawns, mussels, calamari, and clams.
- Mixed/mixta paella: A mix between Valencian and marisco with meat and seafood. It’s the most popular of all.
- Paella negra: Immediately recognizable with it’s inky black rice. It’s made with squid ink and is a Spanish favorite.
- Vegetarian/paella vegetariana: Loads of vegetables like artichokes, lima beans, and red and greens peppers. Sometimes you’ll find chickpeas and potatoes too.
Should you presoak the rice?
There’s no reason to soak the rice. Soaking the rice will make it more likely to be overcooked and mushy.Do you stir while cooking?
Nope, no stirring required. Paella is not risotto and stirring will give your rice a creamy texture instead of the crispy socarrat you’re looking for.Do you cover the pan when cooking?
Unlike other rice dishes, you don't need to cover the pan. The rice can only reach its signature al dente texture if the moisture can escape. This also makes the best the crispy socarrat.What is paella sauce?
In Valencia, no paella is complete without a side of paella sauce or garlic aioli. The creamy, garlicky sauce is reminiscent of mayo and goes perfectly with the smoky, flavorful rice. To make garlic aioli, place 1 cup neutral oil, 1 egg yolk, 1 tbsp dijon, 2 tsp lemon juice, and 1 clove garlic into an immersion blender cup. Use an immersion blender and blend until combined and thick. Season with salt to taste.How to reheat
The best way to reheat paella is in a pan on the stove top. Take the leftovers out of the fridge and let it come to room temp for about 30 minutes before you reheat. Heat a bit of oil in a frying pan over medium heat, then spread out the paella. Let it crisp, stirring occasionally until it is heated through. You can also heat it up in the microwave, stirring and heating as needed, about 1-2 minute on high.What else can I use a paella pan for?
You can use it for cooking anything that will do well with a wide, flat cooking surface. It’s perfect for searing meats, using as a roasting pan, or even stir-fry. I hope you guys give this recipe a try. smoky saffron rice and crispy bits forever, xoxo stephPaella Recipe
Paella even has its own emoji!
- medium-sized paella pan
- 30 threads saffron (lightly crushed, about 1/2 tsp)
- 1/4 cup neutral oil (high heat such as grapeseed preferred)
- 2 links Spanish chorizo (sliced)
- 4 bone in skin on chicken thighs
- 10-12 large shrimp (peeled and deveined)
- 1 small onion (minced, about 1 cup)
- 3 cloves garlic (crushed)
- 3 medium tomatoes (diced or grated, about 2 cups, see notes)
- 1 tbsp smoked paprika
- 6 cups chicken broth (no sodium preferred)
- 2.5 cups bomba rice
- 1 red or orange pepper (sliced into 1" strips)
- 12 clams
Stir the saffron into 1⁄4 cup hot water in a small bowl and let bloom for 15 minutes.
In a 16″–18″ paella pan, heat the oil over medium-high heat. Add the chorizo and the chicken, skin side down. Add the the shrimp and cook, flipping occasionally, until browned, about 5 minutes, then transfer the shrimp to a plate, leaving the meats to sear in the pan.
Add the onions, garlic, tomatoes, and paprika and cook, stirring often, until the onions soften, about 6 minutes. Add the saffron and 4 cups of chicken stock. Flip the chicken so it’s skin side up and bring everything to a boil over high heat.
Sprinkle in the rice, distributing evenly, then add the peppers on top. Cook, uncovered, without stirring, until rice has absorbed most of the liquid, about 12-15 minutes. If the pan is larger than the burner, rotate it every two minutes to evenly distribute the heat. Once the stock is low enough, add the remaining 2 cups chicken stock.
Reduce heat to low, and top with the cooked shrimp. Nestle in the clams, hinge side down. Continue to cook, without covering or stirring, until the clams opened and the rice absorbs the liquid and is al dente, 5–10 minutes more. Turn heat to high for 1-2 minutes to create the socarrat. Remove pan from heat, cover with aluminum foil, and let sit for 5 minutes before enjoying.
Paella is totally customizable so feel free to make this dish vegetarian, all seafood, or all meats.
You also can grate the tomatoes on the largest holes of a box grater. Be careful and discard the skin afterwards.

I Am... Air Fryer Grilled Cheese
All you need is ten minutes for this perfect air fryer grilled cheese and it might be the best way to make grilled cheese. It's time to catch up to 2025 when everyone owns an air fryer and it's actually good! This air fryer grilled cheese is hands-off, quick and easy perfection with extra crispy toasty outsides and gooey melty cheesy insides I love grilled cheese sandwiches. They’re one of my all time favorite comfort foods. I love simple, classic grilled cheese and fancy grilled cheese - to me, all grilled cheese is good grilled cheese. But, when I’m starving and I need grilled cheese almost instantly, an air fryer grilled cheese is my go-to.
Why air fryer grilled cheese?
Remember when I said all grilled cheese is good grilled cheese? Well, I lied. I absolutely abhor any kind of burnt grilled cheese. Or even worse, when the outsides are toasted but the cheese isn’t melted. For such a simple sandwich, there are so many things that can go wrong if you’re not patient at the stove. That’s why air fryer grilled cheese is amazing. It comes out the same every single time you make it. Once you set the temp and time, you can just chill out and let the air fryer do its thing. No fiddling with looking at how golden your bread is, no burnt bits, and thankfully, no unmelted insides.How to make air fryer grilled cheese
Making a grilled cheese sandwich in the air fryer is much the same as making one on the stove in a pan, minus the standing at the stove. Here’s how you do it:- preheat - preheat your air fryer while you’re prepping your sandwich.
- butter - use softened room temperature butter to generously butter two slices of bread.
- build - place one slice of the buttered bread in the basket of the air fryer and top with two slices of cheese. Place the other slice of bread on top of the cheese, butter side up.
- air fry - air fry the sandwich for 3-5 minutes, then flip and continue to air fry until perfectly golden.
- enjoy - remove, slice if desired, and enjoy!
What kind of cheese for air fryer grilled cheese?
There’s only one cheese for classic grilled cheese: American. It’s the perfect melty, cheesy filling for a grilled cheese. Yes, you can get fancy with sharp cheddar, gouda, or whatever your favorite cheese is, but if you want pure comfort food, American cheese is what you want. For those times I don’t go with American cheese, I like one slice of cheddar and one slice of mozzarella.What is American cheese?
Contrary to what you’ve heard, American cheese is cheese. It’s perfect for grilled cheese sandwiches because it’s mild, creamy, and has a low melting point. American cheese has a bad reputation because it’s processed, but in reality, all cheese is processed. What people are really complaining about is the fact that it’s pasteurized, which makes people think that it’s “plastic.” American cheese is in fact, made from cheese, more specifically cheddar or Colby cheese that’s been melted with sodium citrate (a citric acid salt aka salt from the the acid found in citrus fruits) so it can be pasteurized into a creamy texture that doesn’t separating. Anyway, that was just a long way of me saying that American cheese is real cheese and it’s good!The best bread for grilled cheese
For a classic grilled cheese so all you need is simple sandwich bread. It’s up to you if you want to go for white or whole wheat, but if you’re having a grilled cheese sandwich, I recommend white bread. My favorite kind of white bread for grilled cheese is super soft shokupan/Japanese milk bread but obviously I don’t always have homemade bread hanging out in the kitchen. My next favorite choice is any sort of fluffy, super squishy sandwich loaf.Tips and tricks for a perfect air fryer grilled cheese
- use room temp butter so you don’t tear your bread trying to spread hard butter on soft bread. If you don’t have room temp butter, melt some in the microwave and brush the bread with the melted butter. If you don’t have butter, you can always substitue mayonnaise.
- preheat the air fryer, even if it’s not for a long time. Just press the preheat button while you’re assembling your sandwich. It really does make a difference in the heat transfer and toasting of the bread.
- use 2 slices of cheese. It seems like overkill, but one sandwich with two slices of cheese is the way it should be. You want enough cheese in the middle of your grilled cheese to melty and gooey. No one likes a grilled cheese that skimps on the cheese.
- choose regular sandwich bread thick bread. The bread to cheese ratio is perfect when you go with a regular thickness. This is not the time for thick slices of bread; too thick and your grilled cheese won’t be as crispy.
- add a rack or a small baking sheet to the basket and place the bread and cheese on top if you don’t want your grilled cheese to have air fryer basket marks.
Which air fryer is this?
We have a Cosori air fryer with a clear window. I love it because you can peek inside without opening the drawer. So much of knowing when something is done cooking is about appearance and the little window lets you see everything that’s going on inside. I also love that it’s so big. It doesn’t look absurdly large but it fits a lot of food inside and it hasn’t let us down yet. It’s kind of hilarious but Mike and I love it so much that we joke all the time about getting a second one so we can air fry multiple things at once. (not sponsored, btw) That’s it, air fryer grilled cheese for the win. Hope your future is cheesy! xoxo stephAir Fryer Grilled Cheese Recipe
Quick and easy perfection with extra crispy toasty outsides and gooey melty cheesy insides.
- 2 slices bread
- 2 slices cheese (of choice, American preferred)
- 1 tbsp butter (room temp)
Preheat the air fryer to 400°F. While the air fryer is heating, butter both slices of bread.
Place one slice of bread, butter side down, in the air fryer basket.
Top the slice of bread with 2 slices of cheese.
Place the other slice of bread on top, with the butter side facing up.
Air fry until golden brown, about 3-5 minutes, then flip and air fry for an additional 1-2 minute or until the grilled cheese reaches your desired toastiness.

I Am... One Day No-Knead Focaccia
If you love bread, this recipe is for you: no knead, one day, full proof, homemade bread. Specifically, an impressive bubbly, crispy, gloriously golden tray of no knead focaccia is the stuff bread dreams are made of. I love bread so much. I have a sourdough starter (named Justin Bread-ber) that I love so much that I have both dehydrated and frozen back ups of him. Bread is absolutely magical. That being said, I know that bread can be intimidating even though it is the easiest thing to make. I mean, people baked bread back in the day when there was no electricity or ovens. But no-knead focaccia is the best thing to start with. If they can do it, you can do it. I believe in you.
What is focaccia?
Focaccia is a delightful oven-baked Italian flatbread that is made with yeast. It comes in rounds, rectangles, and squares. It’s bubbly and squishy and has a signature golden brown top that’s dimpled and adorned with olive oil, flaky salt, and herbs. There are so many regional types of focaccia that you could do a focaccia tour of Italy twice around and still find different kinds to eat. It’s a beauty of a bread because there are so many varieties topped with different ingredients.How to make no knead focaccia
- Measure - start off by measuring out the flour, water, yeast, and salt. It’s best to use a kitchen scale, but if you don’t have one, I’ve included cup measurements. Thankfully bread is super forgiving and you don’t need to be extra accurate.
- Stir - Stir the flour, water, salt, and yeast together in a bowl until everything comes into a shaggy ball.
- Proof - Cover the dough and let it proof for 30 minutes in a warm spot in your kitchen. After 30 minutes, lightly wet your hands and grab some of the dough and fold it over and in on itself. After each fold, turn the bowl 90 degrees. In the end you’ll complete 4 folds. Cover and let the dough proof for another 30 minutes. After 30 minutes, lightly wet your hands and grab the dough with both hands, scooping it up and holding it over the bowl. Some of the dough will naturally fall down towards the bowl. Tuck the ends that fall down towards the bowl under the dough. Turn the bowl 90 degrees and repeat. The dough will look like a blobby rectangle.
- Dimple - Drizzle olive oil in a cake pan and place the blobby rectangle directly into the olive oil. Use your fingers to gently spread out the dough and dimple slightly. Cover and let rise for 30 minutes to an hour, or until doubled and poofy. Right before baking, drizzle generously with olive oil and dimple the dough: use your fingers to press down into the dough, almost all the way to the bottom of the pan.
- Bake - Bake the focaccia in a preheated 450°F oven for 20-25 minutes or until golden and baked through. Let cool in the pan for 30 minutes before enjoying warm or at room temp.
No knead focaccia ingredients
- flour - regular all purpose flour is what we’re using. If you have bread flour on hand, it will give your focaccia more structure and therefore more fluffiness, but it’s not absolutely necessary.
- salt - bread is only 4 ingredients and salt is essentially for flavor. If you want to get fancy you can use flavored salts on top, but in the dough, simple fine table salt is best because it dissolves easily into water.
- yeast - we’re going for instant yeast, the kind that comes in little packets or jars. Just look for yeast that says “quick-rise” or “fast-rising.”
- water - this is a 90% hydration dough meaning there’s quite a bit of water in it. The large amount of water is what makes it super easy to stir up the dough so we don’t need to knead it. We want a warm-ish water so the yeast has a happy environment to grow. In this case, warm means warm but not hot to the touch.
- olive oil - you can’t have focaccia without olive oil. Giving your baking pan a nice drizzle of oil means your focaccia gets a crisp and almost deep fried bottom crust. A generous drizzle of olive oil on top and in the dimples of focaccia is signature. Make sure you’re using an olive oil you like the flavor of.
- toppings - you can keep it simple and just go for olive oil and salt. You can also go a with a bit more and add your favorite fresh herbs. Really, you can top this with anything: tomatoes olives, cheese, garlic, go wild!
Why no knead focaccia?
The beauty of no-knead bread is that the ingredients do all the work for you. You don’t need a mixer, a bread machine, or to even really use your arm muscles. Everyone can make no-knead bread, with little to no equipment. No-knead bread is the gateway bread, the bread will show you how it’s possible to make homemade bread yourself!How does no knead bread work?
Typically, when you make bread, please excuse this pun, you need to knead it. Kneading bread is what develops the gluten in the dough, making bread chewy. It also incorporates air which is what makes the dough puff up and inflate when proofing and baking. No gluten and no air means flat, dense bread. So, then, how and why does no-knead bread work? It’s science! No-knead bread uses a relatively long rising (fermentation) time instead of kneading to develop gluten. No-knead breads have a very high hydration, meaning they have a lot of water in the dough, making it easy to mix with a wooden spoon or silicone spatula. Instead of kneading a small amount of water into a large amount of flour, an almost equal mix of water and flour and simply stirred together. Time and yeast do the rest of the hard work by producing a bubbly, strong, elastic network that holds air well.What is lukewarm water for bread?
We want water that’s warm to the touch, but not hot, if you want to get specific, we’re looking for between 80°F and 100°F.How to do stretch and folds
Stretch and folds are super simple. It helps if you think of your bowl as cardinal or compass directions. The top of the bowl is North, the bottom is South, right is East and left is West. Lightly wet your hands and scoop underneath the dough at North. Pull the dough up and fold it over down South. Then, scoop under the dough South and fold it up towards North. Do the same with East and West. You will have completed 4 folds.How to do coil folds
Coil folds are stretch and folds but in the opposite direction. Instead of folding the dough up and over on top of itself, you’re folding it underneath. Lightly wet your hands and use both hands to reach underneath the dough and pull up so the dough is hanging from your hands. Some of the dough will naturally fall down or stick to the bowl so it’ll look like you’re holding a very floppy cat. Tuck the two floppy ends underneath the bulk of the dough, first the top floppy part, then the bottom floppy part, kind of like you’re folding a letter in thirds. Turn your bowl 90° and do another stretch and fold. Your bread should look kind of like a loose blobby rectangle.No knead focaccia tips and tricks
Here are some tips and tricks to make your focaccia the best it can be:Cold fermentation
Some people are very particular about the flavor of yeast. I’m one of them. I definitely prefer slow, cold fermented doughs which means if I have enough foresight, I will almost always make my dough the day before and let it cold ferment in the fridge. What this means is stopping (also card retarding) the proofing. When you put dough in the fridge, the coldness slows down the yeast growth and stops the yeast from digesting the flour. Slower yeast growth leads to better flavor development because there is less off gassing. If you do a cold ferment, you’ll want to put your dough in the fridge after the second set of coil folds, once you have put your dough into the baking pan. Keep it wrapped up and just pop it in the fridge. The next day, about 2-3 hours before you want to eat your bread, take the pan of focaccia out of the fridge and let it sit at room temp or in a happy proofing temperature for 2 hours or until doubled and very poofy.What temperature for proofing no knead focaccia
If you’re really particular and want to have the ideal temperature for your focaccia to thrive, you’ll want your ambient air temperature to be 85°F. Nice and toasty for all the yeasties to grow and bubble. Some ovens have a proofing setting and if yours does, go ahead and use it. Otherwise, you can always pop your proofing focaccia into your toaster oven or microwave; just be sure to leave a sign on the door so no one accidentally kills all your hard work.What kind of pan for no knead focaccia
You can really use any kind of pan you want as long as it can contain your dough. If you use a rimmed sheet pan your focaccia will be thinner and if you want a fluffier, thicker focaccia, you should use a cake pan. This recipe will fit nicely into an 8 inch cake pan or a rimmed quarter sheet pan. In this post, I used an 8.6 x 6.6 inch rectangular pan.When to dimple?
Most people dimple their focaccia at the end, right before they pop it in the oven. The truth is, you should dimple twice: right when you put your dough in the baking pan and then again right before you bake. Dimpling the first time helps expel any extra air which will give your focaccia a good crumb. Dimpling right before you bake means you’ll get more airy bubbles and a good crumb. Because the dimples are little pockets where the olive oil can pool, you’ll want to have just the right amount. Dimpling right before you bake helps you know that you’ve proofed just enough. The dimples will stay indented and the dough around dimples will be bubbly and airy.Bread heads
For all the bread heads out there, this is a 90% hydration dough which makes it super fluffy and bubbly. Here are the baker percentages if you want to adapt the recipe:| Ingredients | Grams | Baker’s % |
| flour | 240 | 100% |
| salt | 5 | 2% |
| instant yeast | 2.5 | 1% |
| water | 225 | 90% |
More breads
Once you’ve dipped your toes into bread making, try these recipes out:- Parmesan garlic knots - seriously the BEST garlic bread knots you’ll ever have
- Soft and fluffy Parker House rolls - these are so soft and pillowy, you’ll want to make a bed and sleep on them
- Sourdough of course - Try your hand at sourdough. Step-by-step instructions on how to cultivate your very own starter and make your first loaf with wild yeast
- Pretzels - Homemade pretzels are a serious flex, they take a bit more time than these regular bread but they are so worth it
- And even Pretzel Dogs - it’s almost Oktoberfest so why not make some pretzel dogs
One Day No-Knead Focaccia
Make impressive bubbly, crispy, and gloriously golden focaccia with almost no effort.
- 2 cups all purpose flour (240 grams)
- 1 tsp salt (5 grams)
- 3/4 tsp active dry yeast (2.5 grams)
- extra virgin olive oil (to taste)
- flaky sea salt (to taste)
- fresh rosemary (to taste)
In a large bowl, whisk together the flour and the salt.
In a small bowl or liquid measuring cup, add 225 grams (about 1 cup) warm water. Sprinkle on the instant yeast.
Stir the yeast into the water then add to the bowl with the flour and salt. Use a silicone spatula to mix well, until everything comes together in a shaggy ball. Scrape down the sides if needed, then cover and let rest for 30 minutes.
After 30 minutes, use lightly wet hands (or you can use nitrile kitchen gloves) and complete a set of stretch and folds, picking up the dough and folding it over on itself. Cover and rest for 30 minutes.
After resting, complete a set of coil folds, sliding your slightly wet (or gloved) hands underneath the bulk of the dough and picking it up over the bowl, letting the weight of the dough fall down. Tuck the ends under each other, turn the bowl 90 degrees and do another coil fold.
At this point, you can cold ferment your dough in the fridge (see the above post) or transfer the dough to an olive oiled cake pan.
Gently press the dough out to the edges and dimple slightly with oiled hands. Cover and proof for 30 minutes.
After 30 minutes, lightly oil your hands and dimple the dough again. Cover and let rest for another 30 minutes or until completely doubled and very poofy.
Heat the oven to 450°F and drizzle the top of the focaccia generously with olive oil. Dimple one last time and sprinkle on flaky sea salt and fresh rosemary.
Bake for 20-25 minutes or until the top of the focaccia is golden and crisp and the focaccia is cooked through (you can use an instant read thermometer inserted into the middle, it should read between 190–210°F). Remove and let cool for 30 minutes, then slice and enjoy!
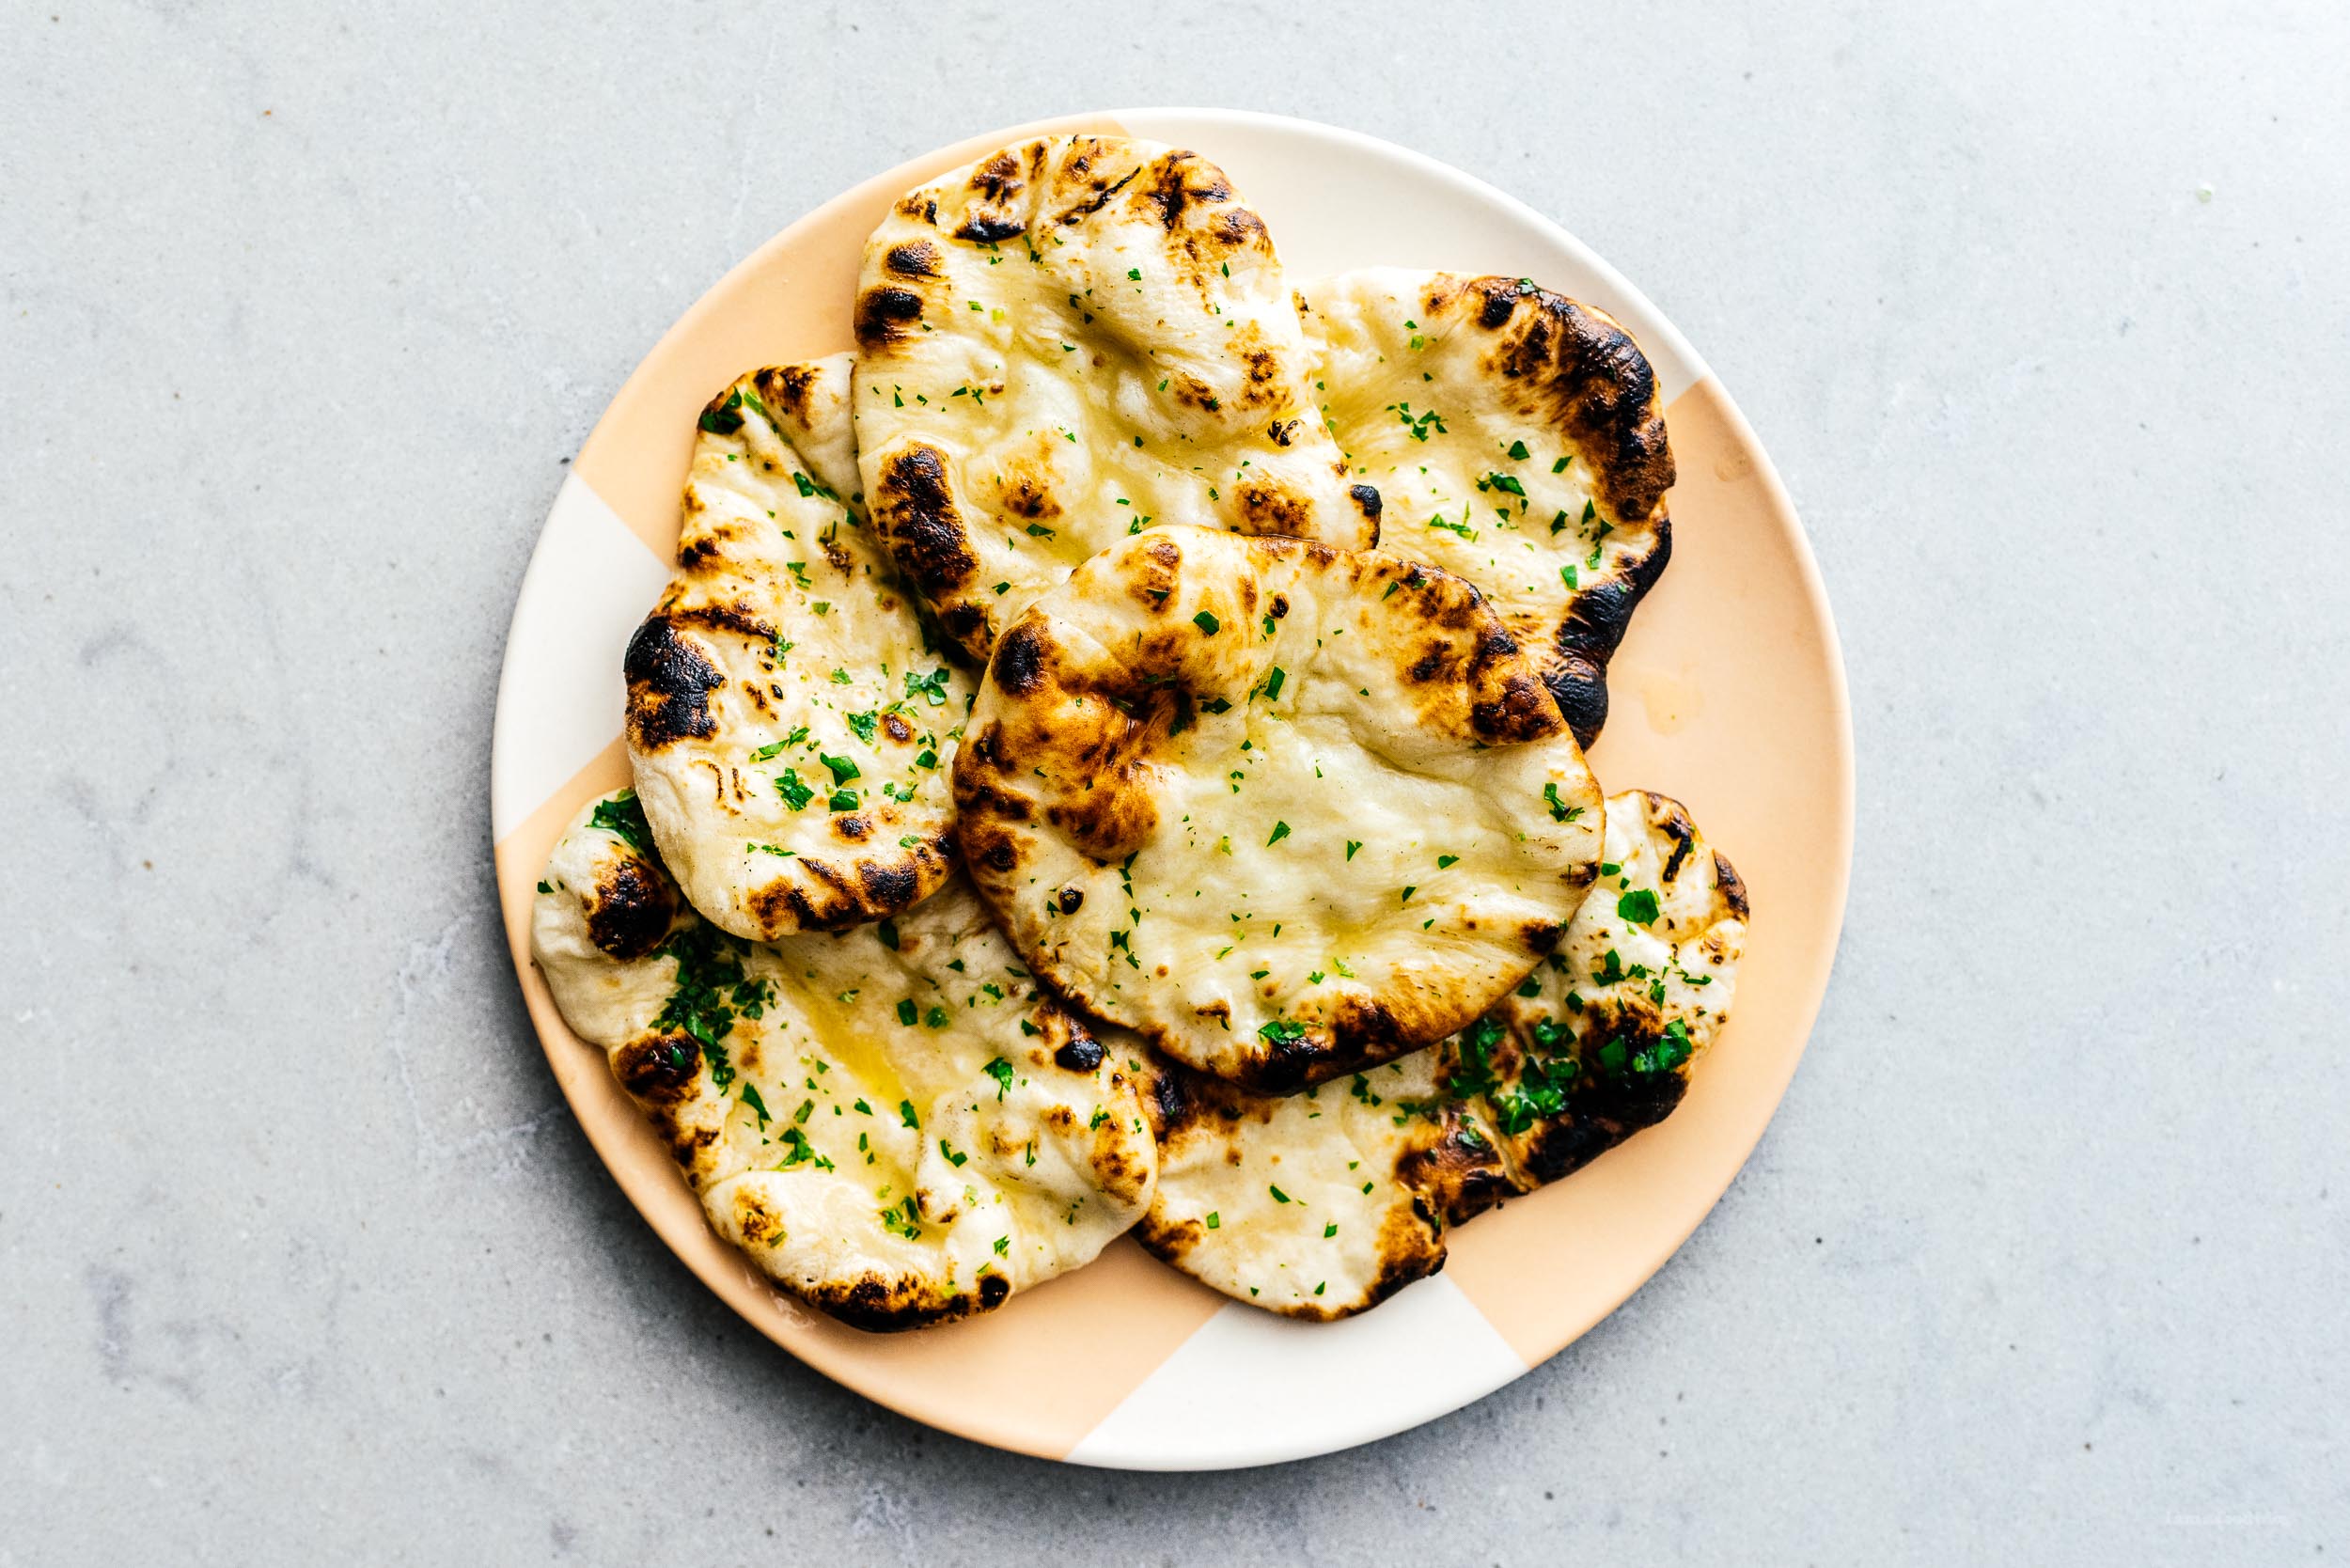
I Am... The Easiest Naan
Making homemade naan is easy and delicious – it’s the fastest, best bread you’ll make at home. This naan recipe comes together super quick. It’s soft and puffy, just like the bread you get at your favorite Indian restaurant. A recipe for naan is something every home cook should have in their back pocket. This recipe gets it tang and softness from milk and yogurt. The fluffy plushness is thanks to baking powder and soda which is amazing because you don’t need to proof it as long as you would with yeasted dough.
What is naan?
Naan is a type of flatbread, popular in India, South Asia, and Indonesia. The kind we’re talking about here specifically, is Indian-style bread baked in a super hot tandoor oven where the bread gets puffy and bubbly. Most home cooks use a (hopefully gas) stove top with a hot cast iron skillet because who has a tandoori at home?! (Some people, actually. They even make not-well-rated mini tandoori ovens for home) Naan is soft yet crispy, puffy and lush. It’s basically the best flatbread you’ll ever eat. If you like fresh homemade bread, you’ll love this recipe. Side note, although a lot of people call it naan bread, it’s kind of funny because the word naan actually means bread. So really, you’re saying “bread bread”. It’s kind of how like when you say shrimp scampi you’re saying “shrimp shrimp.”Naan ingredients
- Milk. I use 2% milk because it’s usually what I have in the fridge but this recipe will work with any kind of milk. If you’re vegan, you can make a vegan version by using a plant-based milk.
- Yogurt. Yogurt gives your bread a bit of tang and flavor. I’ve made this with Greek yogurt, regular yogurt, kefir, and soy yogurt.
- Flour. Simple all-purpose flour is what you need. If you’re looking to sub whole wheat, you can use 3/4 cup whole wheat with 1/4 cup all-purpose.
- Baking powder and baking soda. This is a yeast free recipe which is perfect because you don’t need to wait for it to rise. Instead it gets its fluffiness from baking powder and soda.
- Sugar. We need just a touch of sugar for a bit of sweetness. There’s only 1/4 teaspoon in this whole recipe so you can always skip the sugar if you want to be sugar-free, you probably won’t miss it.
- Salt. You need just a touch of salt to make your naan sing. We like our homemade naan more neutral, so be sure to adjust the salt level to your personal salt taste.
- Butter and herbs. Butter and herbs are optional but so delicious. We use melted butter and chopped cilantro, but you can use all kinds of herbs and spices. Try parsley, mint, green onions, garlic, cayenne, cumin, graham masala, chili powder, the world is your oyster! If you’re making vegan naan, sub olive oil or a vegan butter.
How to make naan
- Whisk. Whisk the milk and yogurt together in a liquid measuring cup.
- Combine. In a large bowl, stir together the flour, baking soda, baking powder, salt, and sugar. Make well in the middle and add the yogurt mix in bit by bit with a rubber spatula. Knead into a soft dough, gather into a ball, cover, and let rest for 1 hour.
- Shape. Give your dough a little knead on a lightly floured work surface then divide it up. Use a rolling pin to roll it out into ovals or circles. You’ve made naan!
- Bake. Heat up a heavy bottomed cast iron skillet over high heat. Brush the naan with water and place in the skillet water side down and cover. When it bubbles and rises, take the lid off and then flip it over and cook the other side.
Variations
- Mini naan - Divide the dough into 8-10 pieces and make naan dippers then cook as usual.
- Giant naan - Divide the dough into 2 and then cook as usual. If your naan isn’t rolling out large enough, let the dough rest longer. The longer it rests, the more relaxed the dough will be and the larger you’ll be able to roll it.
- Garlic naan - To make garlic naan, melt together 1/4 cup butter with 4 cloves minced garlic and 1 tbsp finely chopped parsley or cilantro. Brush the garlic butter on both sides of cooked naan and enjoy.
- Cheesy naan - To make cheesy naan, divide the dough into four pieces then roll them out. Place 2 tbsp shredded cheese into the middle of each naan and seal it in the middle by pinching together the edges. Let it rest briefly, then use a rolling pin to roll it out. Cook as per usual.
How to store naan
Naan tastes best fresh. But if you want to make it in advance, just cook it and leave it plain, without butter. Let it cool off completely then store in an airtight container or zip top bag. It should keep for up to three days.How to freeze
To freeze, just cook it and keep it plain, then let it cool completely. Wrap tightly in plastic wrap before putting it in an air tight container or bag. It should keep frozen for up to 2 months.Reheating
Microwave
Lightly brush with water and heat briefly, in 20 second intervals until it’s warm and pliable. When it’s warm, brush with melted butter and finish with chopped herbs.Oven
Heat the oven to 400°F. Lightly brush the naan with water and heat on a baking sheet for 2-3 minutes. When it’s warm, brush with melted butter and finish with chopped herbs.From frozen
Let thaw at room temp before reheating, either in the microwave or oven.What to serve alongside
- butter chicken
- basmati rice
- butter paneer
- dal makhani aka black dal
- tandoori chicken
- chicken tikka masala
- chicken biryani
Naan Recipe
The best flatbread you’ll ever eat.
- 1/4 cup milk
- 1/4 cup yogurt
- 1 cup all purpose flour
- 1/4 tsp baking powder (+ an extra 1/8 tsp)
- 1/4 tsp baking soda
- 1/4 tsp sugar
- 1/8 tsp salt
- 1 tbsp butter (melted, to serve)
- 1 tbsp fresh cilantro (chopped, to serve)
In a small bowl, whisk together the milk and yogurt. Set aside.
Mix the dry ingredients together in a bowl or on a clean work surface. Make a well and slowly add in the milk-yogurt mix bit by bit, combining with the flour. Knead into a soft dough. Gather into ball and cover for 1 hour.
Lightly dust your work surface with flour. Divide the dough into 4-6 equal pieces and use a rolling pin to flatten and stretch out.
Heat up a heavy bottomed or cast iron skillet (with a lid, preferably a glass lid) over high heat. Brush one side of the naan with water and place in the skillet, water side down.
Cover the pan and cook for 30 seconds, then check it to see if has started to bubble and rise. If it has, use a pair of tongs and take it off the pan and cook the uncooked side over direct flames until it starts to char. Alternatively, flip and cook the pan until it starts to brown.
When the naan is browned on both sides, brush with a bit of melted butter and sprinkle on chopped cilantro. Repeat with the remaining dough. Enjoy warm.
via Indian Simmer

Latest Comment
“I have the same issue. Tall at the time of flipping. Stiff peak egg white. I use lime juice.”Doris on Japanese PancakesPopular
 2015 Holiday Giveaway
  One-Pot Lemon Scallop Pea Spaghetti
  Beer Battered Onion Rings, Jalapeno Aioli
  2014 Holiday Gift Guide and a Giveaway
  Easy Gourmet Hot Wings and a Giveaway!
 The Ultimate Veggie Sandwich
  Vegan(!) Creamy Corn Soup Recipe
  Sunday Brunch: Grilled Cheese Eggs Benny
