I Am... Classic Chinese Tomato Egg Stir Fry
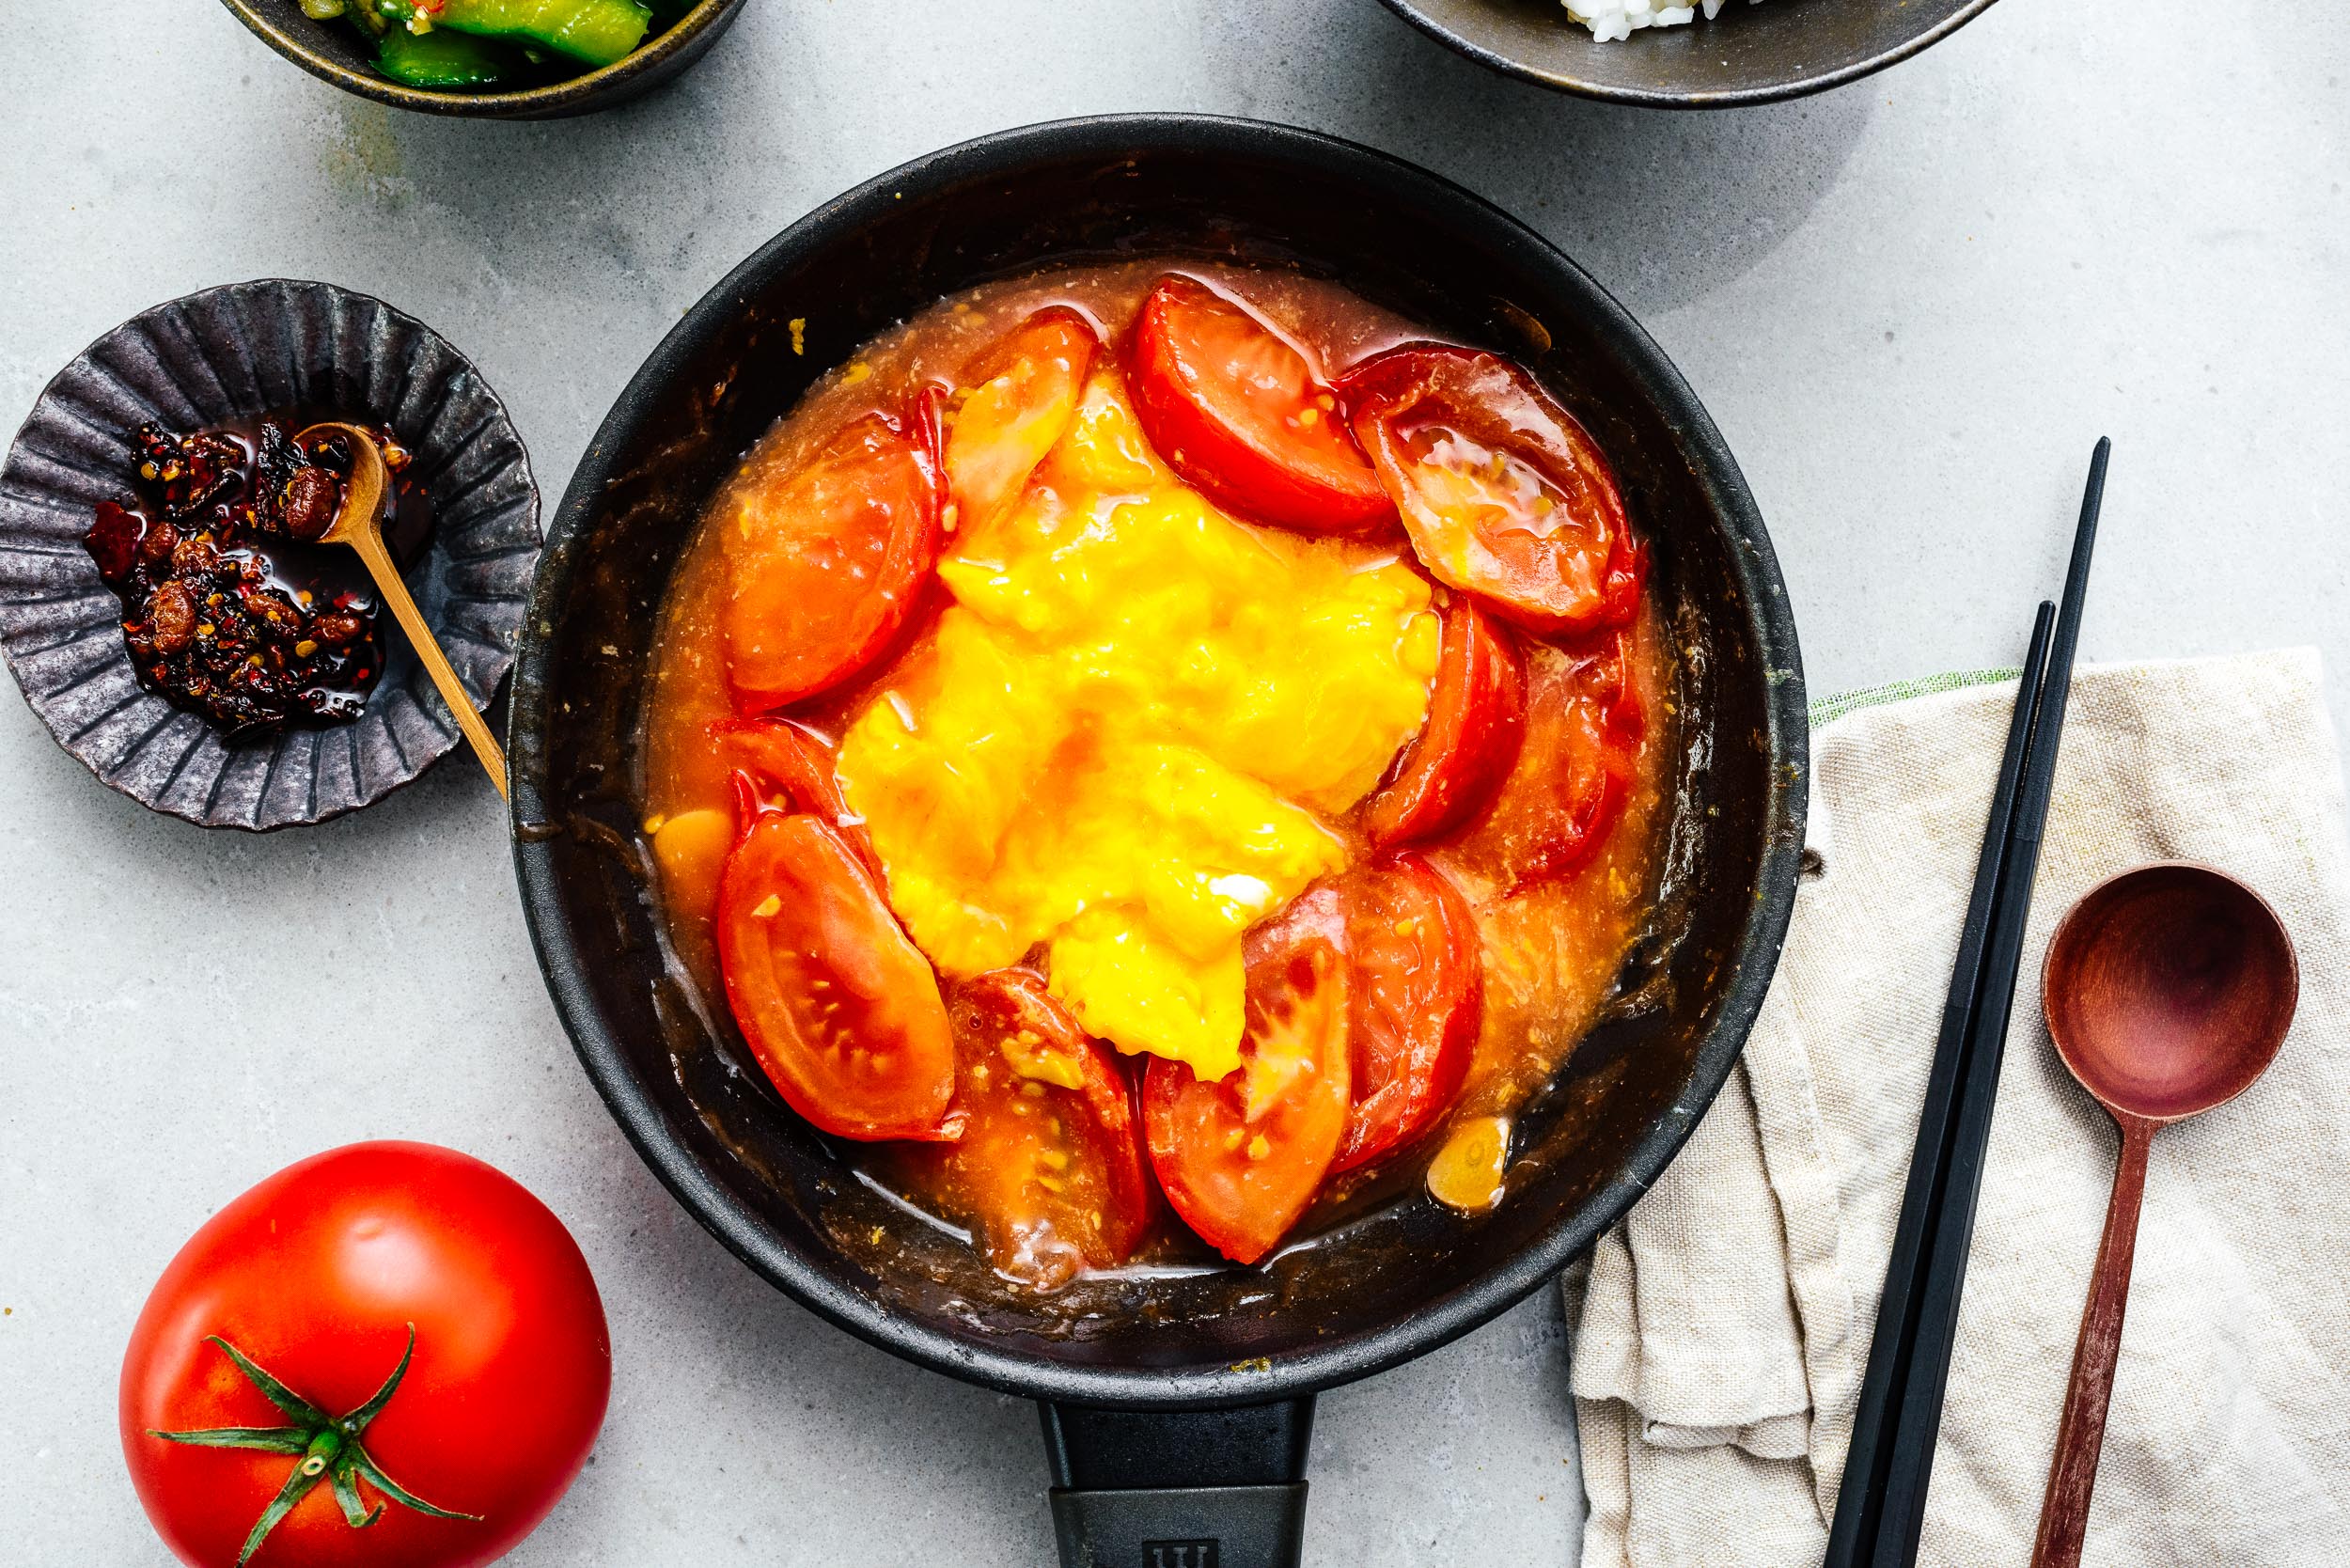
Do you have a childhood favorite dish? Something that brought you comfort and you would eat no matter what? For me, that was tomato and eggs (fan qie chao dan/番茄炒蛋). Stir fried tomatoes and eggs are a super home style comforting meal (jia chang cai) found both at home and also at casual home-style restaurants. It’s a super simple combination of flavors, but there’s something about the sweet sauciness of the tomatoes and the savoriness of the eggs that is a perfect pair. Because it’s so simple – literally just stir-fried eggs with tomatoes – it’s one of those dishes that is on repeat. It comes together in less than 15 minutes, even if you’re not experienced in the kitchen and the pay off is unbeatable. Part of the appeal is definitely convenience and part of it is wistful cultural nostalgia. Along with rice and instant noodles, stir-fried tomatoes and eggs is probably one of the most quoted Chinese comfort foods. If you’ve had stir-fried eggs and tomatoes before before, as the kids say, if you know, you know. If you haven’t, welcome to the world of rich and creamy scrambled eggs, tangy with sweet and saucy tomatoes. It’s so satisfying.
What is stir fried tomato and eggs/fan qui chao dan/番茄炒蛋?
Stir fried tomatoes and eggs is a common home-style Chinese food dish that’s enjoyed both at home and at restaurants. It’s especially popular in school canteens in China. Essentially eggs are scrambled into large curds and stir fried with sliced tomatoes. The tomatoes cook out into a jammy sweet and savory sauce which combines with the eggs for the ultimate comfort food dish.What do you eat tomatoes and eggs with?
Most of the time tomatoes and eggs are eating on top a huge pile of steaming hot, fluffy white rice. The sauce stirs into the grains of rice and everything is combined into a super saucy rice bowl. But, tomatoes and eggs as a combination are so popular that there are a ton of other ways people eat tomatoes and eggs too. I’ve had them in dumplings, in soup, with noodles, with bread. The list can go on and on. To lots of Chinese people, tomato and eggs are the perfect combination, much like how a huge chunk of America considers peanut butter and jelly the ultimate food combination.What goes in stir fried tomatoes and eggs?
Just like peanut butter and jelly, there are a million different ways to make tomatoes and eggs. Because it’s a homestyle dish, everyone makes it differently. At it’s core, it’s tomatoes and eggs but people also add in garlic, ginger, shaoxing wine, vinegar, toasted sesame oil, ketchup, tomato paste, green onions, sugar, onions, white pepper…really there’s no right or wrong way to make tomatoes and eggs. Personally, I keep it pretty simple with eggs, tomatoes, a bit of sugar, ketchup (this is what really makes my tomato and eggs good!), and a bit of a cornstarch slurry to make everything extra glossy and saucy. Not everyone likes their tomato eggs saucy but I really like the extra silky luxuriousness that comes from a cornstarch thickened sauce.How to make stir fried tomatoes and eggs
1. Lightly beat your eggs. In a small bowl or liquid measuring cup, lightly beat your eggs with a pinch of salt, then set aside. The salt helps break down the structure of your eggs which will make them fluffy and tender because the salt helps breakdown proteins. The eggs become more liquid-y and viscous. Plus your eggs will be seasoned and we want everything to be nice and seasoned. 2. Prep your tomatoes and garlic. I like to keep my garlic in slices but of course you can mince if you want to. This is a personal preference, so do as you do. As for the tomatoes, if I’m going all out, I will remove the skins (see below) but most of the time, I just cut them into six wedges. I like using romas or tomatoes on the vine. Basically any super red and juicy tomato will do. 3. Get all your other ingredients ready. Make sure you have your measuring spoons out – if you don’t mind washing extra dishes and want to feel like you’re on a cooking show, you can even pre-measure everything out into little dishes – as well as your oil and sugar. Make a cornstarch slurry by whisking up your cornstarch with a bit of cold water. 4. Gently cook the eggs. It’s time to cook the eggs. Give the eggs another whisk then heat up a touch of oil in a non-stick pan. Cook the eggs over medium high heat being careful not to move them around too much. You want nice big curds. Use a silicone spatula to move the eggs from the edge of the pan into the middle, pushing them when you see that they have started to set. When the eggs are done but still soft, scoop them out into a bowl and set aside.What can I serve tomatoes and eggs with?
Classically served with fluffy white rice but you can of course serve it with fried rice too if you’re extra like that. Or maybe even toast!Tips and Tricks for the best Tomatoes and Eggs Stir Fry
- Peel the tomatoes. This is an extra step that most people don’t do but if you want a super soft and smooth tomato egg dish, you’ll peel your tomatoes because tomato skins are tough and fiberous. Make a tiny x in the bottom of the tomato, blanch and quickly toss into an ice bath and the skins just come right off. - Make sure you don’t overcook your eggs. Rubbery eggs don’t taste good. This is your chance to show off your soft scramble technique. Also, be sure to try to keep the curds nice and large, you don’t want your dish to be huge pieces of tomatoes and broken up egg bits. - On the other side of the equation, don’t undercook your tomatoes. You want the juices to come out and the sugars to caramelize into a delicious jammy sauce. Hard, under cooked tomatoes in this dish is a travesty. If you can, be sure you’re using summertime sweet tomatoes. If it’s the middle of winter, just be sure to cook your tomatoes down enough. I hope you try this dish! It really is one of my favorites and I hope it’ll be one of your backpocket favorites too. It’s not impressive and it’s not the prettiest to look at, but it’s homey and comforting and good. tomatoes and eggs, xoxo steph PS - If you love egg dishes, please try this soft scramble tamagoyaki with rice, jammy eggs with yogurt, crispy fried eggs, or coddled eggs.Classic Chinese Tomato Egg Stir Fry 番茄炒蛋
- 3 eggs (lightly beaten)
- salt (to taste)
- neutral oil
- 3 roma tomatoes (sliced)
- 2 cloves garlic (sliced)
- 1 tsp sugar
- 1 tbsp ketchup or tomato paste (optional)
- 1 tsp cornstarch
Lightly whisk the eggs with a pinch of salt. In a non-stick frying pan, heat up a bit of oil over medium high heat. Add the eggs, using a rubber spatula to stir occasionally so the eggs cook slowly and evenly, pushing every so often so you end up with large curds, about 2-3 minutes. Remove from the heat into a bowl and set aside.
Add a bit more oil to the pan and add the tomatoes and garlic and cook over medium heat until the tomatoes start to cook and caramelize, pushing down on the tomatoes to release their juices. Stir in the sugar and ketchup.
When the tomatoes are juicy and bubbling, turn the heat down and let the tomatoes reduce a bit.
While the sauce is reducing, whisk the cornstarch into 1/4 cup water then add to the pan. Stir in and the sauce come to a bubbling simmer to thicken slightly.
Add the eggs back into the pan briefly and then enjoy on fluffy white rice.
For a bit of extra oomp, whisk in 1/2 tsp shaoxing wine with the eggs and finish with a drizzle of toasted sesame oil.
I Am... Tofu Fried Tofu Vegan Chicken Nugget Recipe
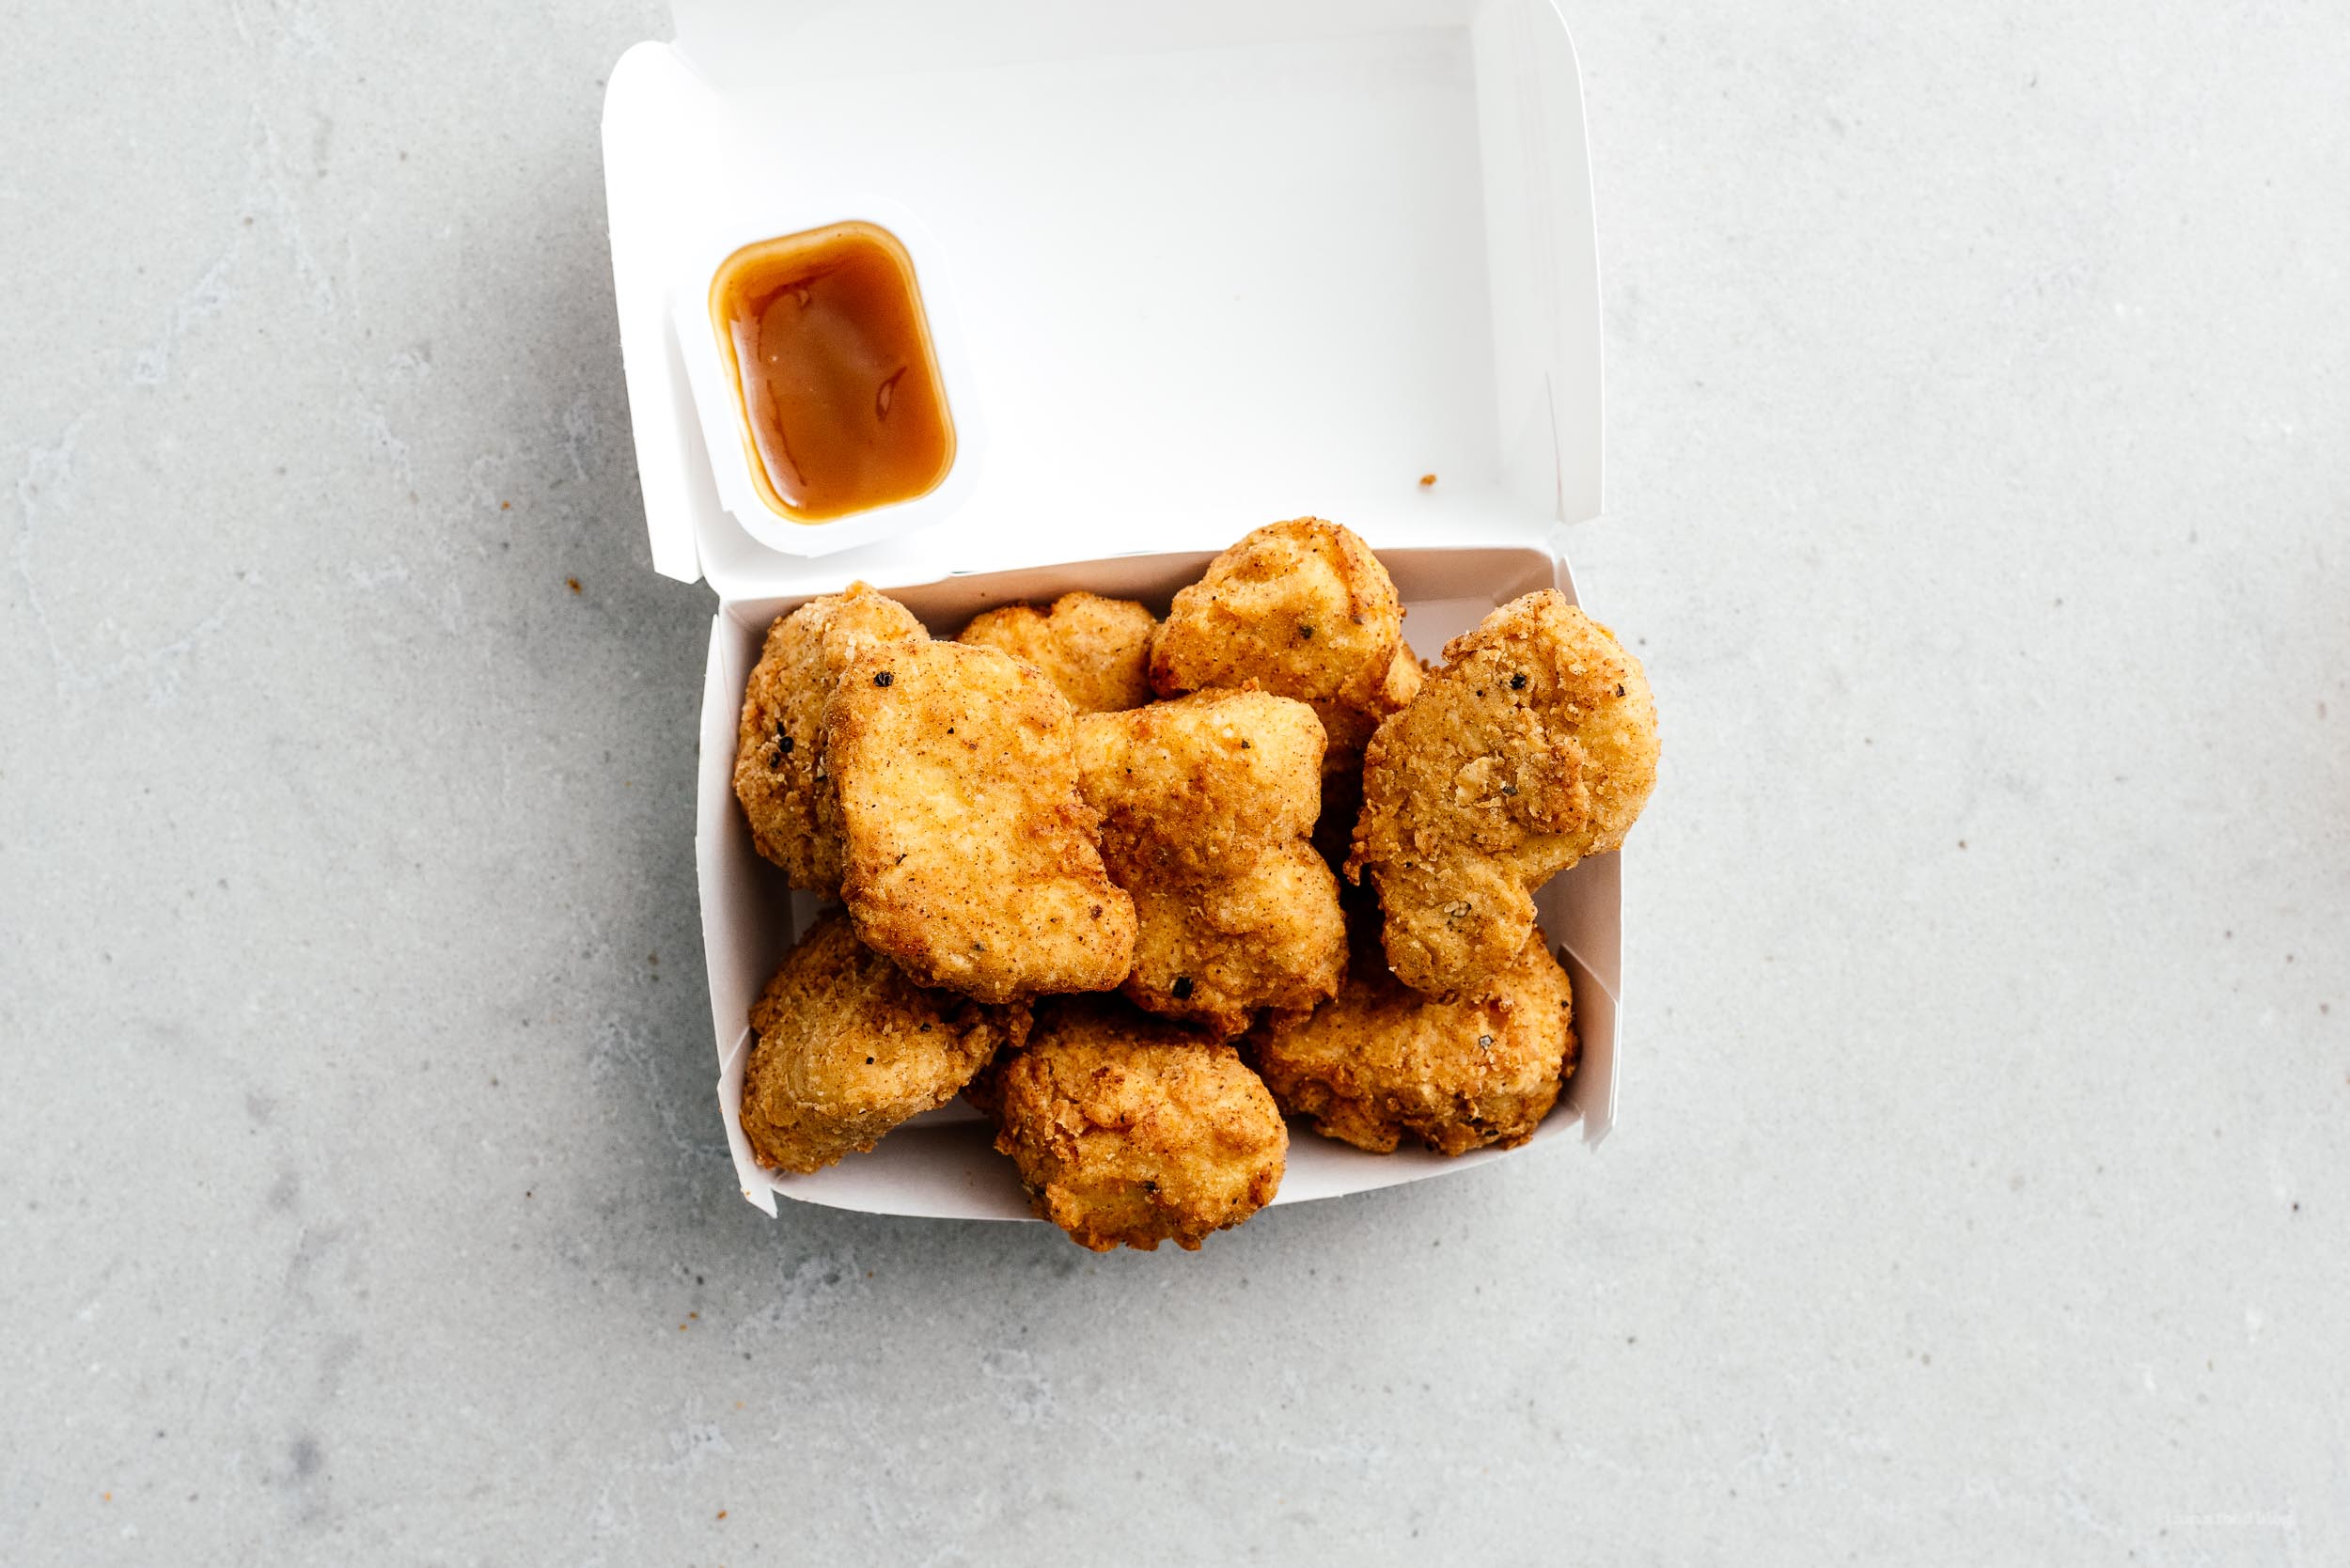
If you’re one of those people who think tofu just isn’t for you, these supremely savory, catastrophically crunchy, jaw droppingly juicy chicken fried tofu nuggets inspired by NYC’s Superiority Burger will change your mind forever. I’m a lover of tofu. I love it in all it’s forms: plain with just a drizzle of soy, in a ruby red mapo sauce, crispy with a sweet and savory miso glaze, and even in wonton. Tofu to me, is undeniably a good thing: high in protein, plant based, and incredibly tasty. But, I get it, some people don’t appreciate tofu. They think it’s bland or has a weird texture. I’m here to tell you tofu doesn’t have to be bland! It has texture! I’m here to give you tofu fried tofu nuggets! Because a life without tofu isn’t a life worth living. I’ve had many, many versions of crispy fried tofus and while I love them all, this chicken fried tofu (more on what that means exactly later!) is one of the best nuggets I’ve had, chicken or not. Extra firm tofu is given a golden crust then brined in spices so it soaks in flavor like a sponge. After the brine, a heavenly homemade mix of 11 herbs and spices (JK there aren’t 11) are mixed into flour to give it the same crunch as you find on classic fried chicken. If you like nuggets, these nuggets will satisfy you to no end, pinky swear.
What is tofu fried tofu?
Tofu fried tofu is kind of a misnomer. I think it stems from “chicken fried,” like how everything that is battered in buttermilk and coated in flour is considered “chicken fried.” But since there’s not buttermilk in this recipe – it’s completely vegan – the internet started calling battered tofu “tofu fried tofu.” Or maybe that’s just me? Anyway, this tofu is inspired by Superiority Burger’s crispy fried tofu sandwich which has been named as one of NYC’s best chicken sandwiches even though there’s no chicken in it. For this tofu fried tofu we’re going to do a three step process: brown, brine, then deep-fry. Browning the tofu gives it an extra crust and stability. It also pulls out some moisture which we’re going to add back in by brining. The brining will inject salt, garlic, and onion-y flavors all through the tofu, making it incredibly savory and juicy. After the brine, the tofu nuggets get double dunked into a seasoned flour. It sounds like a lot, but it’s not and really, it’s so worth it.The best kind of tofu for tofu fried tofu
Tofus are categories by texture/consistency which is determined by water content. The more water, the softer and silkier the tofu. Tofu comes in silken/soft, regular, firm, and extra firm. The best kind of tofu for this kind of preparation is extra firm. It comes packaged in plastic, without any extra water. It holds its shape well but you can also crumble it. You can find it at all Asian grocery stores and even Trader Joe’s sells it. I like to use a local tofu maker’s firm tofu variety.How to make tofu fried tofu nuggets
1. Shape: cut the tofu up into nugget shapes (I went with the classic ones - the boot, the tombstone, and the oval). If you want your nuggets to look more organic, use your fingers to crumble the edges. Pat the nuggets dry. 2. Sear: give the tofu a nice golden brown sear in some hot oil. I like to use cast-iron or a non-stick pan for this step. 3. Soak: brine the tofu in a salt-sugar mix with garlic and onion powder for extra flavorful juiciness INSIDE the tofu. 4. Coat: set up a dredging station with two bowls, one filled with the seasoned flour mix and another one with water mixed with a bit of vegan mayonnaise or mustard. The mayo/mustard gives a bit of flavorful body and mimics buttermilk so you’ll get a nice coating of crunchiness on each nugget. Pat your nuggets dry then dip into the mayo-mustard, then seasoned flour. Double dunk for max crunch. 5. Fry: Time to fry! Heat up at least 2 inches of oil in a heavy bottomed pot and make sure it reaches 360-375°F. You want a moderately high temp to quickly fry the tofu. When it’s brown and crunchy, remove it from the pan and let it drain on a wire rack.The best sides to serve with tofu nuggets
Personally we just devoured these nuggets as is with a side of homemade sweet-n-sour sauce (recipe coming soon) but if you have the deep fryer out and you want to be a little crazy, you can make Heston Blumenthal’s insanely crunchy two day affair triple cooked chips. If you want something a little less time consuming but just as good, you can go with air fryer fries. I also LOVE LOVE this perfect picnic potato salad, these crispy stovetop roasted red potatoes, these crispy oven roasted potatoes, and these insanely delicious potatoes with burrata. Obviously I think potatoes go with nuggets :) I hope you give these a try especially if you love tofu and even if you don’t. They’ll blow your mind. tofu forever! xoxo stephTofu Fried Tofu Vegan Chicken Nuggets Recipe
- 14 oz Extra firm tofu
- High heat oil for deep frying (such as grapeseed)
Brine
- 1 tsp garlic powder
- 1 tsp onion powder
- 1 tsp sugar
- 1 tsp salt
- 1 tsp freshly ground pepper
Coating
- 1/4 cup mayo (see notes)
- 1/2 cup all purpose flour
- 1/2 tsp smoked paprika
- 1/2 tsp ground cayenne pepper
- 1/2 tsp onion powder
- 1/2 tsp garlic powder
- 1/2 tsp salt
- 1/2 tsp freshly ground pepper
- 1/4 tsp baking powder
Prep the marinated tofu: line a cutting board or baking sheet with paper towels or clean kitchen towels. Cut the tofu into 2 inch by 1 inch slabs, 1/2 inch thick. If desired, crumble the edges so they look more like nuggets. Lay out in a single layer on the prepped baking sheet and cover with towels. Gently press to extract some moisture.
Heat up 2 tablespoons of oil in a large non-stick or cast iron skillet over high heat until shimmery. Sear the tofu, until it forms a golden brown crust, flipping once, 4-5 minutes per side. Remove and drain on a rack.
Make the brine: in a large bowl, combine 1.5 cups water with the garlic powder, onion powder, sugar, pepper, and salt. Add the seared tofu to the brine and let marinate for minimum 1 hour and up to overnight.
Prep the fried tofu: In a shallow bowl, mix the mayonnaise or mustard with 1/4 cup water until smooth. In another shallow bowl, whisk together the flour, spices, salt, pepper, and baking powder. Remove the tofu from the brine and pat dry. Dip the tofu in the mustard mixture, turning until coated, then dip into the flour. Dip back into the mustard, then the flour, so each nugget is twice coated.
In a dutch oven, heat 2 inches of oil over medium high heat and prepare a wire rack on a baking sheet. When the oil reaches 350°F carefully lower the battered tofu into the hot oil and fry, flipping as needed, until golden brown, about 3-4 minutes. Transfer to the wire rack.
Enjoy hot with sauces!
inspired by Superiority Burger via their cookbook
You can sub vegan mayonnaise, vegan yogurt, or mustard in the coating. You want something that’s a bit thick so that the flour can cling to the tofu. I used a half-half mix of mayonnaise and mustard.
I Am... The Best Cajun Butter Steak Recipe
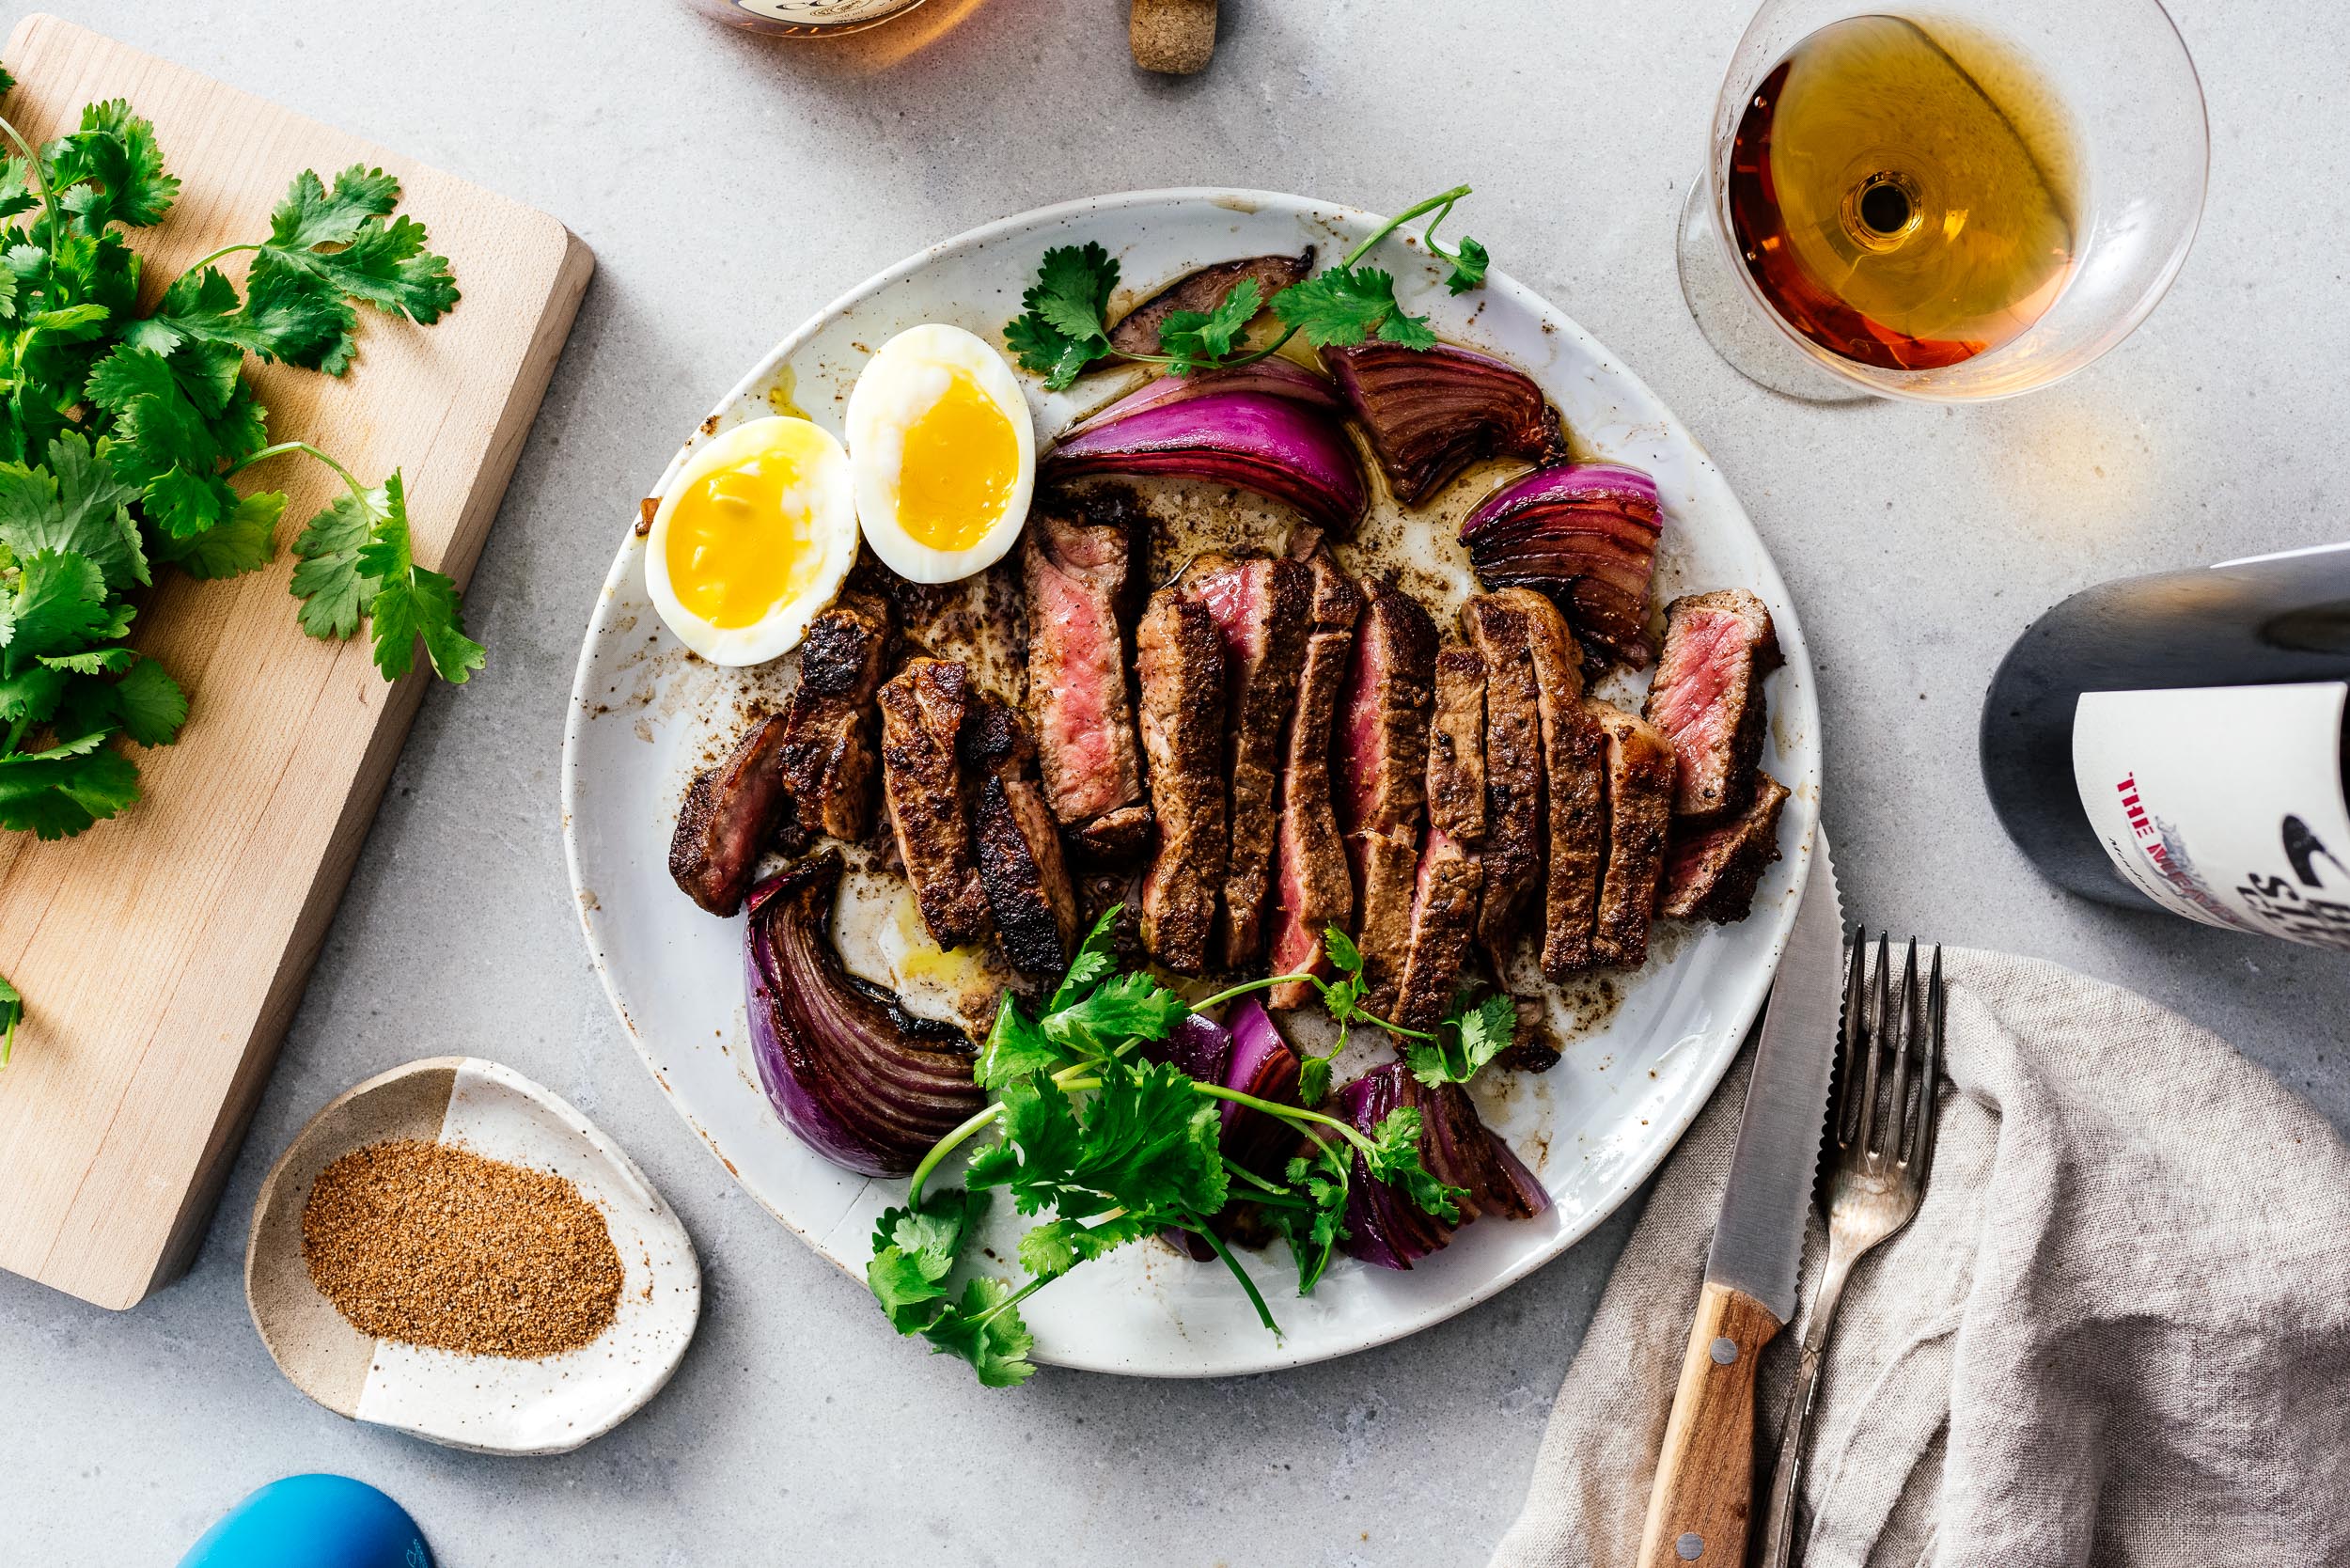
If you’re one of those people who think steaks should only be seasoned with salt and pepper, this deliciously juicy, incredibly flavorful cajun butter steak recipe based off of Smith & Wollensky’s Cajun Rib Steak will change your mind forever. I used to think that adding anything but salt and pepper to a high dollar, high quality cut of beef was basically wasting it, but as I got older I quickly saw the error of my ways. After all, steak frites is my favorite food in the whole world, and who serves steak frites without at least a good herb butter? Not to mention chimichurri, that famous sauce from le relais l’entrecôte, or classic peppercorn sauce? A life without seasoning is a pretty boring one. This cajun butter steak is one of the best I’ve tried. The homemade cajun spices add just the right amount of heat and savoriness without tasting like those bad cajun wings at the pub (although there’s a time and a place for those). It’s both dry rubbed and marinated in oil for up to two days to pull out water and replace it with pure flavor. If you are a salt and pepper evangelist, one bite of this steak will change your mind, I promise.
What is the cajun rib steak
The steak preparation I’m using for this cajun butter steak recipe is based off of the cajun rib steak, one of the signature dishes at Smith & Wollensky, an old money-looking steakhouse chain created, ironically, by the guy who created TGI Fridays. Don’t let the questionable heritage fool you though, the original location got a glowing two star review from Ruth Reichl. The recipe was recently released and shared far and wide as part of a fundraiser for NYC restaurants. Once I saw it, I couldn’t help but try it out. The cajun spice rub helps create a blackened version of that prized thick crispy crust that everyone tries to get at home, while the long two day cajun-based marinade imparts natural complimentary smoky flavors to the meat. It’s so good that you don’t really need the cajun butter peppercorn sauce, although it's delicious and really recommended. It definitely adds a nice hit of heat. Eventually - I’ve made this a lot of times now - I even stopped adding salt, thus in this recipe both are now optional steps.The best cut of beef for steak
This is a New York-based recipe, so it’s only natural that you should use a New York strip, and that’s what I did. Another option (and my go-to answer whenever someone asks me what's the best steak) is a thick cut ribeye. Honestly though, the marinade makes this so tender that you can use anything, and I wouldn’t go any more expensive than strip. The first steak I tried it with was a cheap sirloin, and it tasted amazing.What’s the best way to cook steak
You can cook this steak any way you like and it partially depends on the thickness of the steak you have, how much you’ve tempered it (let it sit out of the fridge), and your preferred doneness. While you can grill it, if you want to make the optional peppercorn sauce (which is really good), you'll need to use a skillet. This recipe is written for rare/medium rare for steaks under 1.5”. For steaks over 1.5” thick or other donenesses, you can reverse sear, sous vide, or sear, then finish in a 350ºF oven until your steak hits your desired temp. If you are a steak-pro, you already know all this, and if you aren’t, I highly recommend getting a good thermometer, like an instant read thermocouple style meat thermometer. It takes all the guesswork out and gives you perfect steak every time.Steak doneness temperatures
For a quick and easy reference, when we have dinner parties in our house, our steaks are roughly done at: Rare: 125ºF Medium rare: 135ºF Medium: 145ºF Medium well: 155ºF Well done: ?♂️How to make cajun rib steak
1. Toast your spices: combine all the spices together and toast them over a low heat until they are fragrant. 2. Dry rub: rub each steak generously the toasted spices (about 1.5 tablespoons each), then place in the refrigerator uncovered for one hour to dry out. 3. Marinate: while the steaks are resting, combine the ingredients for the marinade in a container just large enough to fit your steaks. Add the steaks when they are ready, then cover with extra oil. Marinate for between 6 hours and 2 days; try to get as close to the 2 day mark as you can though, the longer the better. 4. Sear your aromatics: aka cook your onions. Heat up a large cast iron skillet with 1 tablespoon of high heat oil until it’s just about smoking. Add the onion wedges and cook for 2 minutes per side, or until charred. Turn them with a flipper or tongs and cook the other side, then remove and set aside. 5. Sear your steaks: Season your steaks if you know you like your food on the saltier side. I prefer to season with flaky sea salt at the table for this sort of thing. Cook the steaks roughly 3 minutes per side for rare or 4 minutes per side for medium rare. Rest the steaks while you make the cajun butter peppercorn sauce. If you are doing these in batches, turn your oven to warming or proofing mode (no higher than 80ºF) to keep the steaks warm. Let the skillet come back to temp in between steaks. 6. Make the sauce: While the steaks are resting, make the cajun butter peppercorn sauce by reducing the cognac, then whisking in the butter, cream, and 1 tablespoon each of freshly cracked black pepper and cajun spice mix.Do you really have to marinate it for two days?
Not really, but I tested one after one day and while it was good, it didn't have that deep level of flavor that the two day one had. Besides, if you are going to use a whole onion and two cups of oil, not to mention some nice steaks, you might as well go all the way. I even covered and saved the marinade in the fridge to reuse a second time and it was still ok.The best sides to serve with steak
Personally, I love this steak with just the onions in the recipe, but if you want to go all out (and I mean all-out), you can make Heston Blumenthal's crazy good and just plain crazy two day triple cooked chips. For something a little easier, we have air fryer fries, instant pot mashed potatoes, or for a little surf and turf, a really nice lobster risotto. I really hope you give this a try, I'd never considered cajun as a steak flavor before and it's totally blown my mind how good it is. -MikeThe Best Cajun Butter Steak Recipe with Cajun Butter Peppercorn Sauce
- 2 10oz steak of choice (ideally New York Strip)
- 1 red purple onion (cut into wedges)
Cajun Spice Mix
- 2 tsp cayenne pepper
- 2 tsp chili powder
- 2 tsp garlic powder
- 2 tsp ground black pepper
- 2 tsp ground white pepper
- 2 tsp onion powder
- 2 tsp smoked paprika
- 1 tsp ground cumin
Steak Marinade
- 2 cups neutral oil (such as canola, plus extra if needed)
- 1 medium onion (finely chopped)
- 1/4 cup vinegar (I used apple cider vinegar)
- 1 tbsp brown sugar
- 1 tsp salt
- 1 tbsp cajun spice mix (from above)
Optional Cajun Butter Peppercorn Sauce
- 2 tbsp cognac
- 2 tbsp unsalted butter
- 2 tbsp heavy cream
- 1 tbsp cajun spice mix (from above)
- 1 tbsp freshly cracked black pepper
Make and toast the cajun mix by combining all the spices together and toasting over a low flame until fragrant, 2-3 minutes.
Rub each steak generously with about 1.5 tablespoons of the cajun mix per steak, then chill in the refrigerator uncovered for one hour.
While the steaks are chilling, combine the ingredients for the marinade in a container just large enough to fit your steaks. Add the steaks when ready, then cover with extra oil if needed. Marinate for between 6 hours and up to two days - longer is better.
Heat up a large cast iron skillet with 1 tablespoon of high heat oil (not olive) until it’s just about smoking. Add the onion wedges and cook for 2 minutes per side, or until charred. Turn them with a flipper or tongs and cook the other side, then remove and set aside.
Optionally season your steaks with salt. Add the steaks and cook roughly 3 minutes per side for rare or 4 minutes per side for medium rare. Rest the steaks while you make the cajun butter peppercorn sauce. If you are doing these in batches, turn your oven to warming/proofing mode (or just with the light on - no higher than 80ºF) to keep the steaks warm. Let the skillet come back to temp in between steaks.
If you are making the cajun butter peppercorn sauce, reduce the heat to low and add cognac to the pan. Let reduce while stirring with a wooden spoon or silicone spatula to deglaze, then add butter, cream, cracked peppercorns, and cajun spice mix. The resulting sauce will be a little grainy and not creamy like French peppercorn sauces, but delicious and spicy.
Slice steaks and enjoy immediately.
Note: you can change the serving size to reflect the number of steaks you have.
Loosely based on Smith & Wollensky's Cajun Rib Steak recipe.
I Am... One Ingredient Air Fryer Keto Popcorn Cheese Puffs Recipe
Guys, I just made keto popcorn cheese puffs and I am DEAD. They were SO good. Seriously, they are the perfect zero carb keto snack. I just did a little test run with just two ounces of cheese and to be honest I’m glad I didn’t make more because I think I could have devoured an entire pound in one sitting. They’re crispy, crunchy, cheesy, and everything you want in a snack. I am a snack monster in the best of times (please check out my favorite keto snacks here!) and the worst of times. Sometimes I think I could live on snacks alone. But the problem is, almost all snacks are super carb-heavy. I’m talking about chips and popcorn of course. There’s something about snacking, it’s almost like it is a law that snacks need to be crunchy and satisfying. Most low-carb snacks aren’t but I am here to save you from bad snacks. Keto popcorn cheese puffs are here! Keto popcorn cheese puffs are super easy to make at home, just one ingredient, and zero carb. I mean, win-win-win, am I right?! I first came across these when I did a google search for the best keto snacks to make at home. Keto popcorn kept coming up and after a few clicks down the google hole later, I knew that I had to make them. In three days. Because yes, it takes some time to prep your cheese before you make these guys. But trust me, it’s worth it. If you like ParmCrisps, Whisps, Moon Cheese or any of those other crispy cheese snacks you need to make these at home because they’re cheaper, more delicious (try them when they’re a little warm), and homemade.
What is Keto Popcorn?
Keto popcorn is not actually popcorn, it’s popped cheese! Little crispy, crunchy nuggets of air fried or oven baked puffed cheese. It’s zero carbs depending on the cheese you use and the most satisfying, addictive, crunchy keto snack.Ingredients for Making Keto Popcorn Cheese Puffs
Cheese. Yup, that’s it. All you need is cheese and how much you make is up to you.What Kind of Cheese Can I Use to Make Keto Popcorn Cheese Puffs?
I used medium cheddar but you can use any hard to medium hard firm cheese with a relatively low moisture content: parmesan, pardano, pecorino, white cheddar, gouda, colby, manchego, asiago, comte, emmental, gruyere, monterey jack, colby jack. Basically any cheese than can dry out to hard as a rock can be puffed.How to Make Keto Popcorn Cheese Puffs
1. Cut or crumble up your cheese of choice: I chose to crumble to make the puffs look more organic. You can do whatever is easiest. Aim for pieces that are 1/4 inch to 1/2 inch in size and try to keep them relatively consistent. 2. Dry out the cheese: Place the cheese pieces on a paper towel lined plate or tray and cover with another paper towel. Pop into your fridge. You could leave them out at room temp which is what all of the other recipes online say but the truth is the fridge is great at dehydrating and removing moisture. 3. Bake or Air-Fry: Either bake in a 390°F oven until puffy or pop into an air fryer at 390°F for 5 minutes. I prefer the air-fryer version because after waiting days for the cheese to dry out I don’t really want to wait for the oven to preheat. 4. Enjoy! Crunchy your way to satisfaction.What are the Macros for Keto Popcorn Cheese Puffs?
To be honest, this is going to change depending on what cheese you use. Just be sure that your cheese is truly zero carbs if you’re looking for a really zero carb snack!Keto Air Fryer Popcorn Cheese Puffs Recipe
One ingredient cheesy, crispy, crunchy keto popcorn
- 2 oz cheese of choice
Cut or crumble the cheese into very small 1/4 inch pieces. Place a paper towel on a tray and lay out the cheese pieces. Cover with another paper towel and place in the fridge to dry out for 3-5 days, or until completely dry and very hard. If the cheese doesn’t dry it out, it will just melt in the oven instead of puffing and turning crunchy.
To Bake
Heat the oven to 390°F and bake on a parchment paper lined baking sheet for 3-5 minutes, or until puffed. Let cool before enjoying!
To Air Fry
Preheat the air fryer to 390°F. Place the pieces of cheese in the air fryer for 5 minutes at 390°F. Let cool and enjoy!
I Am... Top 17 Japanese Foods to Make at Home Because Your Trip to Japan Was Cancelled
Japan is a top destination for summer and we go every year, except this year. So let's bring Japan home with us! These recipes are super easy and pretty authentic, you'll feel like you're in Tokyo or Osaka in no time at all! Fluffy Japanese Soufflé Pancakes A must eat if you ever go to Japan because they’re SO FLUFFY! The Best Japanese Cheesecake This cheesecake sells out on the regular in Tokyo - it’s so hard to get your hands on it, they call it the Phantom Cheesecake Strawberry Sando Nothing says summer like strawberries and nothing says Japan like fruit sandwiches! Japanese Shokupan Fluffy Japanese bread is the best bread! Soboro Donburi So simple yet so delicious - sweet n salty pork with eggs on a fluffy bed of rice Tuna Onigiri If you miss those store bought combini rice balls, this is the recipe for you: miso tuna salad tucked into a delicious seaweed wrapped rice ball. Whipped Macha Maybe you won’t be hanging out in any cool Kyoto matcha houses, but you can still get your matcha on! Japanese Style Tamagoyaki French Toast Most people are obsessed with Japanese pancakes but this creamy custardy french toast can give those jiggly cakes a run for their money. Easy Oven Baked Tonkatsu Juicy pork, crispy panko outsides, all baked in the oven for extra ease. Crispy Chicken Karaage Juicy, crispy, maybe the best fried chicken snack ever?! Chicken Katsu Sando Oh gosh how I miss all the different sandos (sandwiches) they have in Japan. This one is filled with a crisp panko chicken katsu. Extra Tall and Fluffy Gram Pancakes Gram is famous for their pancakes in Japan. Good news - you can make them at home! Takoyaki Probably the best little street side snack with beer: crispy molten hot takoyaki. Make them at home, no trip to Osaka needed! Grilled Yakimochi Missing those yakitori vibes? Grill some mochi for a crispy chewy smoky treat. Creme Brûlée Soufflé Pancakes Because creme brûlée soufflé pancakes. Enough said :) Egg Salad Tamago Sando Like those creamy egg sandwiches you can find at 7-11 in Japan but even better because you didn’t have to fly anywhere. Spicy Savory Mentaiko Udon Udon is maybe the best Japanese noodle. Yup, I went there... PS - If you want to live vicariously through old travel posts, please check these out! The Best Combini Sweets The Place for Tuna Lovers in Tokyo 24 Hours in Nagoya Where to Eat Fluffy Shokupan Sakura Season in Tokyo The Search for the Best Udon in Japan I hope I see you soon Japan! xoxo steph
Read More →I Am... Pan-fried Halloumi with Israeli Cous Cous Salad
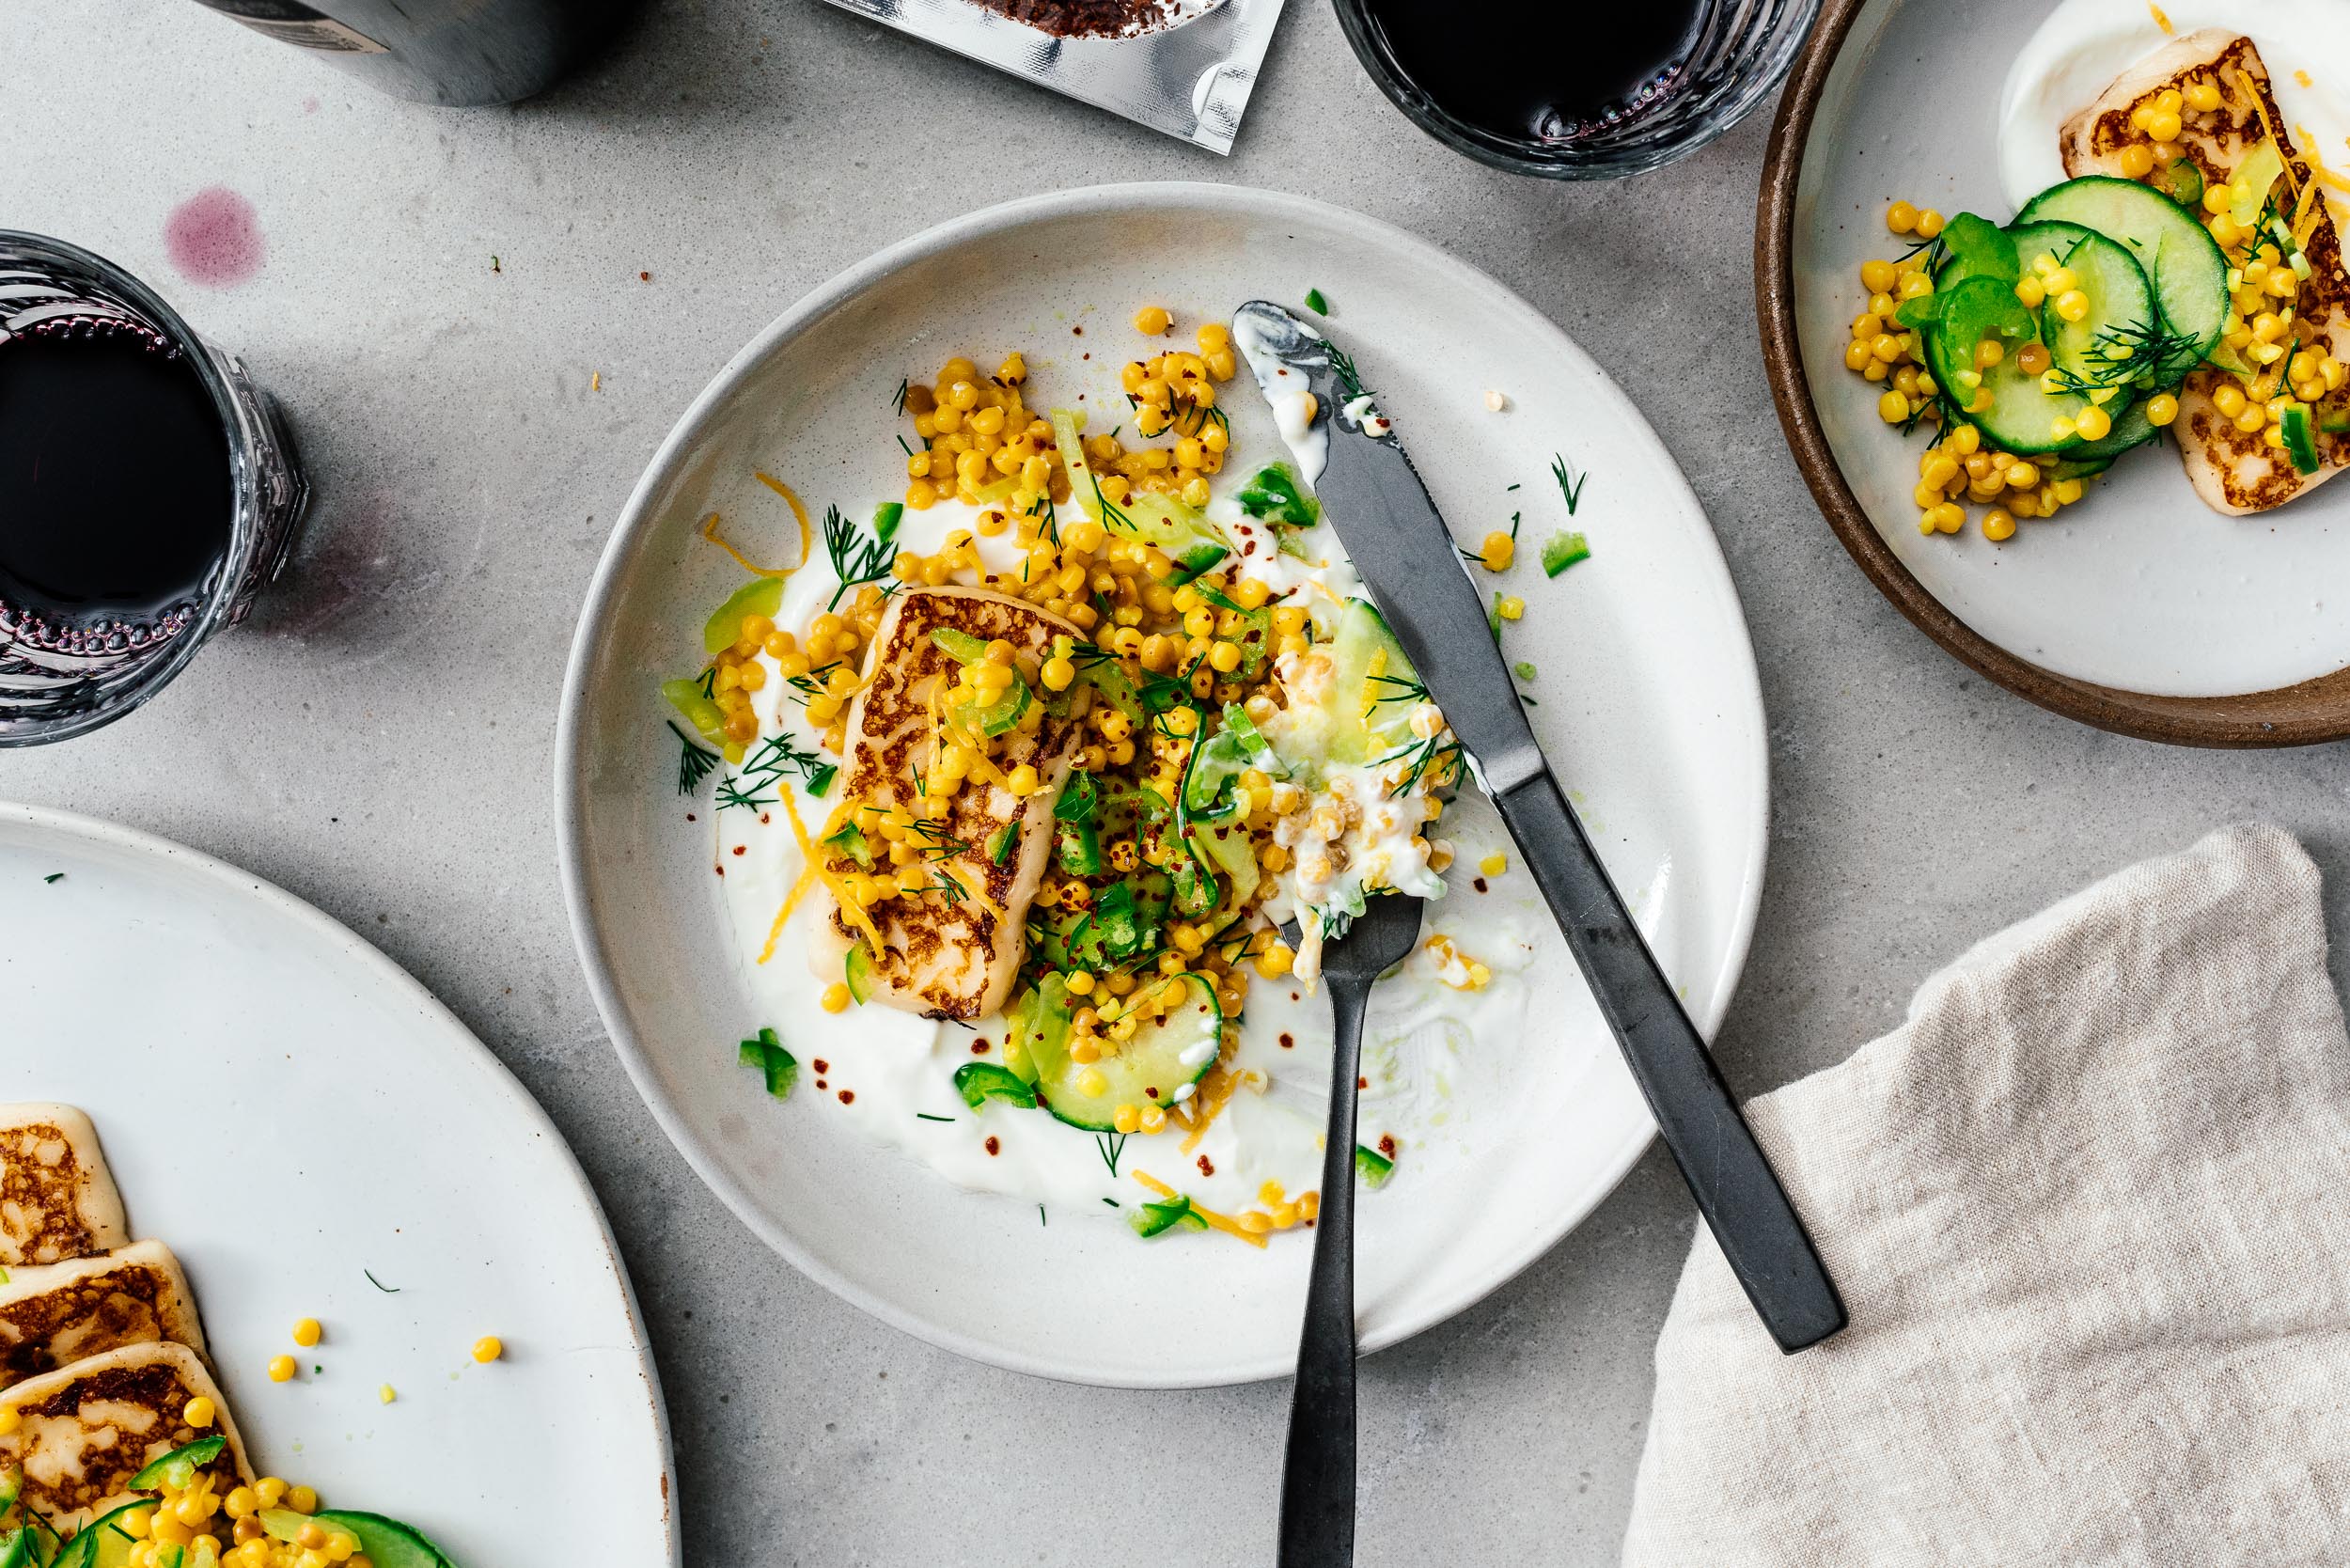
Pan-fried halloumi and Israeli cous cous is the perfect Mediterranean diet summer meal, full of freshness and all the bright and beautiful flavors. I’ve been playing around with the Mediterranean diet lately, trying to make more and more of our meals focused on grains and vegetables. For those of you who don’t know, the Mediterranean diet is considered one of the best in the world, simply because it’s not really a diet in the sense of a weight loss plan, but a diet as in what people in and around the Mediterranean traditionally eat. Essentially, you want to eat vegetables, fruits, nuts, seeds, legumes, potatoes, whole grains, herbs, spices, fish, seafood, and extra virgin olive oil. You can also eat a bit of chicken, eggs, cheese and yogurt. Red meat is a special occasion kind of thing and you should avoid added sugars, processed meats, refine grains, and other processed foods. It sounds healthy and fresh and pretty easy to do so we’ve been playing around with a bunch of different dishes and they’ve all turned out delicious. This pan-fried halloumi and Israeli cous cous has been on repeat because I’m in love with halloumi. I don’t remember the first time I had it – it was years and years ago – but one of my favorite memories of eating halloumi is of a backyard barbecue where the halloumi was the one thing everyone kept going back for. It was a late summer evening where the heat of the day was just easing into a pleasant warmth. I can still remember the warm oozy squeakiness of the smoky chargrilled pieces paired with a refreshing cucumber salad. Pure summer flavors. I recreated that here with a lemony yogurt, dill cous-cous, and pan-fried halloumi, of course. It’s pretty, healthy, and so, so good.
What is halloumi
Halloumi, if you haven’t had it, is a semi-soft, un-ripened, brined cheese. Compared to most other cheeses it has a high melting point which means it retains it shape after frying or grilling. If you’ve had paneer before, it kind of has the same texture. Taste-wise halloumi is pretty mild, with a salty finish. It has a distinctive squeak when you eat it and when it’s grilled or fried, the outside gets a delicious golden crust and the inside is melty and gooey. It’s one of my favorite cheeses, hands down.How to serve halloumi
You can have it simply pan-fried or grilled with a squeeze of lemon, use it in salads, have it in sandwiches, or use it as the “meat” of your main dish. Here I simply pan-fried it until golden and gooey, then served it will a lemon-y dill cucumber and celery cous cous salad.What is Israeli pearl cous cous
Pearl cous cous is just the thing to pair with halloumi – it’s a toasted pasta that’s shaped in little balls. It was invented in Israel when rice was scare but now it’s super popular essentially everywhere. Most pearl cous cous is made from semolina or whole wheat flour, which makes it a tiny bit healthier than regular pasta. It’s chewy and tender and takes on flavor like a boss.How to serve cous cous
Just like pasta, it’s boiled, but before you do that, it’s usually toasted in a bit of extra virgin olive oil or butter for a bit of toasty goodness and extra flavor. You can eat it as a side (like rice), pop it into soups, use it in a pilaf, or use it in a salad, like I did here.How to make pan fried halloumi with Israeli cous cous
1. First, we’re going to start by cooking our pearl cous cous. Heat up a bit of butter or oil in a small pot then toast the cous cous, much like you toast grains of arborio rice for risotto. After the cous cous is toasted, add some water (you can also use vegetable stock or chicken stock for extra flavor), and bring to a simmer, covered. 2. While the cous cous is cooking, zest and juice your lemon, and prep the rest of your vegetables and herbs. I used cucumber and celery but you can use any fresh summer-y vegetables you have on hand, just make sure you cut them up into bite size pieces. Same deal with the dill. I love lemon and dill together but if you have basil or chives, you can use those too. 3. After your herbs and vegetables are prepped, it’s time to make some lemon-y yogurt. All you do is stir together some lemon juice, zest, and Greek yogurt. 4. By now your cous cous should be cooked. I always like to taste one to make sure it’s just the texture I like – some people like their cous cous more bouncy and al dente and some people like it a little more tender. If you want it a bit more tender, just cook for a minute or so more. After your cous cous is cooked to your liking, give it a stir and spread it out on a plate so it can cool off a bit. If you don’t cool it, your vegetables will wilt a bit, which isn’t a big deal, but for aesthetic reasons, we’re going to spread the cous cous out. Once the cous cous is cool, all you need to do to make the salad is mix together the cous cous with the lemon juice, zest, dill, cucumbers, and celery. Taste and season with salt and pepper then set aside so you can pan fry the halloumi. 5. Cut the halloumi into 1/4 inch thick slices. Add the slices to a dry non-stick pan and fry over medium-high heat, until golden brown. It’ll take about 1-2 minutes per size. I like using a small off-set spatula to flip the pieces instead of a big spatula because you can get under the pieces easily. After they’re done, remove them from the pan and it’s time to plate. 6. Pick out your prettiest plates and place a generous scoop of lemon-y yogurt in the middle. Use the back of your spoon and push down and pull to one side to create a swoosh. Top with some of the cous cous salad and place a couple pieces of grilled halloumi on top. Finish off with extra herbs and some diced jalapeños for heat. If you want to be extra, drizzle with a bit of extra virgin olive oil or even a bit of honey!Some other Mediterranean diet ideas:
If you like the sound of the Mediterranean diet, try our creamy homemade hummus, jammy eggs and yogurt, falafel, garlic butter mushrooms, lemon pepper chicken with dill cous cous, eggplant and tomato pasta, penne pesto, chicken souvlaki, salmon and soba salad, or burrata and kale too!Pan-fried Halloumi with Israeli cous cous salad recipe
- 1 tbsp olive oil (or butter)
- 1/2 cup dried Israeli pearl cous cous
- 1 lemon
- 3/4 cup greek yogurt
- 1/4 cucumber (sliced)
- 1 stalk celery (sliced)
- 1 package of halloumi (sliced)
- 1 jalapeño (diced, optional)
- fresh dill (chopped)
- salt and pepper
In a small pot, heat up the butter or olive oil over medium high heat. When shimmery, add the cous cous and cook, stirring, until lightly toasted and coated, 1-2 minutes.
Add 1/2 cup + 2 tbsp water and simmer for 8-10 minutes or until the cous cous is al dente. While the cous cous is cooking, zest the lemon and set aside the zest. Juice the lemon.
Stir the yogurt with 1/2 the lemon zest and 1/2 of the lemon juice and set aside.
By now your cous cous should be cooked through. Let cool then stir in the remaining lemon zest, remaining lemon juice, and a generous pinch of chopped dill. Mix in the cucumber and celery. Taste and season with salt and pepper.
Slice the halloumi and pan fry over medium high heat until golden and crispy, flipping once.
Plate by swooshing on some of the lemon-y yogurt. Top with some of the lemon cous cous salad. Top with halloumi, optional jalapeños, and salt and pepper. Enjoy!
I Am... Umbria Bone Marrow Ragu with Rosemary
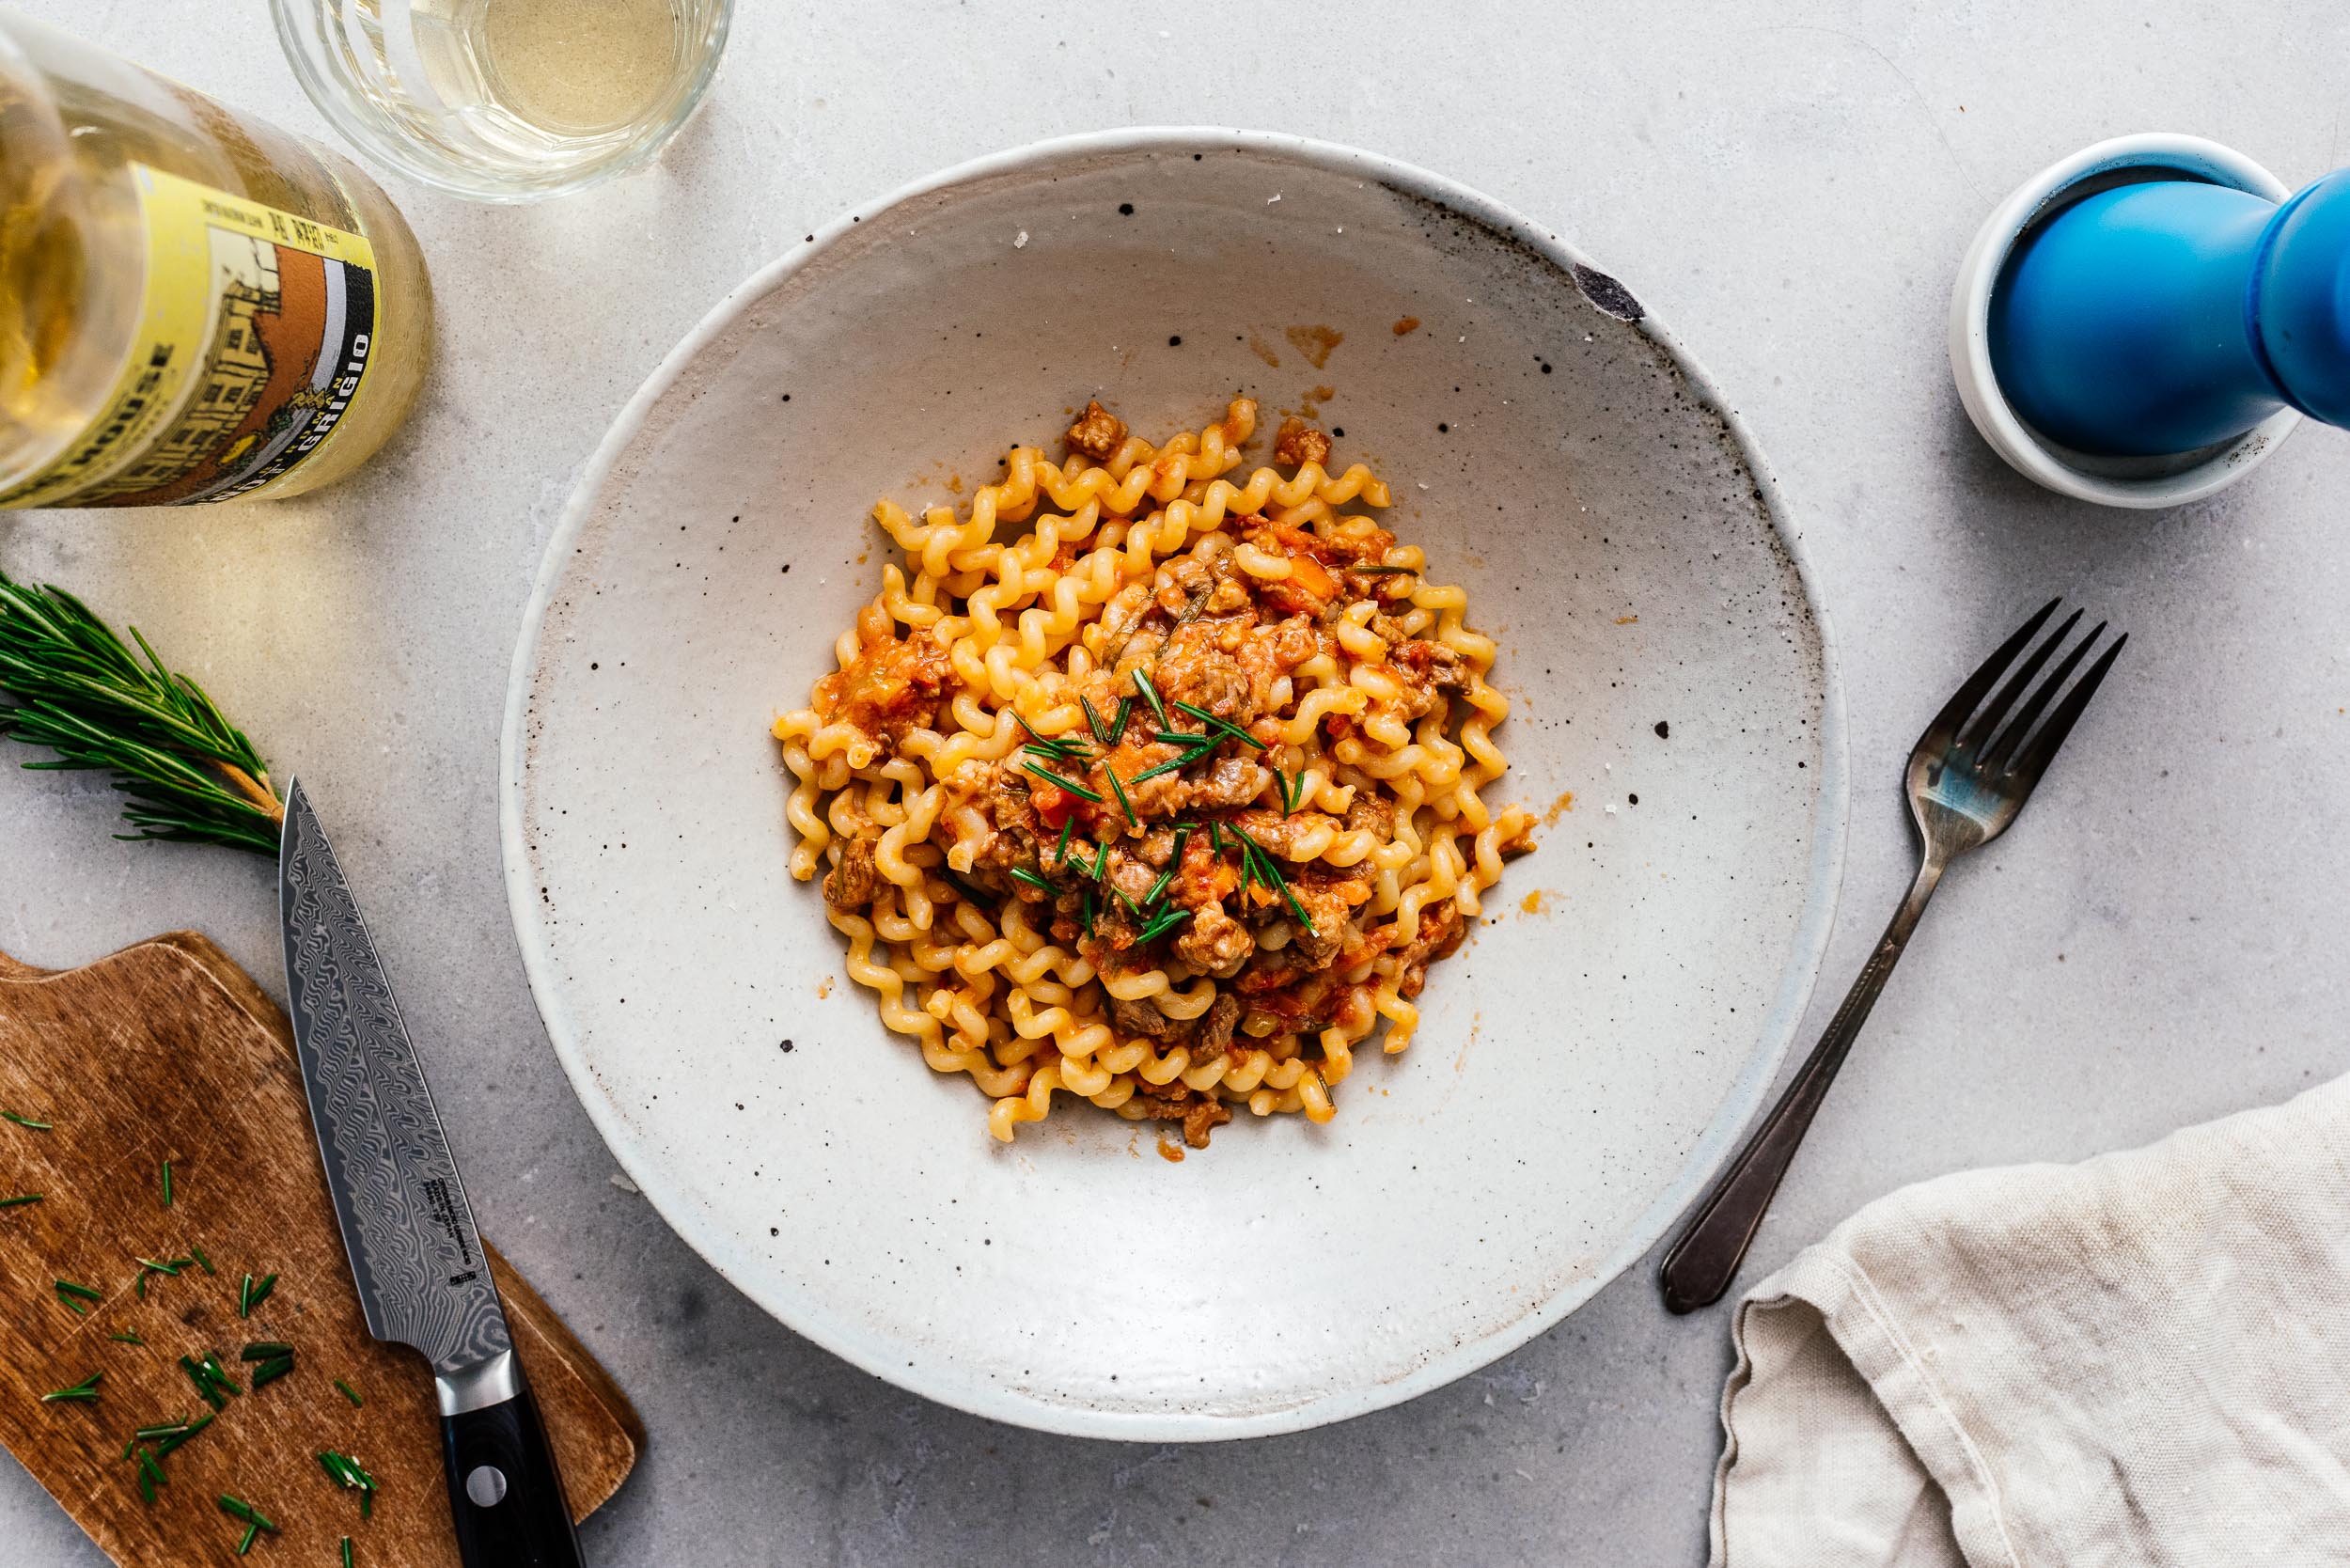
I’m continuing my love affair with Umbria with one of the best pasta sauces I’ve ever had; an irresistably rich celebration of beef, sausage, and rosemary. This is an alternative to ragu Bolognese you’ll be glad you tried. Umbria is the land of many of the best things about Italy: porchetta, truffles, and sausages. Because it’s landlocked, the people of Umbria make the best use of the bounty of the earth, and it shows in this rosemary-heavy ragu. A lot of people may know that rosemary originally came from the Mediterranean area, so it features heavily in the cuisines of Italy, Greece, Spain, and the Levant, but not a lot of people know that rosemary grows wild in the deserts of the American Southwest, and thrives as native landscaping too. Because of that, for me, this pasta sauce tastes like late summer afternoons in Palm Springs: warm and sunny, with wild bunnies eating dinner on the golf courses and the fragrance of rosemary bushes hovering in the air where the wind dies down. It’s the perfect summer pasta for perfect summer nights, or any season, really. This recipe was inspired by a very traditional Umbrian recipe called Ragu di Chianina, which is a ragu of a particular breed of cow. Like most of Umbria's famous foods, Chianina beef never really leaves Italy, so our version won't taste quite the same, but we can still be inspired by the process and celebration of beefiness that is this ragu, which is still unabashedly beefy and delicious.
Where do you buy bone marrow?
Bone marrow can usually be bought as soup bones in the frozen section of most grocery stores, or the meat counter will often have some in the back if you ask. I made this sauce twice though. Once with the bone marrow and once without. It tastes just great without as well, so the bone marrow is definitely an optional component. It adds a huge layer of deep richness, so I wouldn’t skip it, but I also wouldn’t drive across town to get the bones. I also made this both with hand cut angus beef and lean ground beef. If you look carefully, you can see that the photos are mixed together. It wasn't enough of a difference to recommend taking that trouble, either.How do you make ragu?
1. Cook your aromatics over medium low heat until they are golden brown. 2. Add and very briefly sauté your meats 3. Add wine and reduce, add tomato sauce, stock, and herbs 5. Simmer for 2 hours And that’s it.Tips and tricks for the best pasta
I remember a long time ago I could never get pasta to taste like it does in restaurants, even though I followed dozens of different recipes. It turned out I was making a few simple mistakes, the fixes to which are basically summarized below: 1. Choose high quality canned tomatoes. My favorite brand that's widely available is Mutti. 2. Cook covered on low heat for a couple of hours. If your pasta sauce tastes like prego or ragu brand, you probably need to give it another 30 minutes. 3. Reduce your wine thoroughly. For a long time, my pasta tasted very wine-y when I made it, because I didn't give the wine enough time. Once you move onto adding other ingredients, the wine won't reduce properly, so be sure to give it a minute or two of boiling off before you add the tomato sauce and beef broth. 4. Deeply brown your soffritto low and slow. On the subject of giving your ingredients enough time to cook, the soffritto needs the most time. Most recipes tell you to just sauté the aromatics and move onto the next step, but really, the aromatics are the most important step and form the base of your flavors, so take your time on them. 5. Add the appropriate amount of cheese. Which is to say, a lot. I like to go with 1/4 cup of grated cheese (unpacked) per plate of pasta. This is the real tip right here, most people just lightly dust the top of the pasta with parmesan, but it should be closer to at least half an ounce of cheese per portion. This was a really good ragu that I plan on coming back to again and again. If you're a fan of rosemary, this one is for you. #thatnoodlelife MikeUmbria Inspired Bone Marrow Ragu with Rosemary
- 2 tbsp olive oil
- 1 carrot (minced, about 1/3 cup)
- 1 celery (minced, about 1/3 cup)
- 1/2 medium onion (minced, about 1 cup)
- 8 oz ground beef
- 8 oz mild Italian sausage (removed from casing)
- 3 marrow bones (about 1lb)
- 1/2 cup Italian white wine (such as pinot grigio)
- 1 14oz can crushed tomatoes
- 2 sprigs of fresh rosemary
- 1 bay leaf
- 1 cup no sodium chicken stock (or beef stock/water)
- 4 oz pecorino toscana (finely grated, or parmigiano reggiano)
Heat the olive oil in a large pan or pot over medium heat. Add the carrots, onions, and celery, and cook until golden brown and translucent, 5 minutes. Season very lightly with salt and pepper.
Add the sausage and beef. Season very lightly with salt and pepper again, then break up the sausage into small chunks and cook for 3 minutes.
Add the wine and reduce by half, 1 minute or so, then add the marrow bone if using, making small pools so that the bones sit on the bottom of the pot. Add the tomatoes, rosemary and bay leaf, and enough stock to cover the top of the marrow bones, about 1 cup.
Turn the heat up to high to bring to a boil, then reduce the heat down to low and cover. Simmer for 2 hours. Check for seasoning and add salt and pepper as needed.
When you are ready to eat, pop out the bone marrow with a small spoon or the back of a wooden spoon and stir it in along with the cheese over low heat. Cook your pasta 1 minute shy of al dente, then drain and transfer to sauce. Toss lightly, then serve with chopped rosemary, pepper flakes, and cheese, as desired.
I Am... Homemade SpaghettiOs with Mini Meatballs
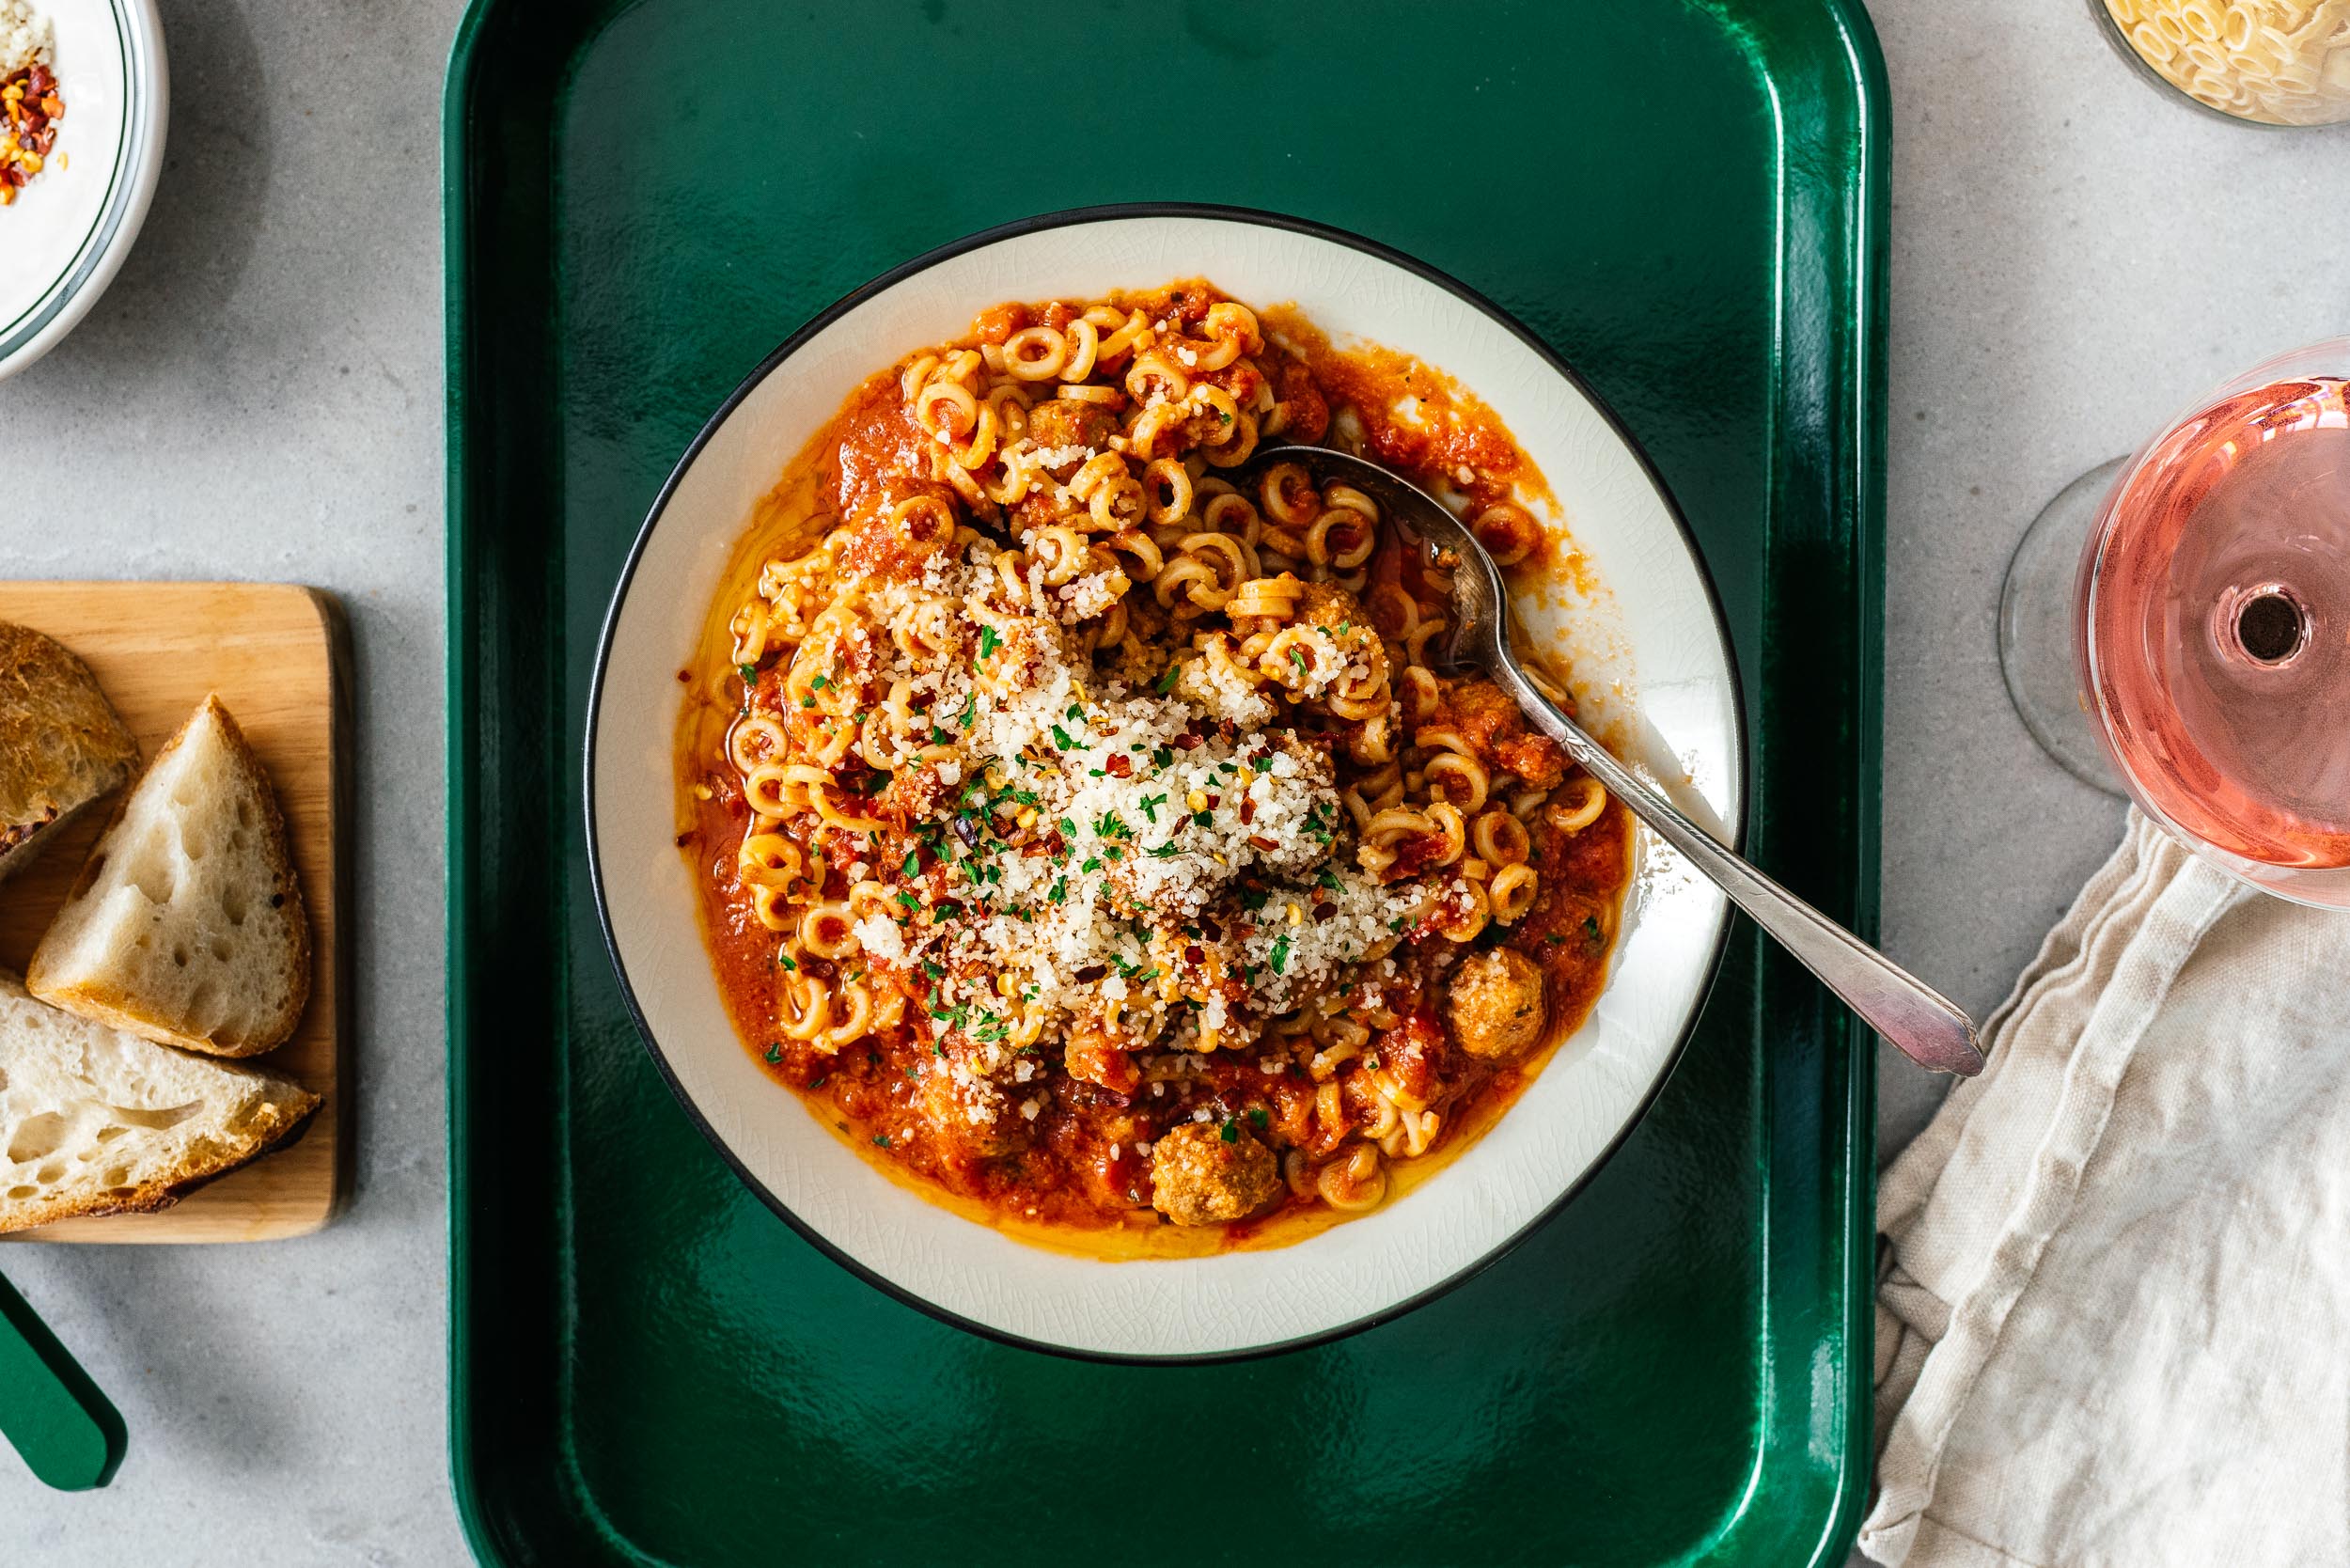
Did you grow up eating pasta out of a can? I sure did and I LOVED it. Our pantry would always have an abundance of 2-for-1 on sale cans of the saucy stuff and I would heat one up whenever I felt like a snack. I miss my kid metabolism…I can’t believe I used to eat cans of pasta as a snack! If only my snacks now were the snacks of my youth…I would be so happy. Anyway, snacks aside I still love a tiny pasta and mini meatball because they’re spoonable and who doesn’t love spoonable food that you eat out of a bowl? Did you know that SpaghettiOs were apparently invented because back in the day they thought that kids didn’t know how to eat long pasta neatly? It also had something to do with the fact that small pasta retains it’s texture better in a can. Doesn’t really matter to me but I do admit there’s something fun about spooning up pasta. It seems a lot more efficient somehow. As fun as spooning is, this recipe almost didn’t happen even though I’ve been wanting to make homemade spaghettiOs forever. Like so many other ideas I just never got around it it. Luckily (or maybe unluckily) these guys got made because of a failed experiment. I had a bunch of mini meatballs in tomato sauce because I wanted to create a bread cube stuffed with spaghetti and mini meatballs. The bread cube didn’t quite work out (I didn’t sauce the spaghetti enough) but the mini meatballs in sauce turned out to be SO delicious that they had to be mixed up with mini rings. Those iconic spaghettiO mini rings are actually not that easy to find. We had some anelli pasta in the pantry, but it was the kind that had cut edges instead of those smooth rings you find in a can. I mean, they worked, but had I had time to plan in advance I would have scoured the internet for those smooth rings. Taste-wise they were practically the same except when you make pasta at home it invariably ends up more al dente from pasta in a can. Sweet and slightly tangy tomato sauce, tender lil meatballs and spoonable scoopable pasta. This was a satisfying taste of nostalgia and I would totally do it again even though shaping those little meatballs was a pain in the butt!
Homemade SpaghettiOs with Mini Meatballs Recipe
Sauce
- 1 tbsp olive oil
- 1 tbsp butter
- 1 tbsp sugar
- 1 tsp dried oregano
- 1 tsp garlic powder
- 1 tsp onion powder
- 1/2 tsp red pepper flakes (optional)
- 28 oz crushed tomatoes (1 can)
- 1 tbsp chopped flat leaf parsley
- 12 oz anelletti or small shaped ring pasta
Meatballs
- 1/2 cup panko (or breadcrumbs)
- 1 tbsp fresh flat leaf parsley (chopped)
- 1 tsp garlic powder
- 1 tsp onion powder
- 1/2 tsp salt
- 1/2 tsp pepper
- 1/2 cup milk
- 1 large egg
- 8 oz ground beef
- 8 oz ground pork
In a large, deep skillet, heat up the olive and and butter. Add the sugar, oregano, garlic powder, onion powder, and red pepper flakes and cook, stirring, until the sugar dissolves, 1-2 minutes. Stir in the crushed tomatoes and parsley. Bring to a simmer, then reduce the heat and cook until the flavors meld, about 20 minutes (or as long as it takes you to make the meatballs). Taste and season with salt and pepper.
While the sauce is simmering, make the meatballs. In a large bowl, mix together the panko, 1 flat leaf parsley, garlic powder, onion powder, salt, and pepper. Stir in the milk and whisk in the egg. Add the beef and pork and mix until just combined, being careful not to overwork. Form into tiny dime sized meatballs, wetting your hands lightly as you go along so the meat doesn’t stick to your hands. Place the meatballs on a tray.
Gently place the meatballs into the simmering sauce. If there isn’t enough room for the meatballs to be covered by the sauce, add a bit of water or stock to ensure all the meatballs are fully covered. Simmer covered for 10-15 minutes or until the meatballs are tender and cooked through (cut one open to check).
While the meatballs are simmering, cook the pasta according to the package in a large pot of salted water.
When al dente, drain well and top with the mini meatball sauce, stirring to combine everything together. Enjoy topped with parmesan, chili flakes, and extra flat leaf parsley if desired.
I Am... Jammy Eggs and Yogurt Breakfast Bowl Recipe
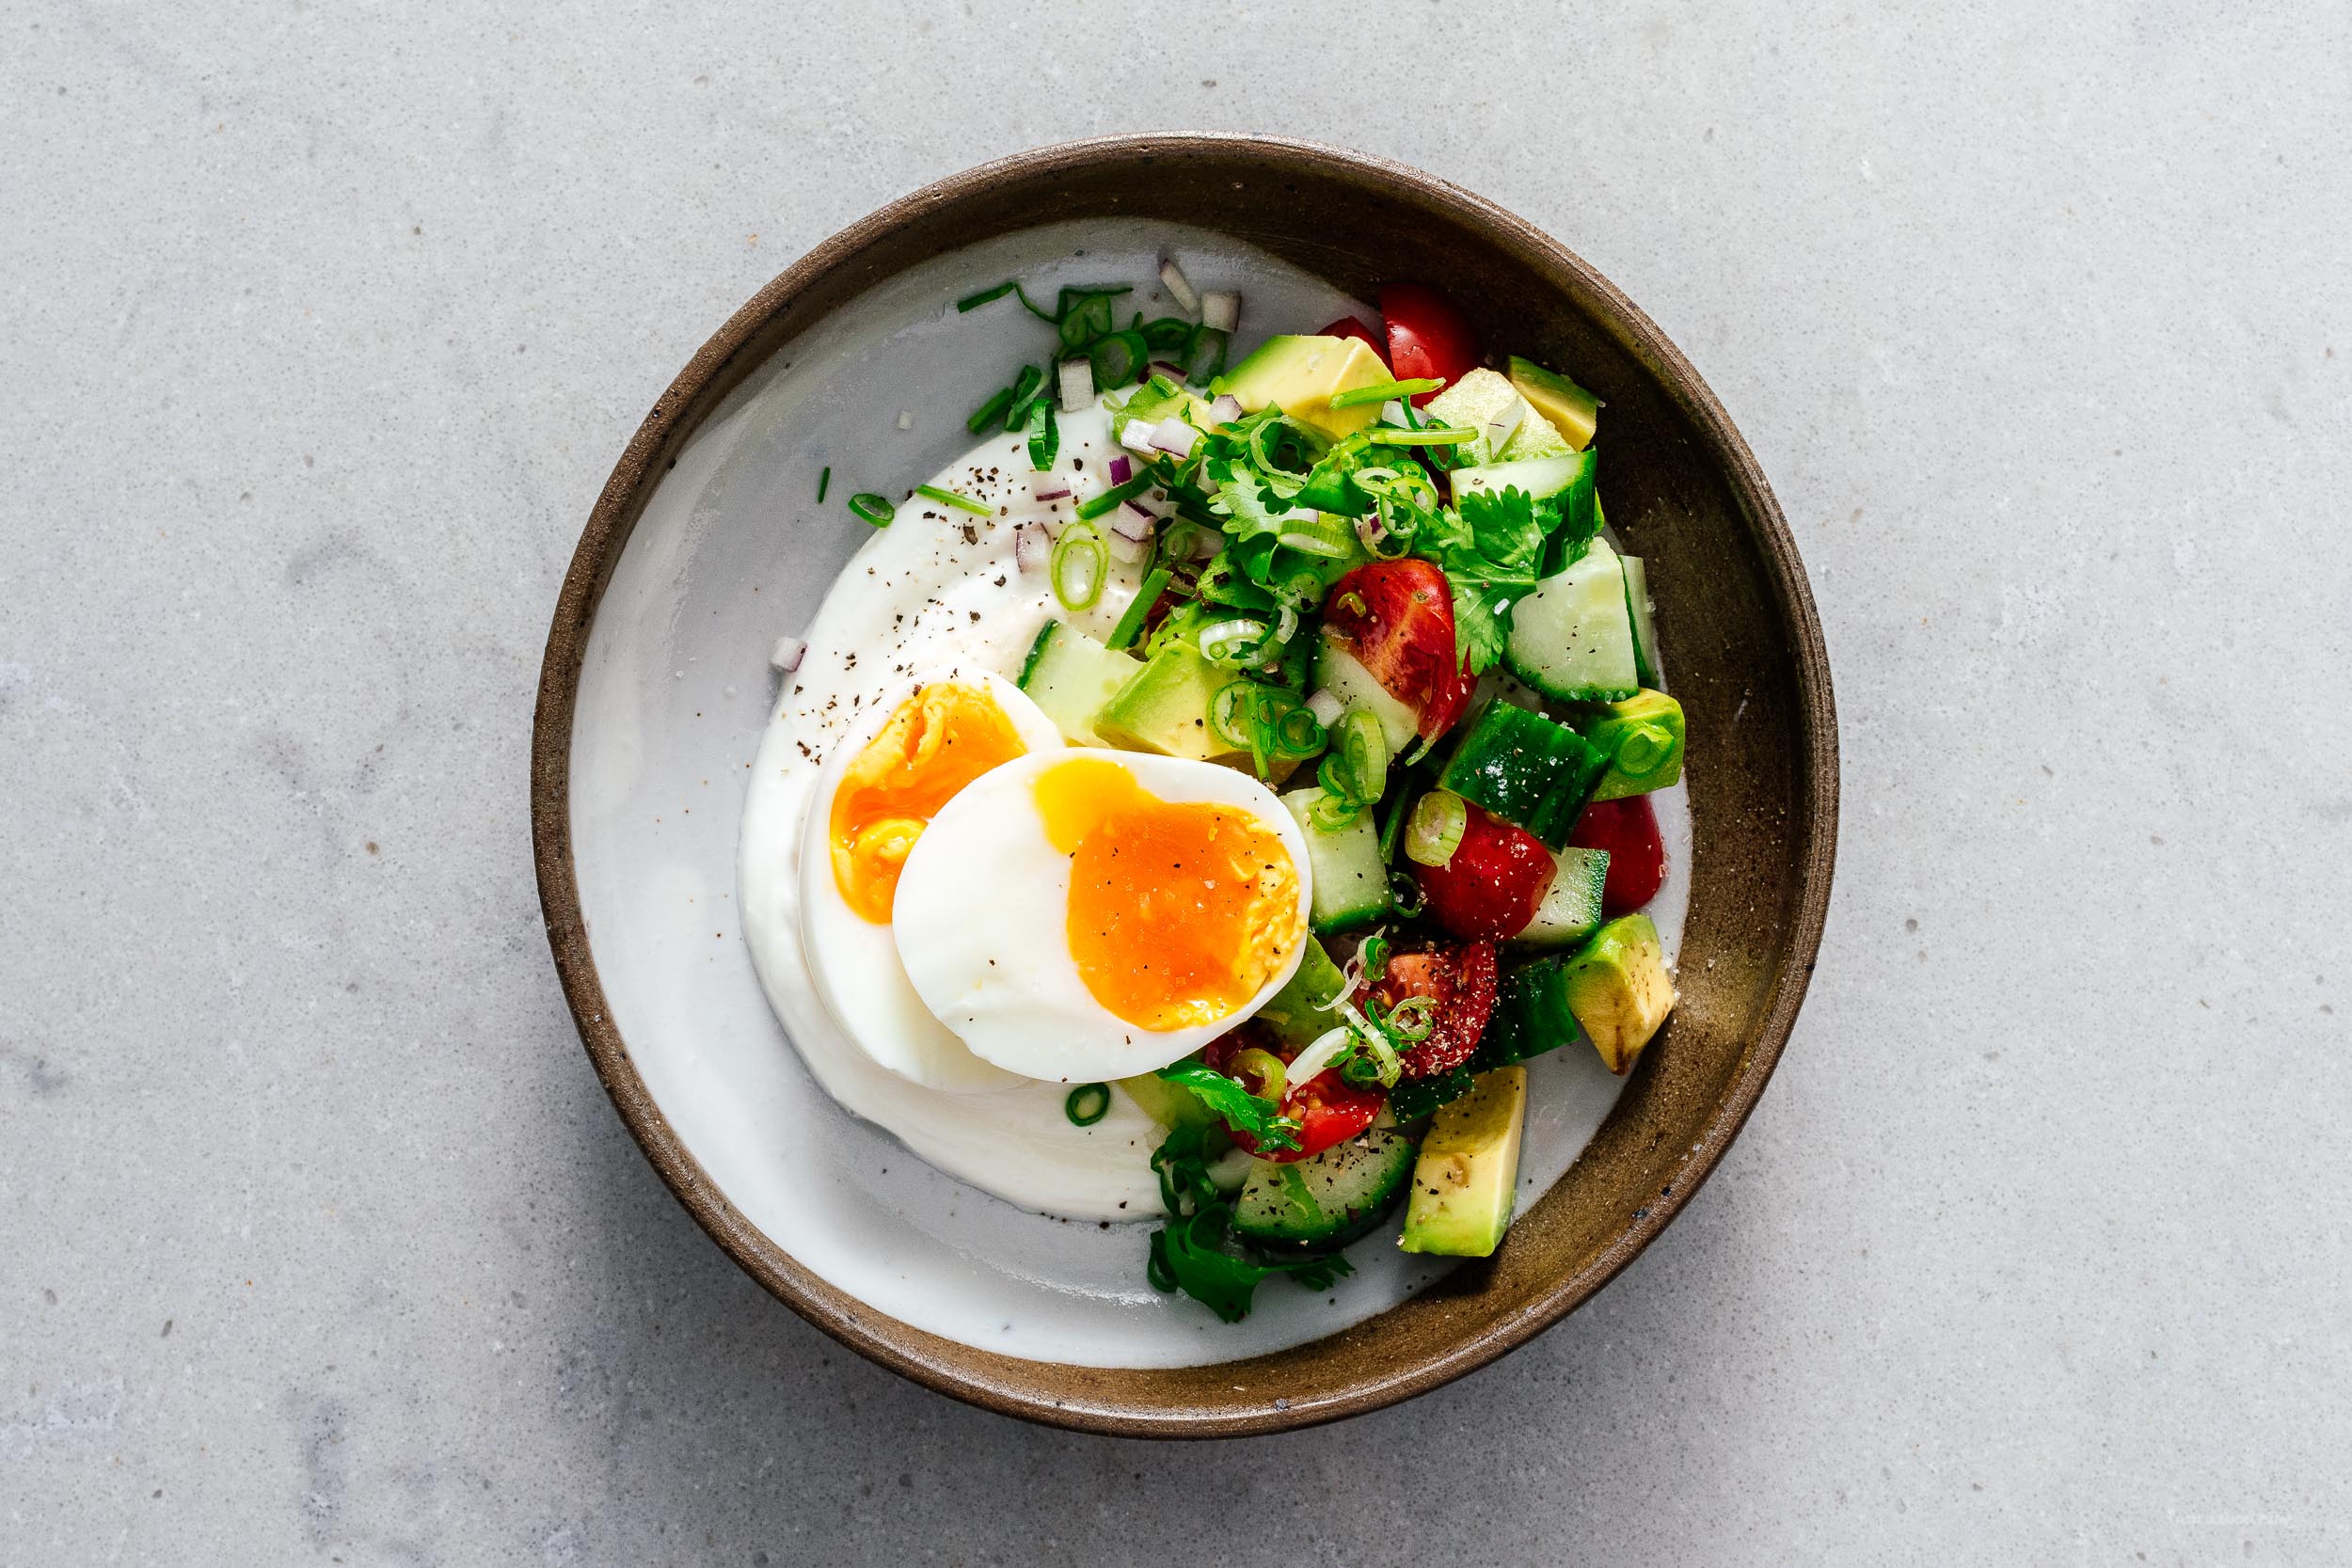
I’m the worst at eating breakfast. I LOVE breakfast foods but I’m always grumpy in the morning and starting the day by making breakfast just doesn’t seem ideal to me. This is why I like to eat breakfast foods at dinner. Or at brunch. Preferably after I’ve already had a coffee or two. Anyway, not eating breakfast makes me not very fun to be around so in an attempt to be a morning person, I’ve been eating this particular breakfast on repeat. I start every day the same: soft boiling a jammy egg and cutting up vegetables while Mike makes pour over coffee. The good thing about eating the same breakfast every morning is that you never have to think about it. Part of the reason why I don’t make a variety of breakfasts is because before my brain wakes up I can’t really think or make decisions. I’m pretty indecisive even in the best of times so having my breakfast decision made for me is just about the best thing ever. Other pros for eating the same breakfast over and over again:
- you can prep most of your breakfast the night before
- grocery shopping is as lot easier because you know exactly what you need for breakfast
- according to science, eating the same breakfast everyday could possibly make you happier because you don’t get as much decision fatigue since your very first decision of the day is made for you
- you save time because you’re not waffling (heehee waffles) about what to make for breakfast
- make it saucy: sauce makes everything look more appetizing and delicious. Dry food doesn’t appeal that much. Even things that are supposed to be dry and crunchy (like fried chicken or fries) get paired with sauce because humans like sauce. Give us ALL THE SAUCE. In this cause the sauce is the yogurt which is swooshed on in a dramatic fashion.
- stack things: you could put the yogurt on one section of the plate, then the vegetables on another, and the egg on another, but when you stack them all together the dish looks more well thought out and restaurant like. Don’t be inspired by those keep it separate dishes. Stack everything, always.
- garnish: when in doubt, garnish with herbs, spices, or other things. There is a reason why the food at restaurants is pretty. It’s because they all have garnish stations. Garnish is the make up of the food world. Sure you could go out bare-faced, but why? Make it rain garnish.
Jammy Eggs and Yogurt Breakfast Bowl Recipe
- 1 large egg
- 2 tbsp yogurt
- 4 cherry tomatoes (quartered)
- 1/4 cup cucumbers (diced)
- 1/4 avocado (diced)
- 1 tbsp red onion (diced)
- herbs of choice
- salt and freshly ground pepper
Bring a small pot of water up to a boil. When at a hard boil, add a large egg, straight from the fridge into the water. Set a timer for 6 minutes and 30 seconds.
Swoosh a spoonful yogurt on a plate. I added an extra swoosh of hummus as well.
Top with the vegetables. I prefer to keep my veggies on one side, for aesthetic reasons.
Chill the egg in very cold tap water and peel. Slice in half and place on top of the vegetables. Finish with salt and pepper and enjoy!
I Am... Small Batch Basque Burnt Cheesecake Recipe
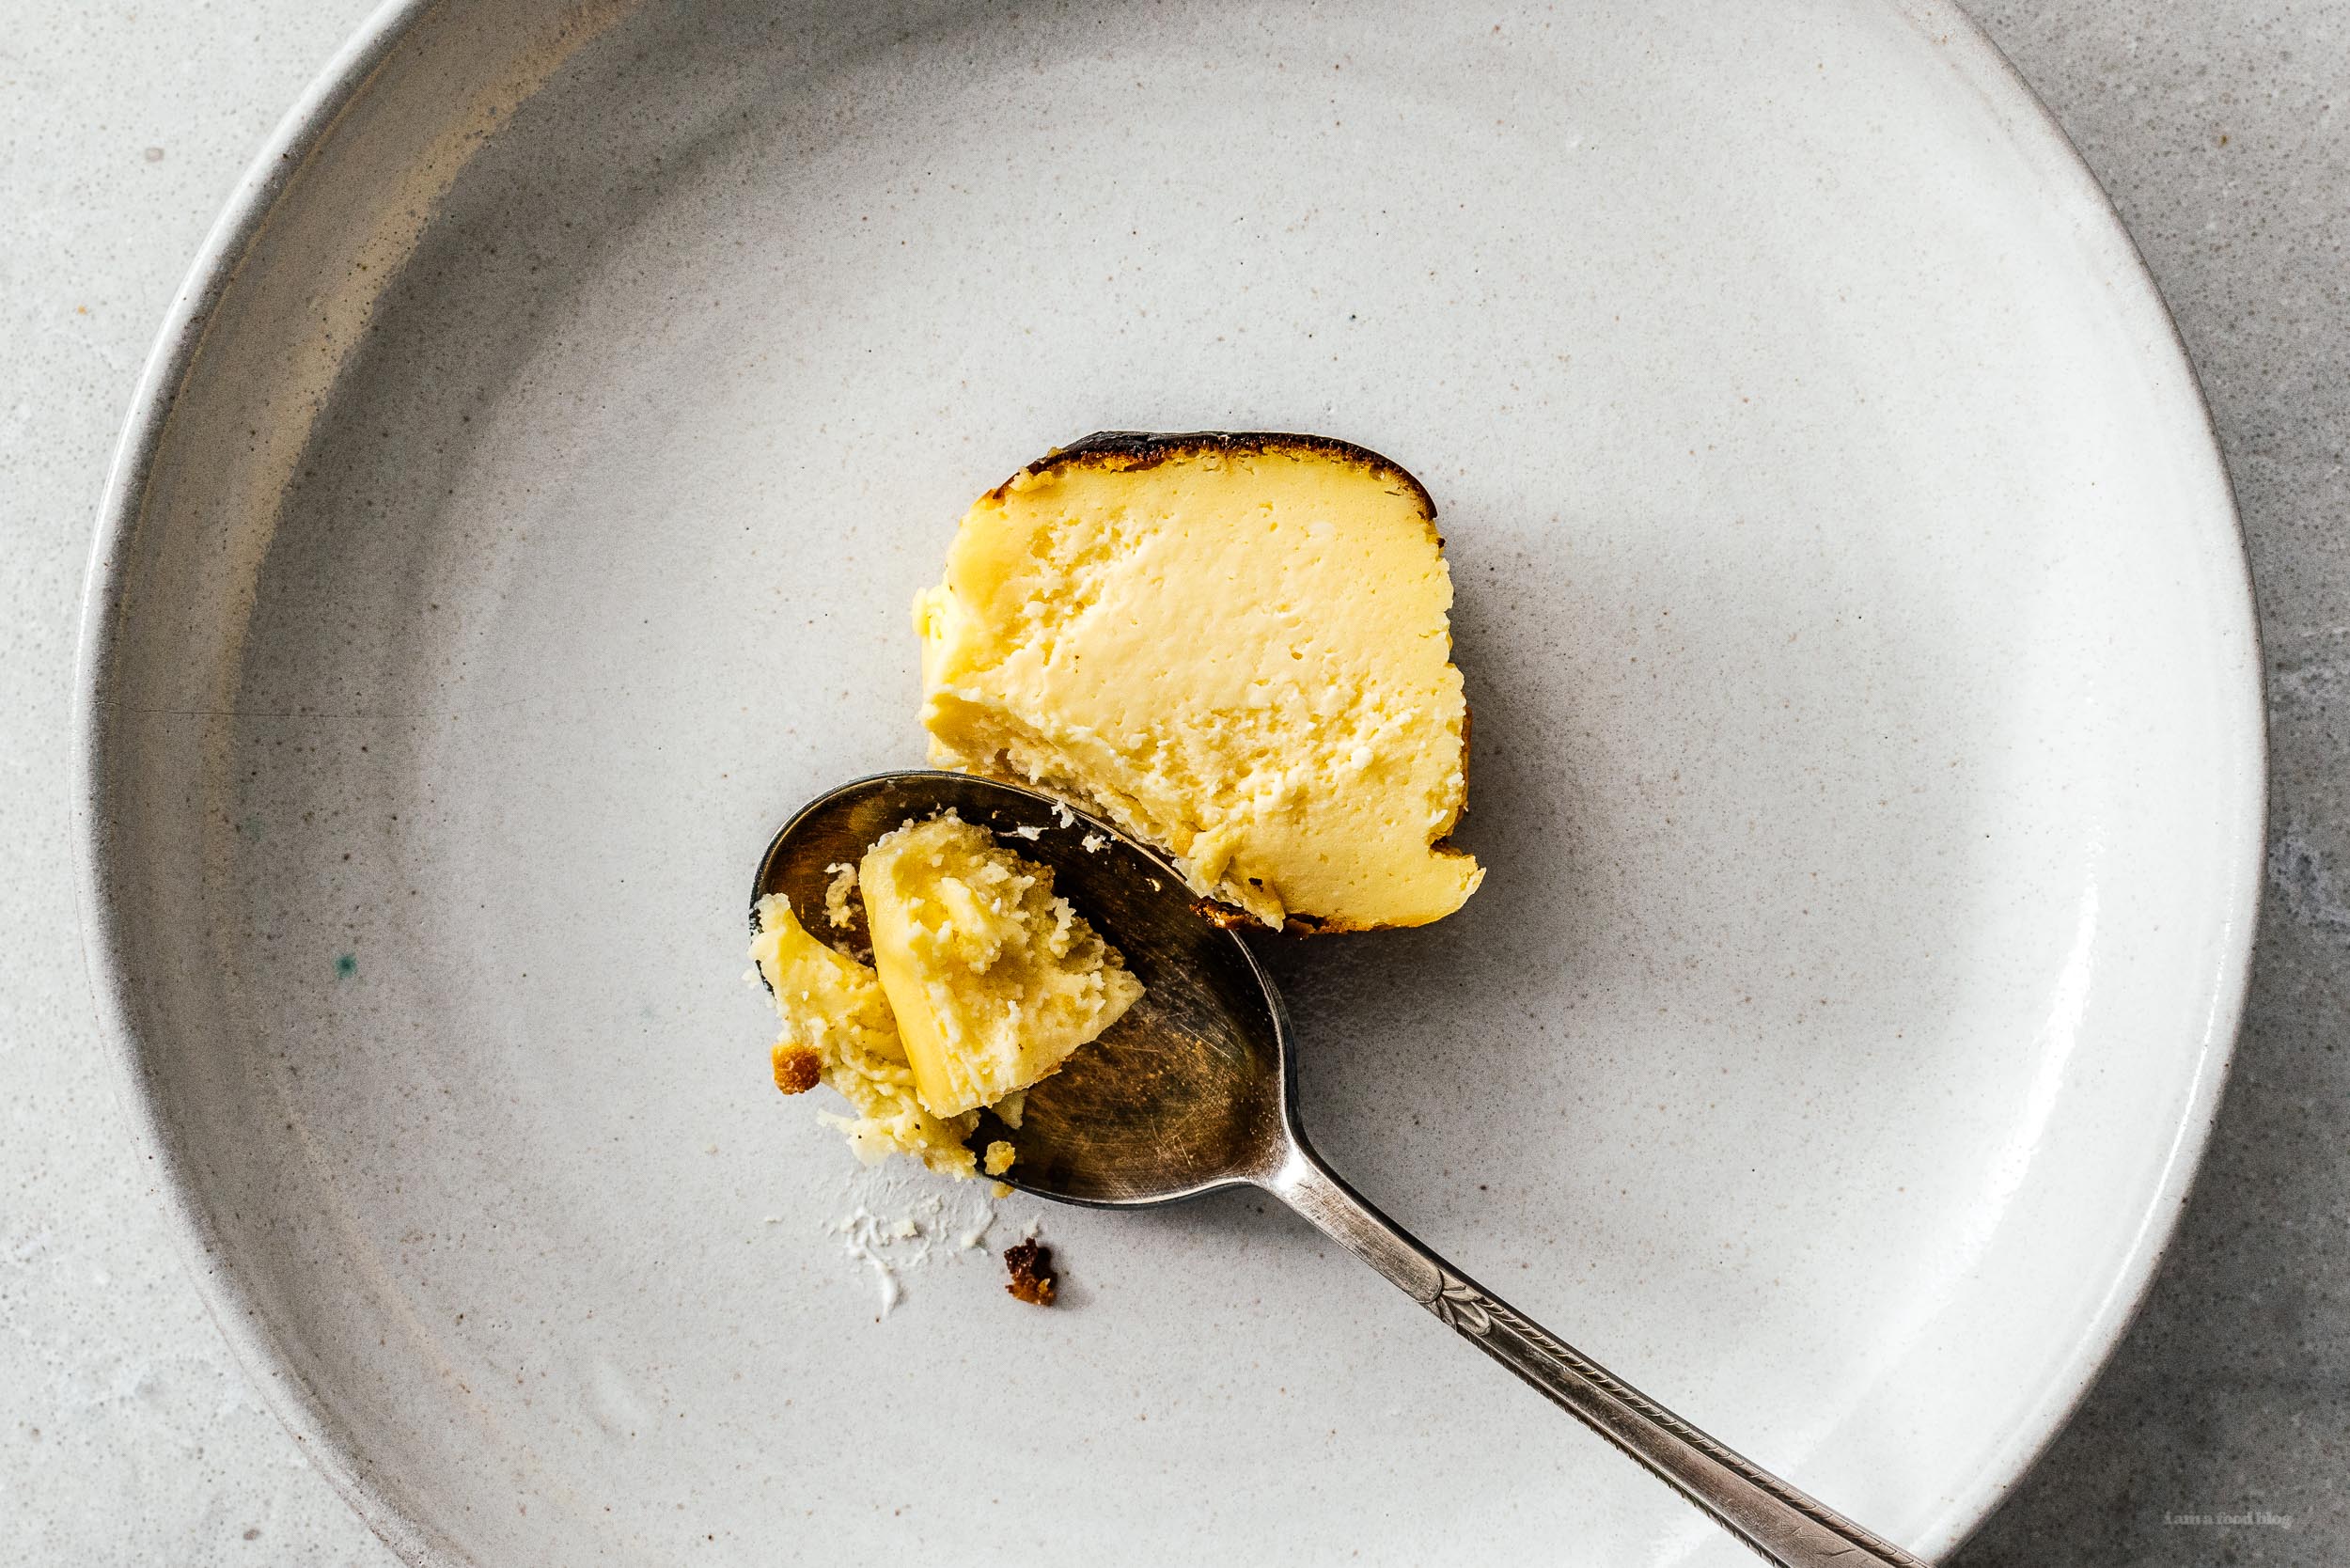
I have a confession to make. I have eaten 3 whole cheesecakes in the last two weeks alone. Granted, they were all small batch cheesecakes, but really, it essentially amounts to me eating one cheesecake, all by myself. I know we’re in the middle of summer and everyone is trying to work off their quarantine 15 but here I am, still soft and plump and not quite ready to stop stress eating sweets. Okay, I lie. I am totally ready to stop stress eating sweets. In fact, I have been looking into the Mediterranean diet. It sounds good! It sounds more sane than keto (which I flirt with still, on occasion) because you can eat loads of vegetables and whole grains. I’m thinking of experimenting with some Mediterranean diet recipes on the blog so if you’re into that, please leave a comment below. Or tell me what your favorite recipes are – I’m excited to learn. But you’re not here for the diet recipes so let’s talk about this Basque burnt cheesecake. I love it because it’s made in a mini loaf pan so you can take slices off of it like a loaf cake. It makes it feel like less of a dessert and more like one of those morning cakes that masquerade as “bread”. You know, lemon loaf and banana bread and the like. Which, let’s face it, are kind of just lemon cake and banana cake but in a different form factor. I love the loaf form factor so it’s no surprise that I love this small batch Basque cheesecake. It’s just a tiny bit different than the other Basque cheesecake recipe on the blog. I wanted to play around with the proportions and bit and try using cornstarch instead of flour for a completely gluten-free cheesecake. This lil cheesecake loaf was sweet and creamy with a hint of burnt caramel from the burnished top. I loved it and now it’s a part of me forever :) PS - If you haven’t heard of Basque cheesecake, please read my original post here!
Small Batch Basque Burnt Cheesecake Recipe
- 8 oz cream cheese (1 package, 226 grams, very soft)
- 60 grams sugar (1/4 cup plus 1 tablespoon)
- 1 large egg
- 1 tbsp cornstarch
- 35 grams heavy cream (2 tablespoons + 2 teaspoons)
Line a small loaf pan (6×3 inches or a pan that fits 2 cups liquid) with baking paper. Heat the oven to 450°F.
Beat together the cream cheese and sugar until very smooth and fluffy, making sure all the sugar is dissolved. If you’re super particular, melt the cream cheese along with the sugar in a bowl over a double boiler. Add the egg and beat until smooth.
In another bowl, add the cornstarch and tiny bit of cream, whisking until smooth, ensuring that the cornstarch doesn’t lump up. Slowly stream in the remaining cream, whisking until very smooth.
Slowly pour the cream and cornstarch mix into the cheese mix. Mix well to ensure everything is combined.
Bake for 20 minutes or until the top is very dark and charred but the middle still has a bit of a jiggle. Broil for a couple of minutes to get extra char if desired. Let cool on a wire rack until room temperature. Remove from the tin, slice, and enjoy!
I Am... Sage and Chicken Liver Ragù Recipe
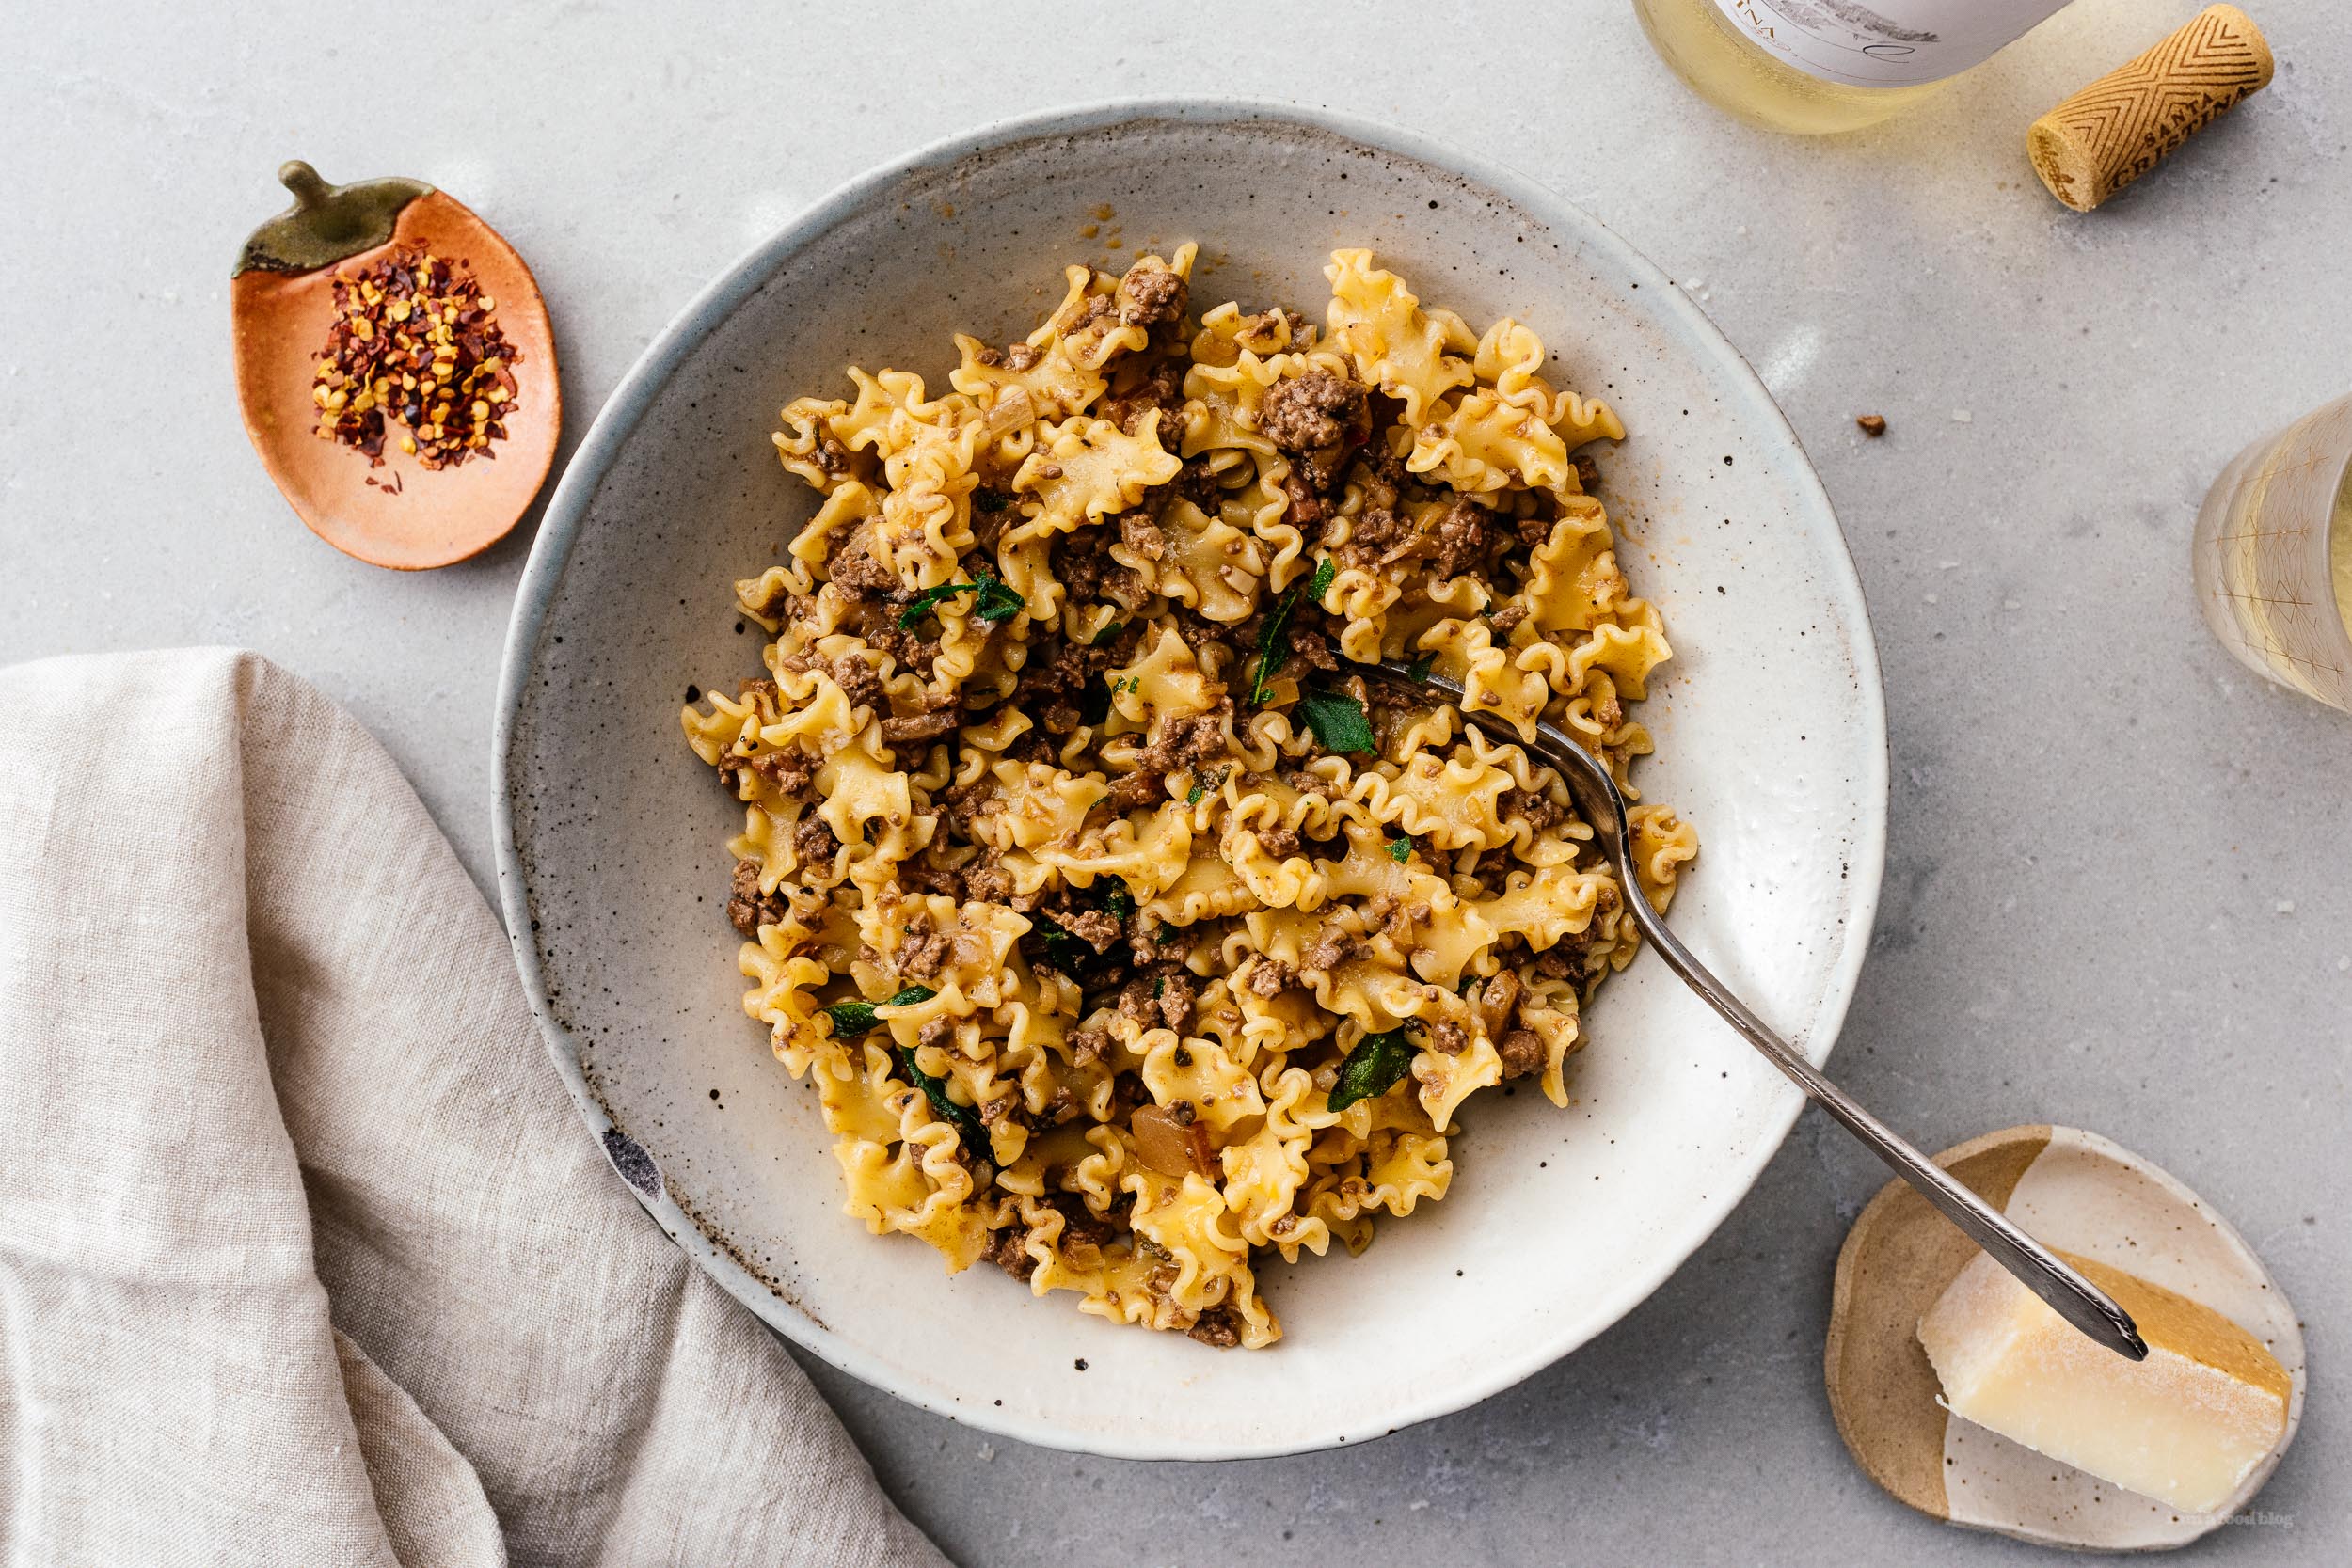
If you love pâté (and who doesn’t?) this chicken liver ragù is an absolute must try. It’s deeply old school Italian - with a suitably deeply old school Italian name: ragù di fegatini di pollo - like the way meatloaf or shepherd’s pie is for us, and it’s genius. I’m deeply in love with all the classic Italian sauces that we never hear about outside of Italy or high-end autentico restaurants. I’m talking way beyond amatriciana or carbonara; I love stuff like pasta alla norcina or ragù modenese. These sauces are so quick, so simple, and so cheap, it’s a shame many of us have to go to expensive Italian restaurants to experience it. I was inspired to make this after seeing it on the menu of our local aforementioned expensive Italian restaurant a couple of months ago. It just clicked with me: chicken livers are the secret ingredient in ragù Bolognese, why wouldn’t they taste good on their own? I’ve been obsessed with making this for months, but somehow never found the time, until now, and I'm so happy I did. If you have everything prepped, this sauce comes together in the time it takes to cook your pasta. There's no 6 hour simmer here. The most expensive ingredient is the cheese, but even so, all in it was about a dollar a plate, and it literally tastes like the love child of a really good chicken liver pâté and an amazing restaurant-made plate of authentic Italian pasta. A note on guanciale, the only ingredient that might be hard to find: if you’ve never had guanciale, it’s a sweet cured pork cheek that you can probably find locally made by someone in most major cities. I'm sure I'll get some grief from some Italians for saying this, but you can use it anytime the base of your pasta calls for any form of cured pork. In keeping with the theme of this post, one cheek keeps me and Steph in pasta for months, and costs less than $10 at our local charcuterie. The equivalent amount of pancetta/proscuitto would be 10x that much. It’s so worth it to seek it out. And the same goes for this pasta. I made it two nights in a row (because I bought a pound of liver) and we were sad when it was all gone. I was tempted to make this sauce senza-liver, because it was so pretty with just guanciale, shallots, sage, and garlic, but the liver was so good we decided to wait until we get more liver and do it justice.
Sage and Chicken Liver Ragù Recipe
- 6 oz chicken livers (trimmed and roughly chopped)
- 2 tbsp olive oil
- 1 shallot (minced)
- 1 garlic clove (minced)
- 1 oz guanciale (chopped, see note)
- 4 fresh sage leaves (chopped, plus extra for frying)
- 1 tsp double concentrated tomato paste (see note)
- 1/3 cup white wine (italian preferred)
- 1 cup parmigiano reggiano (grated)
Bring a large pot of well salted water to a boil over high heat. Add your pasta and cook to 1 minute before the package time. Sprinkle a little salt on your chicken livers at the same time. (Note the photo here is pre-chopped, your liver should be more chopped than this).
While the pasta is cooking, heat up your oil in a large non stick skillet over medium heat. If you are going to fry sage leaves, drop them carefully in the oil for 30 seconds per side, then remove to a paper towel to drain.
Cook the shallot and guanciale until the shallots are translucent, about 2 minutes. Add the garlic and chopped sage. Cook until the garlic is fragrant, stirring frequently so the garlic doesn’t burn, 1-2 minutes.
Add the tomato paste and continue to stir. Cook until the tomato paste has darkened slightly, 1-2 minutes.
Add the liver and wine, turning the heat up to medium-high. Crush the liver into tiny bits if needed. Once the wine has reduced by half (about 2 minutes), add most of the cheese, toss to mix lightly, then reduce the heat to low while you wait for the pasta to finish. Taste and season the sauce with salt and pepper.
Once the pasta has finished cooking, transfer it to the skillet using soft tongs or a spider. Alternately, reserve 1/2 cup of pasta water and drain the pasta, then transfer to skillet without rinsing. Turn the heat up on the skillet to medium high and toss until well coated. If the sauce seems dry, add pasta water, 1/4 cup at a time, as needed.
Top with remaining cheese, black pepper, and sage leaves, if using.
If you can't find guanciale, you can sub pancetta or bacon.
Use 2 tsp regular tomato sauce, but a tube of double concentrated tomato sauce can live in your fridge as needed. We love Mutti.
Inspired by https://www.internazionale.it/notizie/rachel-roddy/2019/02/27/ricetta-fettuccine-ragu-fegatini



 2015 Holiday Giveaway
 One-Pot Lemon Scallop Pea Spaghetti
 Beer Battered Onion Rings, Jalapeno Aioli
 2014 Holiday Gift Guide and a Giveaway
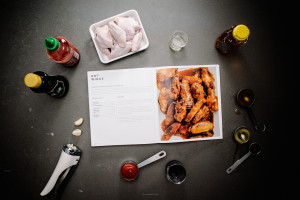 Easy Gourmet Hot Wings and a Giveaway!
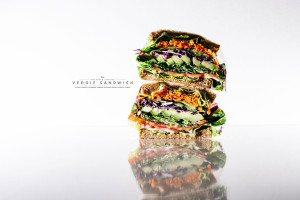 The Ultimate Veggie Sandwich
 Vegan(!) Creamy Corn Soup Recipe
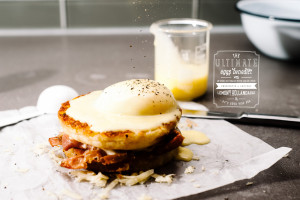 Sunday Brunch: Grilled Cheese Eggs Benny