
I Am... Baked Salad
Baked salad is salad’s cozier, cardigan-wearing cousin. It’s getting super chilly outside which means all the foods I want to eat are warm and cozy. But what about salads!? I could never give up the crunch and variety of flavors and textures in salad. When it’s cold though, digging into a refreshing salad doesn’t have quite the same feels. Enter: baked salad. Just what is baked salad, you ask? Read on, my friend, and I’ll tell you everything you need to know.
What is baked salad?
Think of baked salad as salad’s cozier, cardigan-wearing cousin. Full of oven-roasted vegetables, oven-wilted kale and brussel sprouts, and an addictive toasted sesame-soy sauce dressing, baked salad is everything you want in a healthy, cozy dish. Really, all baked salad is, is a warm salad full of oven roasted vegetables. This particular salad is inspired by Justine Doiron’s baked salad because as she says, it’s baked salad season! This kale and brussels sprouts baked salad is my all time favorite. I love how you can make it ahead of time, with dressing, and it just gets better and better. It’s the perfect meal prep. The kale and shredded Brussels sprouts stay hearty and hold up to the dressing and nothing wilts or gets limp and sad. The roasted delicata squash is sweet and tender, the apples are crunchy, the cucumbers are cool freshness, the carrots add color, and the sliced almonds are the nutty kiss on top. I almost always add roasted chicken breast for protein, but you can skip it or do tofu if you’re vegan. Honestly, this salad is one of my all time favorite things to make and eat.How to make baked salad
- Prep the salad ingredients. Shred the kale and brussel sprouts, cube the delicata squash, shred the carrot, slice the cucumber, and cut the apple into matchsticks.
- Bake the items that need baking. Toss the kale, sprouts, and squash with oil and season with salt and pepper. Roast the squash in a 400°F oven for 20 minutes. Turn the heat up to 450°F and add the kale and sprouts to the baking sheet and continue to roast for another 10 minutes or until the kale and sprouts are warm and wilted and the squash is fork tender.
- Make the dressing. While everything is roasting, whisk together rice vinegar, soy sauce, mirin, neutral oil, sugar, and toasted sesame oil. Taste and season with salt and pepper and set aside.
- Assemble. Toss together all the ingredients in a large bowl, but save some apples, cucumber, carrots, and almonds for garnish.
- Dress. Dress the salad according to taste – you might not need all the dressing. I tend to dress my salads on the lighter side, I usually make a half portion of dressing. This salad is all about you so dress accordingly!
- Garnish. Finish up by garnishing the top of the salad with the reserved toppings and enjoy!
Baked salad ingredients
- kale and brussels sprouts - these guys are the bulk of the salad and they’re amazing because they’re full of nutrients and taste amazing when roasted. They become a little bit wilted, a little bit crisp, and a lot delicious.
- delicata squash - delicata is my all time favorite fall squash and when you roast it, the flavor and texture can’t be beat. Finding little nuggets of delicata in this salad are like finding little nuggets of gold.
- cucumber, apple, and carrots - these three items add freshness and crunch as a counter point to our warm greens.
- sliced almonds - I love the flavor of slivered/sliced almonds. Somehow they’re flakier, crunchier, and have more flavor than regular almonds.
- dressing - This dressing is a simple but addictive mix of Japanese rice vinegar, soy, mirin, sugar, and toasted sesame oil. It’s light and tangy and full of umami. It lets the salad ingredients shine while still bringing the flavor. If you don’t have mirin (a sweet Japanese rice wine that is readily available in the Asian aisle or online), you can leave it out or add more rice vinegar and a touch more sugar.
How to roast delicata squash
- Wash and dry the delicata then trim the stems.
- Cut the squash in half length-wise and use a spoon to scoop out the seeds and pulp.
- Slice into 3/4 inch half moons then cut into chunks.
- Toss the squash with oil and season with salt and pepper.
- Spread the squash pieces out on a parchment paper lined rimmed baking sheet and bake for 20 minutes at 400°F. Give the squash a stir, then turn the heat up to 450°F and roast for another 5-10 minutes or until tender and slightly caramelized.
How to oven roast kale for salad
- Wash and throughly dry the kale.
- Cut out the center stems with a paring knife or tear the leaves off the stem. The stems are tough – you can discard them.
- Roll the leaves into a tight roll and slice into thin ribbons.
- Toss the kale with a bit of oil and season with salt and pepper.
- Spread out and bake on a parchment paper lined rimmed baking sheet for 10 minutes at 450°F until wilted and warm.
How to roast brussels sprouts for salad
I love brussels sprouts in salad – they’re just like tiny cabbages. To shred sprouts: wash, trim the ends off, cut them in half, place them cut side down on the cutting board and thinly slice cross-wise. Toss them with oil, season with salt and pepper, then roast them on the same pan as the kale for 10 minute at 450°F until slightly wilted and warm.What to serve with baked salad
I like this salad as a meal but it makes an excellent side dish for proteins such as: happy baked salad season! xoxo stephBaked Salad
Baked salad is salad’s cozier, cardigan-wearing cousin.
- 1-2 small delicata squash (seeded and chopped)
- 2 bunches kale (dinosaur/lacinato preferred, thinly shredded, about 8 cups)
- 1 lb Brussels sprouts (shredded, about 6 cups)
- 1/4 cup rice vinegar
- 2 tbsp soy sauce
- 2 tbsp mirin
- 2 tbsp neutral oil
- 1 tbsp sugar
- 1 tbsp toasted sesame oil
- 1 cucumber (sliced)
- 1 apple (fuji preferred, cut into matchsticks)
- 1 carrot (shredded)
- 1/4 cup sliced almonds
Heat your oven (or air fryer) to 400°F. Toss the cubes of delicata with a bit of oil and season with salt and pepper. Spread out on a large parchment paper lined rimmed baking sheet. Bake for 20 minutes then remove from the oven.
Turn the oven (or air fryer) up to 450°F. Toss the kale and sprouts in a bowl with a drizzle of oil. Season with salt and pepper. Push the delicata to one side of the baking sheet and add the kale and sprouts. Bake for 10 minutes or until the kale and sprouts are warm and wilted and the delicata is tender. Remove from the oven and let cool slightly.
While the vegetables are roasting, make the dressing. In a liquid measuring cup or bowl, whisk together the dressing ingredients, taste, and adjust.
In a large bowl, toss together the squash, kale, sprouts, cucumber, fuji apple, and carrots. Dress evenly to taste and top with sliced almonds. Enjoy!
Optional: add chicken breast for extra protein.
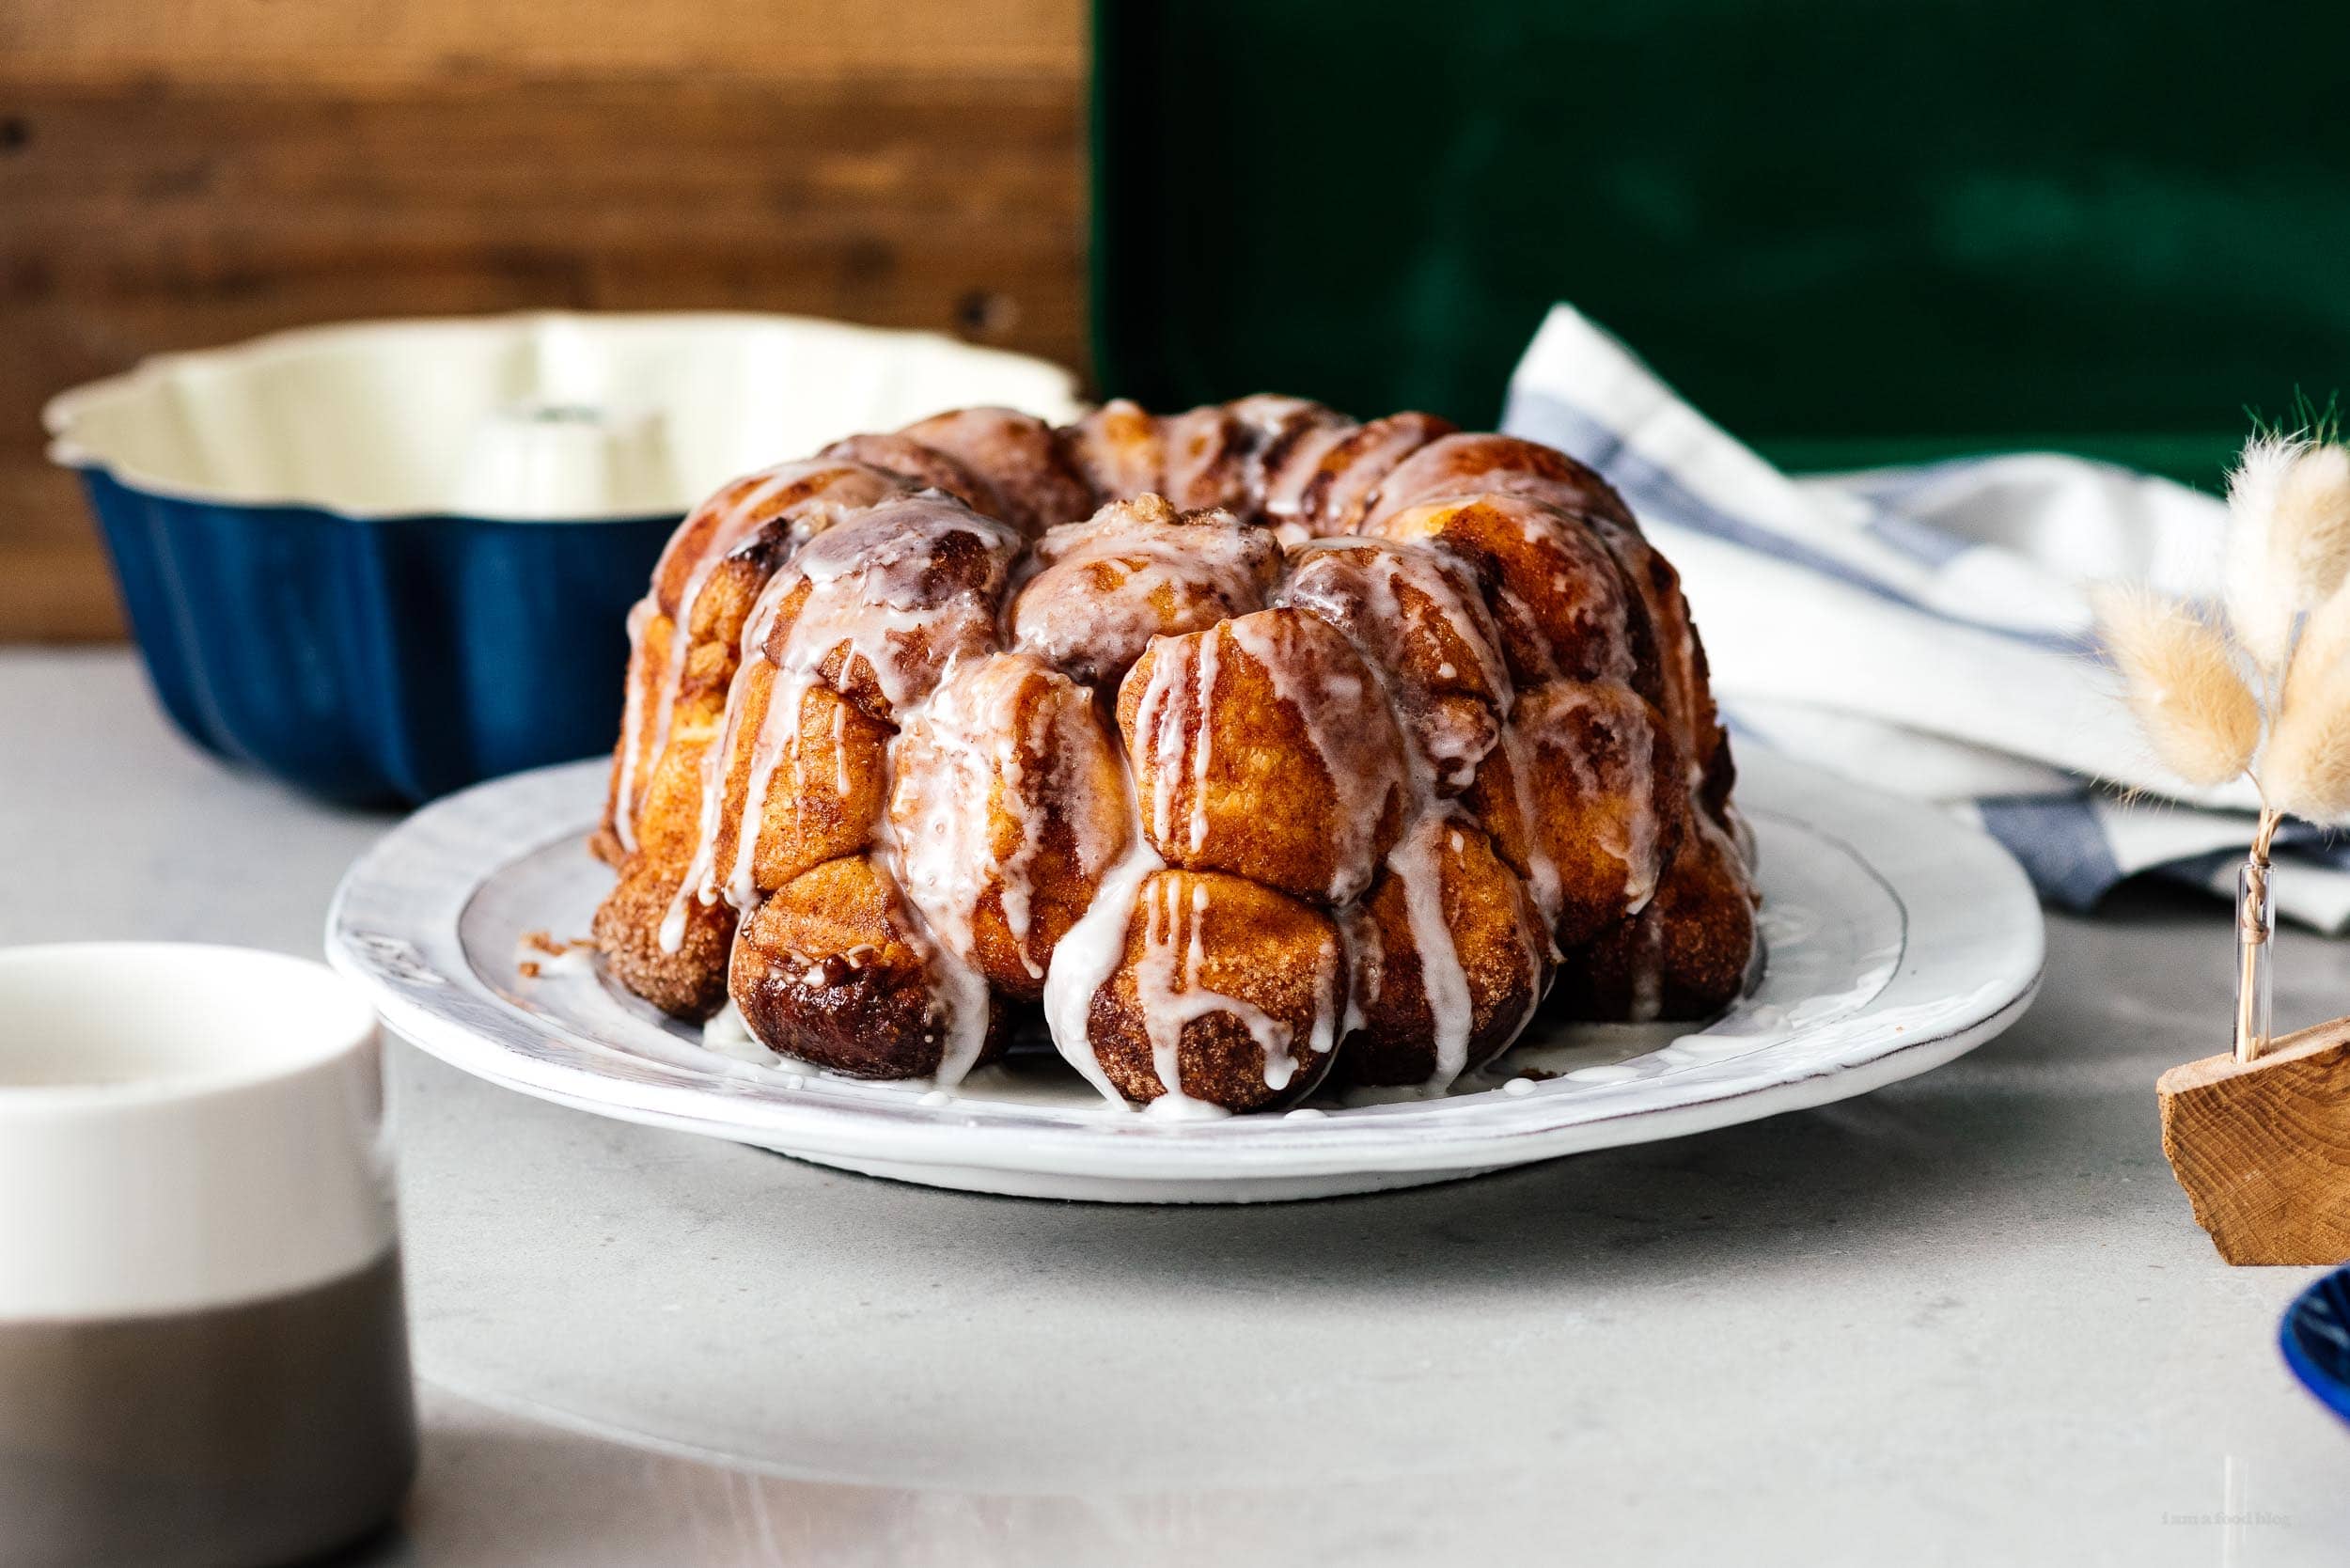
I Am... Cinnamon Bites
Whether you call them cinnamon bites, cinnamon roll bites, honeycomb bread, cinnamon bread bites, monkey bread, or pull apart cinnamon bread, there’s no denying that cinnamon-sugar dusted, chewy, fluffy, little balls of dough are delicious. I love little pull apart squishy balls of chewy, fluffy cinnamon-sugar goodness. If you haven’t had cinnamon bites before, you’re missing out! Think of them as a cross between a cinnamon bun and pull apart bread. You pull them apart with your hands to get to gooey lil cloud-like pillows of sweetness. Cinnamon bites are a treat best enjoyed warm, with the ones you love.
What are cinnamon bites?
Cinnamon bites are a gooey cinnamon-sugar pull apart bread that’s baked, either in a bundt pan or a round baking dish. It’s made with soft and squishy pieces of sweet dough dipped in cinnamon and sugar. They’re topped off with a gooey cinnamon sugar syrup, baked to perfection, then glazed with a vanilla icing while still warm. You can make these one of two ways: the cozy, relaxing, day of baking where you make homemade dough OR the quick and easy way using biscuit dough. I’m going to explain the cozy all day affair first because fall is the ultimate time to spend an afternoon baking. If you’re looking for shortcut cinnamon bites, scroll down to “Easy cinnamon biscuit bites.”How to make cinnamon bites
- Make the dough. Use a stand mixer to do all the hard work. All it takes is a quick knead with a dough hook and you’re good to go. If you don’t have a stand mixer, you can knead the dough by hand until it is soft and pliable.
- Let it rest. After your dough is ready, it’s time for a rest so it can puff up. Now’s a good time to have a cup of coffee or tea.
- Roll the dough into balls. When the dough has doubled in size, it’s time to punch it down and shape it into little balls.
- Dip the balls. Dip the balls into melted butter, then cinnamon-sugar. Pop everything into a buttered bundt pan or a round oven safe pan then pour on the cinnamon sugar syrup.
- Bake. Bake until golden, gooey, and delicious.
- Drizzle. Finish off with a drizzle of vanilla icing while it’s still hot so it melts into all the nooks and crannies.
- Enjoy! Eat it while it’s still warm, there’s nothing better, trust me!
Cinnamon bite ingredients
- Yeast – this recipe uses either active dry yeast OR instant yeast. If you use active dry, you need to dissolve it in a bit of warm liquid before using – in this case sprinkle it on to warm milk. If you have instant yeast, just mix it right into the dry ingredients.
- Milk – I use 2% milk but any milk will work here, even almond or oat milk. If you’re using active dry yeast, warm the milk up slightly in the microwave (I usually pop it in the microwave in 20 second increments) You want it between 105-115°F, which feels like a warm bath.
- Eggs – this is a extra rich dough with eggs in it. Not all bread recipes have eggs in them, but this one does. I love the extra flavor and plushness the eggs gives this dough.
- Bread flour – this one is important. You can use all purpose, but bread flour makes these bites soft and fluffy with just the right amount of chew. Bread flour has a higher protein content than regular all purpose – the resulting dough has more gluten in it which helps the little bread balls stay soft and chewy.
- Cinnamon – fresh cinnamon is best! We’re going to go with a fairly high cinnamon to sugar ratio so each bite is bursting with cinnamon goodness.
- Butter – Who doesn’t love butter. It’s essential for those warm and cozy bakery feels.
Easy biscuit cinnamon bites
If you don’t have the time to make bread dough and let it rise, you can make cinnamon bites quick and easy using a tub of store bought biscuits. Grab the big tube, take the biscuits out and cut each biscuit into 6 equal pieces. Roll the pieces up into little balls, dip them in the melted butter, then roll them around in the cinnamon sugar. Put the balls in a pan and pour the cinnamon sugar syrup over top. Bake them in a 350°F oven until they are golden and cooked through, about 20-25 minutes. Glaze them with the vanilla glaze while still warm and enjoy!
Which is better?
In my option, homemade cinnamon bites are heads and shoulders above biscuit cinnamon bites. They’re fluffier, chewier, and just so much more delicious. There’s something that is way more satisfying about baking your own bread. That being said, if you’re low on time, there’s no shame in buying a tube of biscuit dough. Or, even better, buying some store made pizza dough and using that.
Make ahead cinnamon bites
If you want to make these the day before then bake them in the morning for a warm treat, it’s absolutely doable. Make the bites up until everything is ready in the pan before baking. Wrap the pan up and put it the fridge right away. The next day, take it out and leave it on the countertop while you heat your oven. Bake as usual and enjoy hot and fresh.How to store
Cinnamon bites are best right out of the oven, but if you have leftovers, store them in an air tight container on the countertop for up to three days. Reheat before enjoying.How to reheat
Pull of the cinnamon bite balls and simply microwave on a plate for 10-15 seconds, or until warmed through.How to tell if my cinnamon bites are ready
Sometimes it can be hard to tell if your cinnamon bites are ready. The easiest way to tell if they’re cooked is to use an instant read thermometer. Just stick it right into the middle. If it reads 190°F, you’re good to go! If you don’t have an instant read thermometer, use a wooden skewer. You’ll know the cinnamon bites are ready when the tops of the balls are puffy and crisp and a wooden skewer comes out clean with no crumbs when you poke it into the thickest part. Happy cinnamon ball rolling! These really are the best fall-winter baking treat, I hope you get a chance to try them. xoxo stephCinnamon Bites Recipe
If you haven’t had cinnamon bites before, you’re missing out!
Dough
- 3/4 cup milk
- 1/4 cup sugar
- 1 egg (room temp)
- 1 egg yolk
- 1/4 cup unsalted butter (melted and cooled)
- 3 cups bread flour
- 2.25 tsp instant yeast (~1 envelope)
- 3/4 tsp salt
Cinnamon sugar syrup
- 1/2 cup unsalted butter
- 3/4 cup sugar
- 1.5 tbsp cinnamon
Vanilla icing
- 1 cup icing sugar
- 2-3 tbsp milk (whole milk preferred)
- 1/2 tsp vanilla extract
In the bowl of an electric mixer, whisk together the milk, sugar, egg, egg yolk, and melted butter. Stir in the flour, instant yeast, and salt with a wooden spoon until everything comes together into a ball of dough.
Knead with the dough hook on medium for 8 minutes. Alternately, knead by hand for 8-10 minutes on a floured surface. Lightly oil and large bowl and place the dough inside.
Cover the dough with plastic wrap and a kitchen towel and let rise for 1 to 1.5 hours or until doubled in size.
Melt the butter and set aside. In a small bowl, mix together the sugar and cinnamon.
Shape the balls. Punch the dough down and divide and roll into small balls, about 1 to 1 1/4 inch in diameter. If you want to be precise about it, each ball should weigh about 15 grams.
Dip the balls into the butter, then roll in the cinnamon sugar mix. Place each coated ball into your pan, repeating until you finish all of the dough. Cover the pan with plastic wrap and let rise for 20 minutes. Meanwhile, preheat the oven to 350°F.
Optional: While the oven is warming up, mix the butter with 2-4 extra tablespoons of melted butter, 1/4 cup brown sugar, and 1/2 tsp vanilla. Just before you put the cinnamon bites into the oven, pour the cinnamon sugar syrup evenly over the balls of dough.
Bake for 35-45 minutes or until golden brown and cooked through. Cover with foil if the top starts browning too quickly. When baked through, pull from the oven and cool in the pan for 5-10 minutes.
Make the icing by whisking all of the icing ingredients together. Drizzle on generously and enjoy the cinnamon bites warm.

I Am... Scalloped Potatoes
Scalloped potatoes are rich, creamy, carb-forward, and the perfect accompaniment to any large format meat. They're a classic side dish for a reason, in fact, they’re rich and delicious enough to stand on their own, I say. I would be happy eating only scalloped potatoes for dinner: well seasoned, tender potatoes in a rich and vevelty cream sauce with a little bit of golden brown cheese. Pure potato heaven.
What are scalloped potatoes?
Scalloped potatoes are a gratin style casserole made from thinly sliced potatoes baked in a creamy sauce. The potatoes end up tender and soft and decadent, full of flavor. They’re called scalloped potatoes because they kind of look like scallops. The unique stacked texture is the best part of scalloped potatoes, kind of like a potato lasagna with layers of potatoes instead of noodles.How to make scalloped potatoes
For such a rich and flavor forward dish, making scalloped potatoes is surprisingly easy.- Peel and slice. Peel your potatoes and evenly slice the potatoes into “scallops” or rounds.
- Simmer. We’re going to give the potato slices a quick bath in some warm milk and cream.
- Arrange. Arrange the warm slices of potato (along with the cream mix) into a buttered casserole dish, layering with a bit of shredded gruyere.
- Bake. Bake, covered in foil, until the potatoes are tender and cooked through.
- Broil. Remove the foil and broil until the tops of the potatoes are burnished and beautifully brown.
- Rest. Let the potatoes rest so the cream thickens up and soaks into the potatoes.
Scalloped potato ingredients
- Potatoes. Try to grab potatoes that are all around the same size so your casserole ends up unified and pretty. More on potato choices below!
- Milk and Cream. We’re going to use a mix of milk and cream to create a light, yet rich cream sauce that the potatoes bake in.
- Garlic and thyme. Classic potato flavors accentuate the pure potato-y flavor of these scalloped potatoes.
- Gruyere. Gruyere adds just a touch of cheesiness and structure without overwhelming the potatoes with cheesiness.
What are the best potatoes for scalloped potatoes?
There are only two kinds of potatoes that are perfect for scalloped potatoes: Yukon golds (my absolute favorite) and Russets. Yukon golds are perfect for scalloping because they’re slightly starchy, beautifully yellow, and have a rich buttery potato taste. They’re dense potato with a thin skin, and when you use them, you get a more luxurious casserole. Russets (or Idaho) potatoes are those big potatoes with the dusty skin that most people use for baked potatoes. These are also excellent for scalloped: fluffy, dry, and starchy, when cooked right. Russets are the more mild potato of the two potatoes I recommend and if you’re a fan of lighter, fluffier potatoes, they make a scalloped potato with a more delicate, fall apart texture.- Yukon golds: dense, buttery, rich, more potato flavor, sauce won’t be as thick but the potatoes will hold their shape
- Russets: light, delicate, fluffy, mild potato flavor, will thicken the sauce more, but fall apart
How thick to slice your potatoes
You don’t want to slice your potatoes too thick or thin. A uniform 1/8 to 1/4 inch is perfect. A mandoline is your best friend here, making scalloping the potatoes super quick and easy. You’ll get perfectly even slices which helps the potatoes cook at the same rate and they slices end up super pretty. I have this mandoline and I love it.Cheesy scalloped potatoes
There seems to be a great debate on whether or not scalloped potatoes should have cheese or not. Purists say scalloped potatoes are just potatoes in a roux-based sauce. Cheese lovers pile on the cheese. I’m a potato lover so I love all scalloped potatoes. I like this particular recipe because there isn’t SO much cheese that it overtakes the potato flavor. It’s as good balance between a pure scalloped potato and a cheesy scalloped potato.Should I rinse or soak potatoes for scalloped potatoes?
No! Don’t wash away all that potato starchy goodness. It’s what thickens up the cream and helps the potatoes cook evenly.Tips and tricks
- Warm the milk and cream mixture with the potatoes. The purpose of this step is pure genius: you thicken and infuse the cream mixture with garlic and thyme while warming the potatoes through so they’re pliable when you’re arranging them in the baking dish. Warming the potatoes in the cream helps distribute the starch from the potatoes helping the cream thicken naturally. Warming the potatoes also helps them cook more evenly.
- Use the right dish. A shallow dish is best for scalloped potatoes - it lets the tops of the potatoes brown nicely. Traditional potato gratins, which are the grandfather of scalloped potatoes, were very thin and using a shallow dish will mimic this nicely.
- Let it rest. As your scalloped potatoes rest, the cream sauce thickens up and so the potatoes hold their shape when you cut into them. The sauce will firm up and reincorporate itself back into the potatoes and you’ll get a nice stack instead of potatoes sloppily falling all over your plate. Perfect scalloped potatoes are creamy, velvety and silky. Letting them rest and eating them when they’re not piping hot will let you appreciate their pure potato-ness and texture.
Make ahead:
Scalloped potatoes are the perfect make ahead side. You can arrange the entire dish and just hold off on baking OR you can go ahead and bake the dish before hand and then just warm it, covered in foil, in a 350°F oven until warmed through, about 15-30 minutes.How to store:
Wrap them tightly and keep them in the fridge for up to 5 days.How to reheat:
You can simply reheat them in the microwave for 1-2 minutes until heated through or warm them, covered in foil, in a 350°F oven until heated through, about 15-30 minutes.Serve these with:
Best Scalloped Potatoes Recipe
Scalloped potatoes are a classic side dish for a reason. They’re rich, creamy, carb-forward, and the perfect accompaniment to any large format meat.
- 2 tbsp butter (divided, room temp)
- 2 lbs potatoes (Yukon Gold preferred, about 4)
- 1 cup heavy cream
- 1 cup whole milk
- 3 cloves garlic (crushed)
- 1/2 tbsp fresh thyme
- 4 oz Gruyère cheese (coarsely grated, about 1.5 heaping cups)
Heat the oven to 375°F. Generously butter a small 2 quart baking dish. Peel the potatoes and slice into 1/8 inch thick rounds.
Place the potatoes with the cream, milk, garlic, and thyme into a large pot. Season with salt and freshly ground pepper. Bring to a boil over high heat then reduce to medium and simmer for 1 minute. Remove from the heat and let stand for 10 minutes.
Spoon 1/3 of the potato mix into the prepared dish and sprinkle with 1/2 of the cheese. Add another 1/3 of the potatoes and top with cheese. Dot with butter. Finish on a potato layer and loosely cover with foil.
Bake until the potatoes are tender and cooked through, 35-40 minutes. Remove the foil and broil until bubbly and brown, 3-5 minutes. Let rest for 15-30 minutes before serving.
inspired by Martha Stewart’s Creamy Scalloped Potatoes
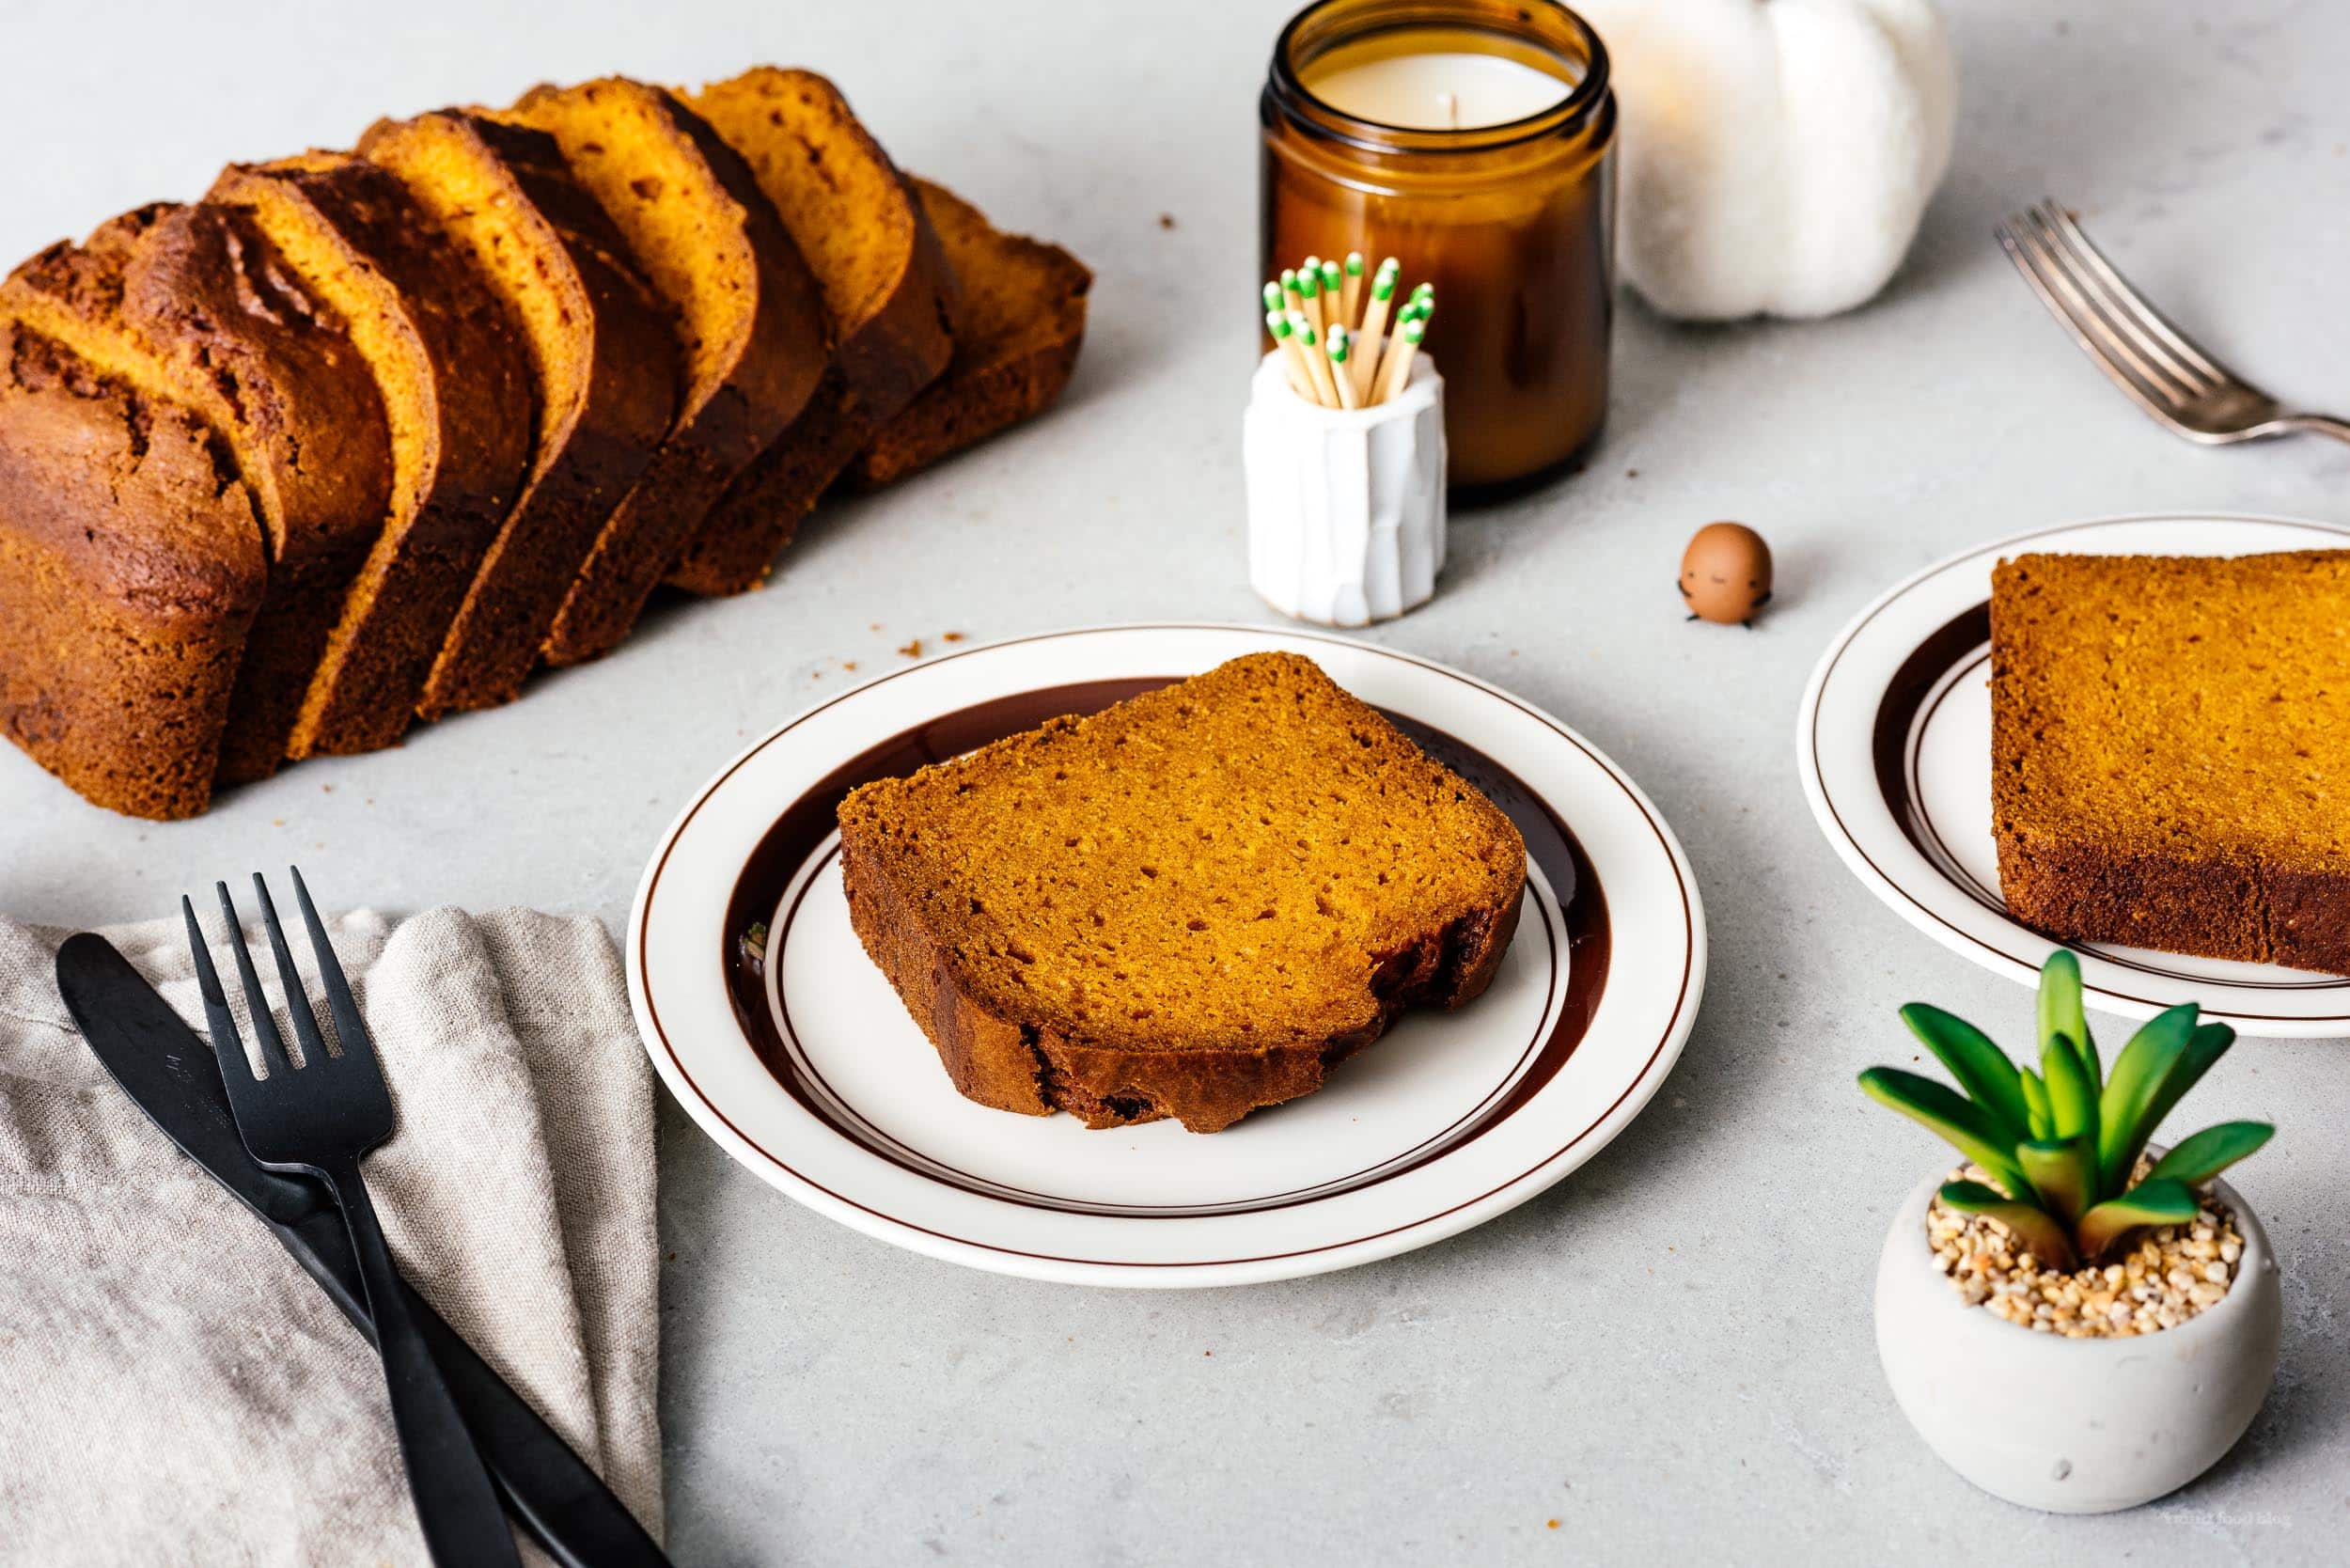
I Am... Pumpkin Bread
If you love pumpkins and pumpkin spice, this easy pumpkin bread is for you. Full of warm pumpkin spice and packed with pumpkin flavor, it’s the perfect fall treat! This is a copycat Starbucks pumpkin loaf recipe but I didn’t want to call it that in the title because that’s kind of troll-y? This loaf is so good it’s actually kind of bad cause instead of having access to only one slice I now have a whole loaf. Truth is, it’s definitely a good thing because this is my absolute favorite pumpkin bread recipe. Each slice is packed with pumpkin, incredibly moist, and full of warming pumpkin spice. Not a dry crumb - not that there will be any crumbs left. Now that it’s officially Autumn, I’m all about the pumpkins and pumpkin spice. Give me all the pumpkin things, but especially pumpkin bread! This is my go-to pumpkin bread. I love that it comes together so easily and is only one bowl too - less dishes are always a good thing. It’s so good that even Mike, who is not the hugest fan of pumpkin, can’t resist a slice when we have coffee in the morning. Pro tip: grill a slice with butter in a non-stick pan until the outside gets all crispy then slather it with whipped cream cheese. SO GOOD.
What is pumpkin bread
Pumpkin bread is just like banana bread but made with pumpkins. It’s perfect for starting your day during fall and all of those autumn weekends ahead. It tastes amazing when it’s warm and soft, with a little bit of salted butter melting right in. It’s all fall spices, deliciously moist, and tastes like pumpkin in the best way. It will get you right into those seasonal fall feels.Copycat Starbucks recipe
If you are looking for a copycat Starbucks Pumpkin & Pepita loaf recipe, this is it! I didn’t add the pepitas on top of mine because I like the pureness of the pumpkin bread, but all you need to do is sprinkle on 1.5 tablespoons of chopped pepitas and you’ve got yourself the perfect copycat Starbucks recipe. Try it, you won’t be disappointed.Pumpkin bread ingredients
The ingredients for this pumpkin bread are pretty standard: flour, sugar, baking soda, salt, cinnamon, ginger, nutmeg, cloves, oil, eggs, and pumpkin puree.Pumpkin Puree
This bread is packed with pumpkin! Most pumpkin recipes only use 1 cup, but this recipe uses one 15 ounce can for extra pumpkin flavor - no more leftover half cans of pumpkin left sitting in your fridge. You can use homemade pumpkin puree, but if you do, make sure that it’s not too liquid-y. I like to use canned solid pack pumpkin puree just because when you need pumpkin bread, you don’t want to be roasting a pumpkin first – at least I don’t. I like Libby's. Instant gratification pumpkin bread all the way!Would butter be better?
You can switch the oil out for butter, if you love the taste of butter. That being said, I love oil in cake and quick breads. For some reason it makes things so much more moist. I’ve made this with both oil and butter and they’re both delicious, but for me, it’s oil all the way. Choose what you like: butter is a bit more rich, but oil has that more classic loaf flavor, like what you taste when you get pumpkin loaf or banana bread from a coffee shop.How to make super moist and delicious pumpkin bread
- Whisk. In a very large bowl, whisk together all the dry ingredients: flour, sugar, baking soda, salt, and the pumpkin spices. I make my own spice mix of cinnamon, ginger, nutmeg, and cloves. You can use store-bought pumpkin spice if that’s what you have, you’ll need 1 tablespoon.
- Fold. Make a well in the middle of the flour mix, then add the pumpkin, oil, and eggs. Starting wisking the wet ingredients without adding any of the flour, until it is smooth, then slowly incorporate the dry ingredients, folding gently. Don’t over mix. You want everything incorporated with no streaks, but over mixing will make your pumpkin bread tough.
- Bake. Pour the batter into a loaf pan and bake! When it’s done, let it cool slightly. I almost always have a slice warm, but really, it’s best if you let it cool all the way because the contained residual heat will help the bread retain it’s shape and keep it extra moist and fluffy.
Healthy pumpkin bread
If you’re wondering how to make this pumpkin bread just a little bit healthier, here’s what to do:- Use a mix of all purpose and whole wheat flour.
- Instead of sugar, reduce the amount and swap it out for maple syrup or honey.
- Instead of eggs, use ground flax seed: whisk together 6 tablespoons water with 4 tablespoons ground flaxseed and let thicken slightly before using in the place of the eggs.
Pumpkin chocolate chip bread
Simply stir in in 2/3 cups of chocolate chips or chunks.Why this recipe instead of the ten thousand other ones out there
- It uses one whole can of pumpkin puree – no more left over pumpkin that you don’t know what to do with
- Only one bowl needed!
- It’s oil based so you don’t need to wait for your butter to soften
- So incredibly moist and full of pumpkin flavor
- It’s the best pumpkin bread you’ll ever make!
What is pumpkin puree?
Pumpkin puree is my most essential Fall ingredient. Pumpkin puree is simply cooked pumpkin. It’s pumpkin that’s been peeled, cooked, and mashed or blended. When you buy it in a can, it’s usually a strained, bright orange, smooth pulp. It’s used in pumpkin bread, pumpkin pie, pumpkin spice lattes, pumpkin muffins, pumpkin pancakes, you name it, it’s in it. It adds instant Fall feels and is cozy and healthy!Does pumpkin puree really have pumpkin in it?
Yes! Pumpkin puree has pumpkin in it. But, it can also have squash. A pumpkin is a type of Winter squash and lots of times canned pumpkin purées contain a mix of pumpkin and other winter squashes. The other kinds of squashes typically include varieties like butternut, and Hubbard. If you want a pure pumpkin puree, go for Libby’s, which is 100% Dickinson pumpkin, a pumpkin that was created for canning and baked goods. Dickinson pumpkins have extra dense, fine-grained sweet flesh that’s not stringy or watery like the kind of field pumpkins you use for decoration or carving.Is canned pumpkin and pumpkin puree the same thing?
Yes, canned pumpkin and pumpkin puree are the exact same thing. Take a look at the label to ensure that the only thing in the can is 100 percent pure pumpkin and you’re good to go.What is pumpkin puree really made of?
It’s make of pumpkin. And…sometimes squash. Pumpkin is a winter squash and the USDA doesn’t distinguish between the two. All pumpkins are squash but not all squash are pumpkins. Which is confusing, but all you need to know is that in the world of canned pumpkins, pumpkin and squash puree are, for all intents and purposes, the same.What is solid pack pumpkin puree?
Solid pack pumpkin or solid pack pumpkin puree is just another way to say pumpkin puree. Solid pack is how canning companies indicate that the can contains all fruit and no added liquid. When you open the can it’s 100 percent pure pumpkin.What can you use canned pumpkin puree for?
It can go into just about anything:Sweet
- pumpkin scones
- pumpkin cold foam/pumpkin spice lattes
- nutella pumpkin french toast
- pumpkin cheesecake bars
- pumpkin chocolate chip cookies
- brown butter frostingpumpkin cupcakes
- pumpkin whoopie pies
Savory
- pumpkin sage mac and cheese
- pumpkin queso
- one pot creamy pumpkin mac and cheese
- pumpkin and sage lasagna roll ups
What is the difference between canned pumpkin and pumpkin pie filling?
Canned pumpkin is plain pumpkin puree and canned pumpkin pie filling is pumpkin puree combined with pumpkin spices. When you buy canned pumpkin pie filling it’s intended to be mixed with eggs and evaporated milk to be baked as pumpkin pie. Happy pumpkin breading! xoxo stephPumpkin Bread Recipe
This loaf is so good: each slice is packed with pumpkin, incredibly moist, and full of warming pumpkin spice. There won't be any crumbs left!
- 2.5 cups all purpose flour (300g)
- 1.5 cups sugar (300g)
- 2 tsp baking soda (12g)
- 1/2 tsp salt (2g)
- 2 tsp cinnamon (3.5g)
- 1/2 tsp ground ginger (1g)
- 1/2 tsp ground nutmeg (1.2g)
- 1/4 tsp ground cloves (.5g)
- 15 oz solid-pack pumpkin puree (1 can)
- 1/2 cup neutral oil (such as grapeseed)
- 2 large eggs (room temp)
Preheat the oven to 350°F. Lightly oil or spray a 9 x 5 inch loaf pan and set aside. In a large bowl, whisk together the flour, sugar, baking soda, salt, and spices until well mixed.
Make a well in the middle of the flour mix and add the pumpkin, oil, and eggs. Use a fork or small whisk and whisk just the wet ingredients in the middle, trying not to incorporate any of the flour.
Slowly start to fold in the flour mix, using a rubber spatula, mixing gently until all the flour is incorporated with no flour streaks. Be sure to scrape against the sides and bottom of the bowl.
Pour into the prepared loaf pan and smooth out if desired.
Bake for 1 hour and 20 minutes, checking at the hour mark with a wooden skewer – it should come out clean in the center. (Tent with foil if the top starts browning too quickly). Remove from the oven, let cool in the pan on a wire rack before removing and slicing. Bread will keep at room temp, tightly covered for 3-4 days or in the fridge for up to a week.
Sprinkle on some pepitas/pumpkin seeds if you want the ultimate Starbucks copycat pumpkin bread.
Add chocolate chips or chunks (2/3 cup to 1 cup) for pumpkin chocolate loaf.
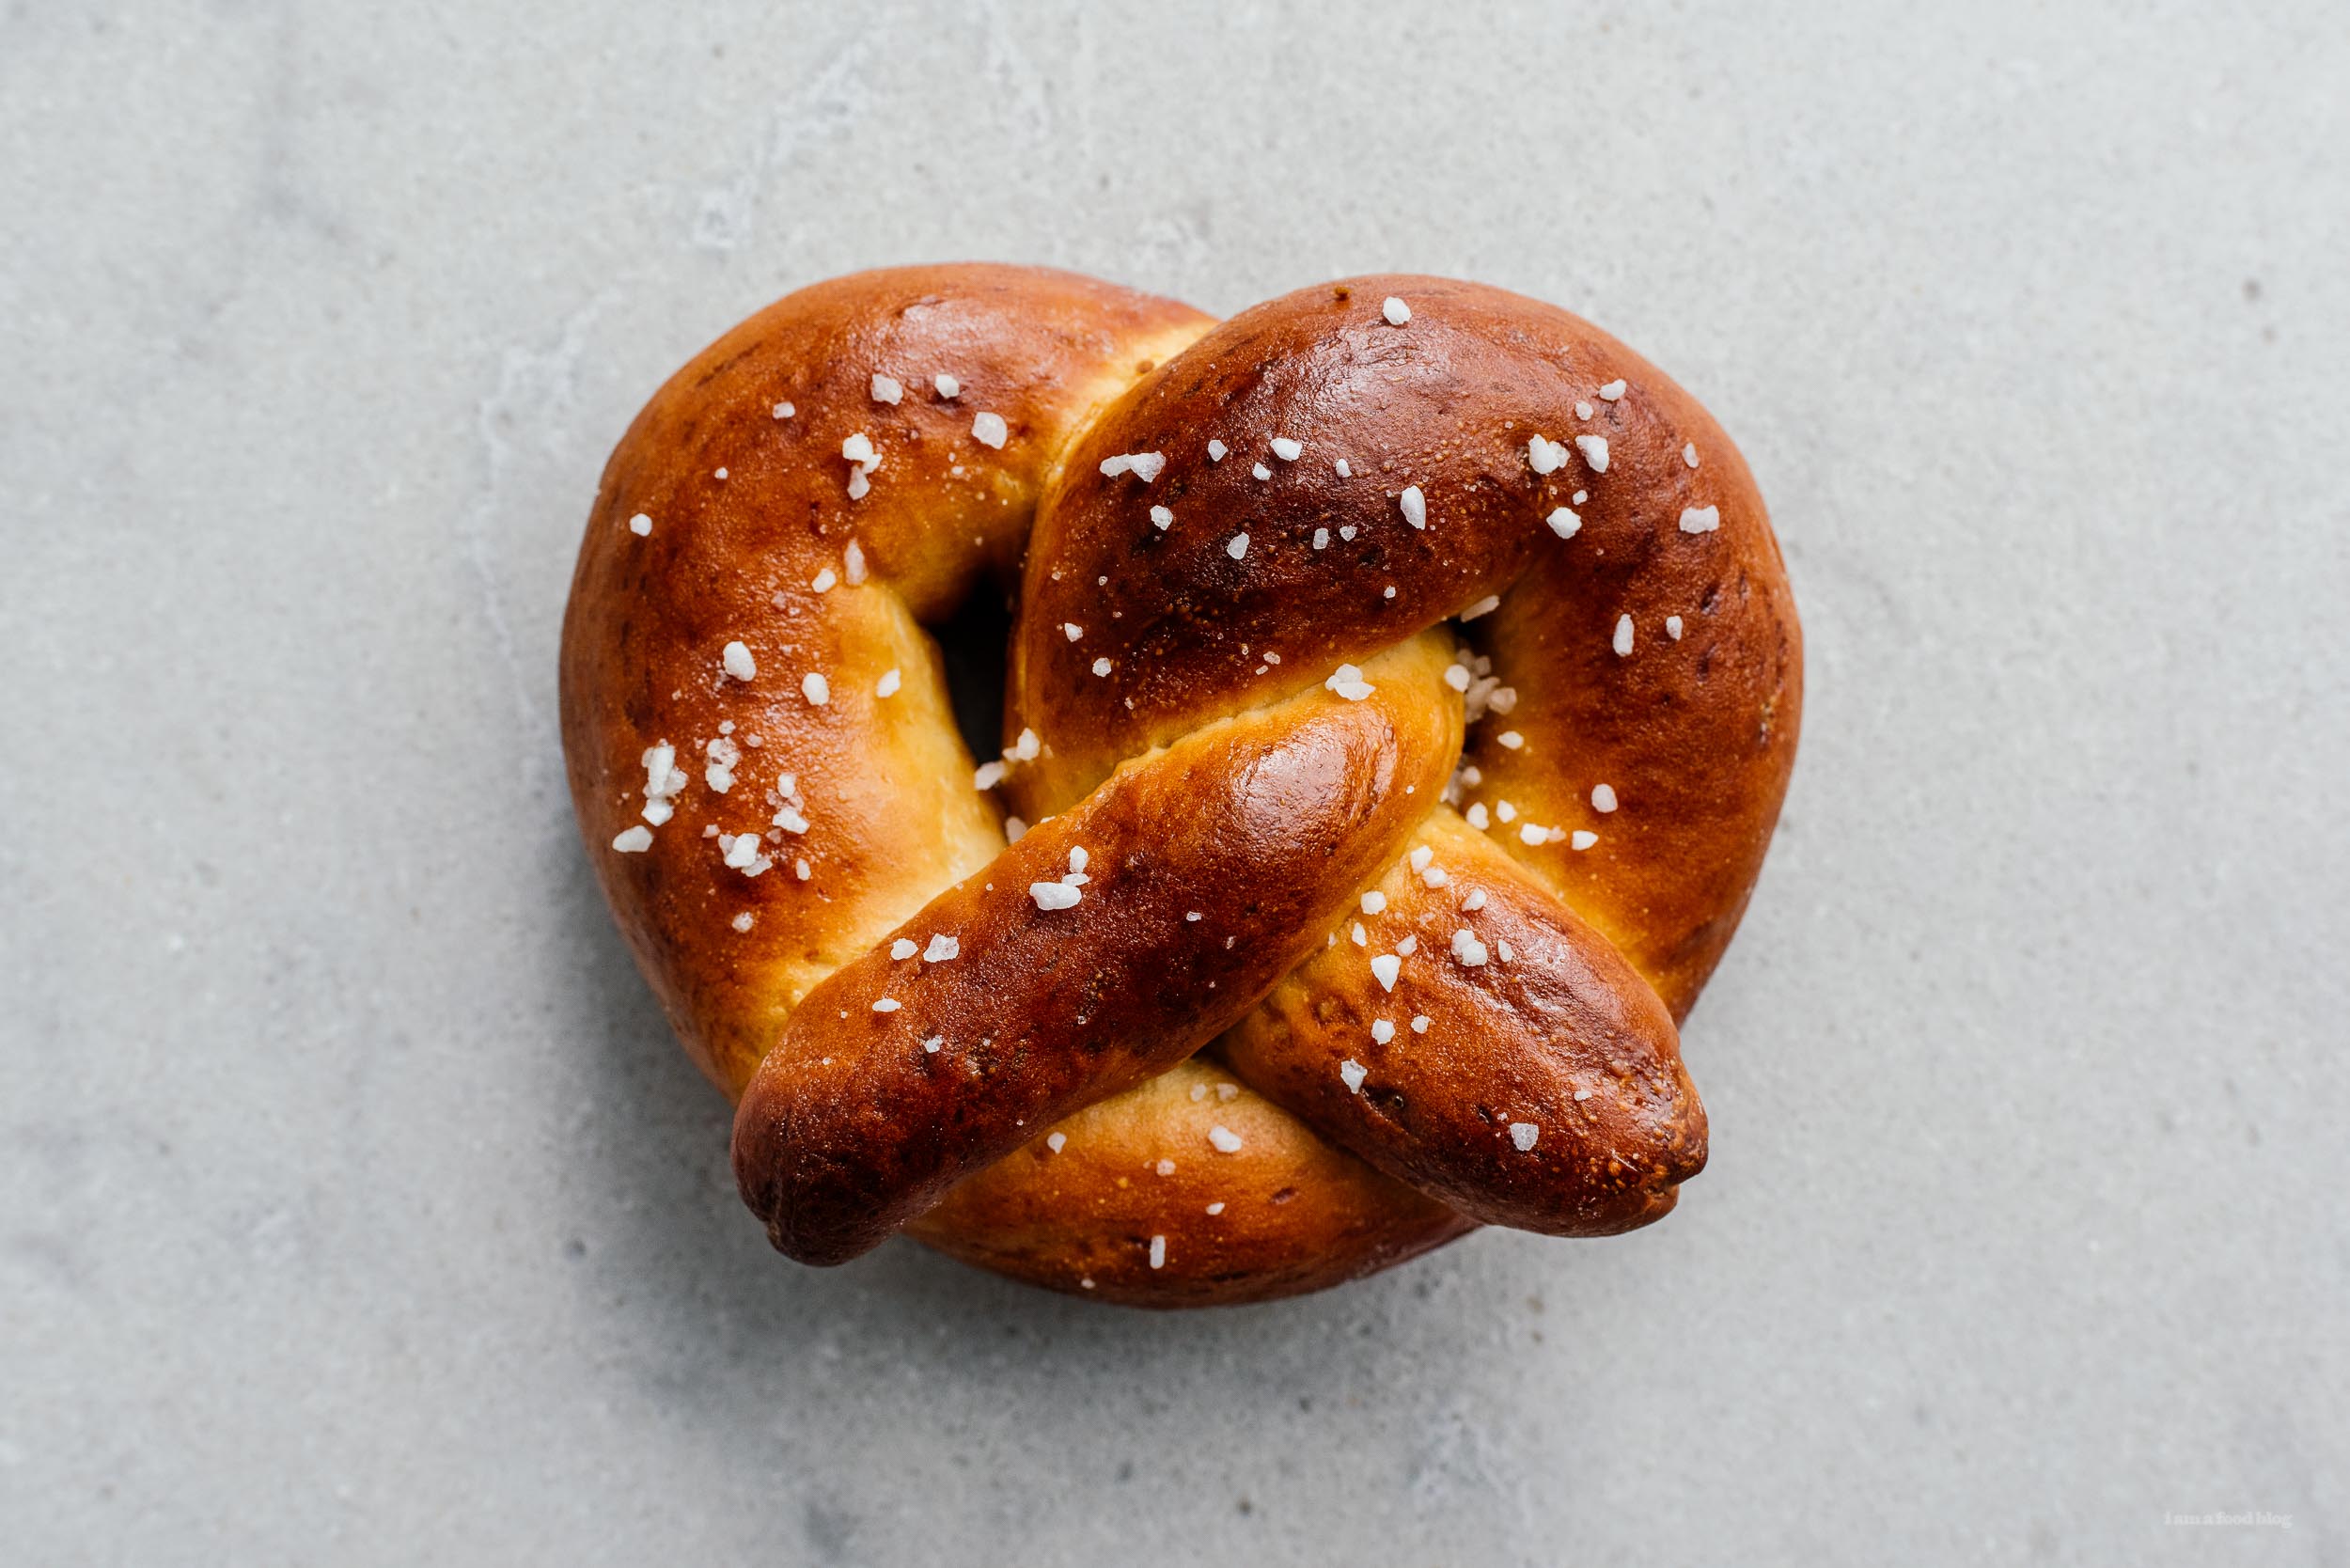
I Am... Pretzels
It’s Oktoberfest! Which is funny to me because it’s actually September, but I’m not one to argue with soft German pretzels, sausage, and beer. Okay, and truth is, it’s not September anymore. Anyway, I’ve never been to Munich, where Oktoberfest – the world’s largest beer festival – is held, but one day I’d like to because I have a huge soft (pretzel) shaped spot in my heart for Bavarian food. I especially like pretzels and weisswurst, which, in Germany, go together like bacon and eggs. Since we don’t have plans to be in Germany anytime soon (thanks covid ☹) we celebrated Oktoberfest at home this year, with homemade pretzels and weisswurst (not pictured). Making pretzels is no quick endeavor with that overnight rise but it’s totally worth it!
The truth is: making pretzels is dead easy.
Unlike some yeast doughs, this one comes together cleanly and smoothy, and rolls out like a charm. There’s beer in the dough too, which makes it doubly perfect for all of your Oktoberfest needs. The hardest part was not eating all of the pretzels in one go. Mike and I shared one, hot and fresh from the oven, then decided to go on a walk so we would be far away from temptation. But then I kind of sabotaged us by popping an extra one into a paper bag and putting it into my giant cardigan sweater pocket. Let me tell you, the smell of a fresh pretzel in your pocket will drive you crazy, in a good way. Thankfully, we were able to put ourselves out of our pretzel craving torture, by eating the pretzel, of course. There was something especially celebratory and fall-ish, walking around sharing a soft pretzel in that crisp autumn air.What are pretzels?
Pretzels are a traditional German bread shaped into a pretzel knot made from a long loop of dough that’s twisted back onto itself. All pretzels are given a lye/alkaline water bath that gives pretzels their signature shiny chewy crust and undeniable pretzel flavor. Pretzels come in hard (snacking pretzels) and soft, like these ones and the ones you find at the mall at Auntie Anne’s.What makes a pretzel a pretzel?
While there are many pretzel shaped foods out there (I’m looking at you tiny pretzel-shaped Danish butter cookies), what makes a pretzel a pretzel is the alkaline bath the unbaked pretzel takes before it is baked.Soft pretzel ingredients
If you’ve made bread before, you can make pretzels! The dough is made out of the same ingredients, plus a little special addition: beer. For these pretzels, you’ll need: instant yeast, water, brown sugar, bread flour, beer, butter, salt, baking soda, and an egg yolk. Easy peasy. I bet you have everything in your pantry right now. The beer adds an extra malty flavor, but if you don’t want to use it, just substitute water.How to make soft pretzels
This is a two day recipe – like sourdough, the pretzel dough hangs out and proofs in the fridge overnight so it develops some really nice flavors. If you can’t wait overnight, start your dough really, really in the morning, it’ll need to proof for 8 hours.- Activate the yeast: Stir together the yeast and sugar with warm water in your mixing bowl.
- Make your pretzel dough: Add the beer, butter, flour, and salt and knead until everything comes together into a smooth elastic dough.
- Rest. Move the dough to a large, lightly greased bowl, cover and let proof in the fridge for 8-24 hours.
- Shape: Divide the dough into 8 and shape into pretzels (see below).
- Proof. Let the pretzels double in size.
- Baked baking soda bath: In a large sauce pan, very carefully heat up the baked baking soda with water.
- Dip. Carefully dip the pretzels in the baking soda bath shake off the excess and place on a parchment paper lined baking sheet. Brush with an egg yolk wash and sprinkle with salt.
- Bake. Bake until beautifully brown and golden. Brush with butter if you want some extra shine and that delicious buttery flavor.
How to shape soft pretzels
Shaping soft pretzels seems complicated, but if you do it step-by-step it’s easier than pie!- Divide the dough up evenly, making sure to keep the dough you’re not working with covered so it doesn’t dry out
- Roll each piece of dough out into a log
- Roll each log out into a rope about 12-16 inches long, let it rest for a short bit, then roll it out into a rope 24-28 inches long
- Put the dough rope into a U-shape with the ends pointing up. Cross the ends once or twice, then bring them down towards the bottom of the U at 4 and 8 o’clock. Press down lightly. That’s it!
What is baked baking soda?
Traditional pretzels are dipped in a lye solution to help their skin firm up and give them their pretzel flavor, but since lye is almost impossible to get, the next best thing is baking soda that you bake. Baking baking soda in a low oven changes the alkaline levels, will makes it possible to get a much better dark, burnished pretzel-y crust. To bake baking soda: spread out 1/4 cup baking soda on a rimmed baking sheet lined with foil. Bake the baking soda for 1 hour in a 250°F oven. Let it cool completely before using. Use gloves when handling the baked baking soda.Do I have to do the baking soda bath?
If the baking soda bath step makes you nervous, you can skip it and just brush your pretzels with a baking soda wash. The baking soda bath will be even better if you used the baked baking soda mentioned above. The pretzels won’t taste as “pretzel-y” but they will still be good. To make the baking soda wash: mix together 1/4 cup warm water with 1 teaspoon baked baking soda – it will foam up. Stir until dissolved. Throughly brush the pretzels with the soda wash, twice, then let dry slightly. Brush on the egg yolk wash, sprinkle on the salt, and bake.Tips for the best soft pretzels
- use a mixer or knead by hand, it’s up to you
- mini pretzels are cute and you can eat more than one!
- brush/dip the hot pretzels in melted butter for that Auntie Anne’s finish
- always reheat your pretzels before eating for the ultimate pretzel experience: 5 minute in a 350° oven
- you can freeze them, just toast them in 350° oven for 10-15 min or until heated through
- make some beer cheese for dipping (see below for recipe)
- try some other toppings other than salt: everything bagel spice, poppy seeds, sesame seeds, even cinnamon sugar
- melt some cheese on top for a cheesy pretzel
Beer Cheese Recipe
To create the ultimate Oktoberfest snack, make sure to make some beer cheese for dipping: 1/4 cup butter 1/4 cup flour 1/2 tsp onion powder 1/2 tsp garlic powder 1 cup milk 2/3 cups beer, IPA, lager, or pilsner 1 tsp dijon 1 tsp Worcestershire 2 cups shredded cheddar 1 cup shredded gruyere- Melt the butter in a saucepan over medium heat. When warm, stir in the flour, onion powder, and garlic powder. Cook, stirring, for 1-2 minutes.
- Slowly drip in the milk while whisking, to ensure the mix is smooth.
- Slowly whisk in the beer.
- Bring to a simmer, stirring occasionally, until the sauce thickens and bubbles.
- Reduce the heat to low and stir in the dijon, Worcestershire, cheddar, and gruyere, until everything is smooth and melty.
- Enjoy with freshly baked pretzels!
Soft Pretzel Recipe
Traditional soft German pretzels for all your Oktoberfest needs (kneads!)
- 2.25 tsp active dry yeast (7g (1 standard packet))
- 1/2 cup warm water (~100º-115ºF)
- 1 tbsp tightly packed dark brown sugar (12.5g)
- 1/2 cup pilsner beer (or lager/beer of choice)
- 2 tbsp unsalted butter (room temp)
- 3.25 cups bread flour (420g)
- 2 tsp fine sea salt (12g)
- 1/4 cup baked baking soda (see notes)
- 1 egg yolk (beaten with 1 tbsp water)
- coarse salt (to finish)
Activate your yeast: Stir together water, yeast and sugar in the bowl of your stand mixer, then let stand for 5-7 minutes. The mixture should be foamy and bubbly.
Add the beer, butter, flour, and salt then knead using the dough hook on low speed until combined. Continue to knead on medium low until your dough is smooth and elastic, 5-7 minutes. The dough should be slightly tacky but not at all sticky. Place dough in a lightly greased large bowl and cover with plastic wrap. Let rise in the fridge for 8-24 hours.
Line two baking sheets with parchment paper and set aside. Turn the dough out on an unfloured work surface. For the next few steps, always keep the dough covered and work with 1 portion at a time.
Punch down to deflate and cut into 8 equal portions. Roll out each portion one at a time into into 12-16 inch long ropes by rolling with light pressure against the work surface with your palms from the center outwards. Keep the center thicker than the ends.
Go back to the first rope of dough and continue to roll each log out into 24-28 inch ropes.
Form the pretzels: position the rope into a U with the ends pointing away from you. Cross the ends over twice starting about three inches from the tips, then bring the ends down towards yourself and press into the U at 4 and 8 o’clock. Place the pretzels on the baking sheet about 1 inch apart, as you form them.
Let rise in a warm spot, until doubled (about 30 minutes) or in the refrigerator (up to 8 hours). Arrange the racks in your oven: one in the upper third and one in the lower third. Preheat to 500°F.
Add about 3 inches of hot tap water to a large pan or pot, then place over high heat to just below a boil. Add the baking soda and stir until dissolved, being careful not to splash it on yourself. Soak each pretzel one at a time into the baking soda water for 20 seconds, using a spoon to carefully spoon the water over the top.
Once each pretzel has been dipped, brush with an egg wash, top with coarse sea salt, and immediately bake until the pretzels are deep mahogany, 8-12 minutes, rotating the pans half way through, front to back, top to bottom. Cool slightly and enjoy!
Make sure you don’t use an aluminum, copper, or nonstick pan for the baking soda step.
Inspired by Andrea Slonecker.

I Am... 55 Best Fall Recipes
We’ve had two days of rain and all of a sudden I am in FALL MODE. I just said to Mike, it’s time for all the fall recipes! He reminded me that next week’s forecast is for the high 90s but heck, fall food is my favorite so I decided to do a fall recipe round up to get hype for fall. Fall is absolutely my all time favorite season. I love the crisp coldness in the air, I love the colors of leaves and I just love how everything you make and eat gives you a warm and cozy feeling. Here are my favorite fall recipes! These 55 best fall dinners will satisfy your cravings for cozy comfort food. Let’s stay in tonight!
Fall chicken recipes
Chicken is fast and comforting, perfect for those days when you spend a little too long peeping leaves.- Honey garlic chicken. This is the best 5 ingredient back pocket recipe. Sweet and sticky savory chicken in no time flat.
- Coconut chicken curry. This is the most authentic Malaysian curry you’ll get now that travel is a thing of the past. Slightly spicy, coconutty, and so comforting.
- Ruby chicken. If you’re looking to turn up the heat, this spicy, sweet, savory chicken curry is for you. The fresh ginger at the end is just *chef’s kiss* (pictured above)
- Creamy dijon mustard chicken. This is a one pan meal that is comforting, quick, and tasty. Mushrooms and kale for health and cream for that extra bit of warm comfort.
- 3 cup chicken. If you haven’t had 3 cup chicken this is a sign to do it! It’s saucy, savory and and so good, especially with fluffy rice. We use wings because it’s fast and easy.
- Chicken paprikash. This oven baked chicken paprikash is pure comfort food heaven, especially when served over egg noodles. Tomato-y, saucy, and full of so much flavor.
- Butter chicken. Butter chicken might be my ultimate fall meal: so saucy, creamy, and comforting, especially with basmati and homemade naan. Bonus: this guy is an instant pot recipe, super easy!
And pork recipes
There’s something very fall about pork as a protein. I think it’s because pork makes me think of apple sauce which makes me think of fall!- Army stew. I just love making a huge pot of army stew and gathering around the table, eating and drinking the night away with my favorite people. Hearty, comforting, spicy, and just about the easiest meal to make.
- Piri piri meatballs. These meatballs have a spicy piri piri sauce with sour cream for a cooling, creamy contrast. They’re baked which makes them extra juicy and hands off.
- Pork chop adobo. Pork chops are the best dinner food: fast, tasty, and easy. These chops simmer adobo style in soy sauce, garlic, and lemon juice. Sweet and savory, low prep for high reward.
- Bourbon black bean pork belly. Braised pork belly is super a super comforting mix of meatiness and tender bits. Black bean sauce and bourbon add bold flavors making this a winner, winner, fall dinner.
- Pork tenderloin. Super juicy and soft and tender, this tenderloin only takes 30 minutes to whip up. The green sauce it’s served with is zingy and full of parmesan and fennel.
- Oven baked tonkatsu. Sometimes you just want crunch but don’t want to break out the deep fry oil. For those times, this oven baked tonkatsu is for you. Mostly hands off and super crunchy. Serve it with Japanese curry for a fall meal to remember. (pictured above)
- Soboro donburi. If you have had soboro donburi, you’re in for a treat. It’s a quick and comforting rice bowl topped off with sweet and savory pork and tiny fuffy scrambled eggs. Anything out of a bowl is better.
Fall beef recipes
Is there anything more hearty or filling than beef? Super savory, super cozy flavors.- Korean BBQ. The weather is getting chillier and that means more time at home eating. Why not throw a KBBQ feast? Sweet, savory, smoky meats and banchan all in the comfort of your own home. (pictured above)
- Super easy osso buco. This osso buco is beef shank instead of veal and is so incredibly luxurious and easy. Only 6 ingredients to a crave inducing Italian meal.
- Salisbury steak. Old school Salisbury steak for all the fall feels. Tender, juicy beef patties swimming in a rich mushroom gravy is the coziest.
- Crockpot Vietnamese beef stew. This is a little twist on your regular crockpot beef stew. Still tender and full of chunks of beef, carrots, and potatoes but with a ultra warm spice mix. The smell will drive you nuts in a good way.
- Steak Diane. If you love steak but you’re tired of just salt and pepper or steak spice, Steak Dianne is perfect. It’s like mushrooms and peppercorn sauce in one and it’s so good you’ll want to drink it.
- Swedish meatballs. I can’t think of anything cozier than a plate of meatballs smothered in gravy with creamy mashed potatoes. Swedish comfort food at its best.
Fall one pot recipes
One pot recipes because you don’t have time to cook, it’s fall!- Hainanese chicken rice. The ultimate chicken and rice dish. So few ingredients, so much flavor. Everyone who makes this dish raves about it! (pictured above)
- Baked feta pasta. This has got to be the easiest pasta dish in the world. Fall might not be classic tomato season, but this is cheesy, comforting, warm, and SO good. Baked feta pasta is here to stay.
- Chinese sticky rice. Sweet and savory sticky rice studded with juicy pieces of chicken, Chinese sausage, and tender mushrooms. If you’re craving for a stick to your ribs meal that will warm you from the inside out this is the one to make. It’s a bit of a time investment but so worth it - the perfect weekend cooking project!
- Instant pot pasta and meatballs. I love the instant pot because you can pop everything in, set it and forget it. This meatball and pasta dish is perfect for for making when you get home from work. All the ingredients go right in the pot, including raw pasta. The instant pot does its thing and in no time you have saucy, savory pasta and meatballs.
Fall pasta recipes
Why fall is the best: because it means ALL THE CARBS. Fall pasta is the best pasta, am I right?- Pumpkin sage lasagna roll ups. Pumpkin season is upon us and these pumpkin roll ups are always on the menu every fall. I love the sweetness of the pumpkin and the taste of sage together. It’s a great special fall meal.
- Velveeta mac and cheese. Could this be the best mac and cheese ever? Everyone who cooks it thinks so and I do too. It’s so incredibly creamy and flavorful. I feel like I could live on Velveeta mac and cheese forever and ever. (pictured above)
- Chicken spaghetti. This is a one pan meal full of tender chicken, tomatoes, bell peppers, and onions. It’s creamy, comforting and the best part are the leftovers.
- Bolognese. The ultimate pasta sauce for fall (or any time really). Our bolognese is slow simmered for a silky, smooth, deep, full bodied sauce, perfect with dried pasta, or if you’re going all out, freshly made egg pasta.
- Creamy chicken alfredo. Juicy pieces of chicken in a smooth and creamy, extra cheesy alfredo sauce. So incredibly easy to make because it’s an Instant Pot recipe!
- Honeynut garlicky pasta. Honeynut squash are the cutest fall squash around but they aren’t just a cute face, they taste excellent too, especially when paired with a creamy garlicky sauce, pasta, and hearty greens.
- Creamy pumpkin mac and cheese. Pumpkin mac and cheese just screams fall. It’s pumpkin spice and all things nice in a savory mac and cheese format. One pot, extra creamy stove top mac and cheese, no pasta draining needed.
Fall soup recipes
Is it even fall if you don’t soup? Soup is the best, meal prep it and you have instant comfort all week long.- Secret ingredient cabbage soup. Cabbage soup isn’t always thought of as sexy but this cabbage soup sure is hot! It has a secret ingredient and it’s AMAZING. Make a big pot and enjoy it while it lasts.
- Creamy comforting potato soup. Like a baked potato but in a bowl and super creamy and comforting. Potato soup is stick to your ribs filling and this one has all the good stuff plus white miso for extra oomph and umami.
- Chicken tortilla soup. A warm and savory broth-y soup with chunks of chicken, crunchy strips of tortilla, cheese, sour cream, and avocado. It warms you up with a little bit of spice and it comes together in just 15 minutes. (pictured above)
- Chili. This chili has no beans because it’s Texan style, a chili con carne that’s hearty, spicy, and just perfect topped with sour cream, shredded cheese, and scallions. Two dumps of chili spices because that’s what makes it so flavorful!
- Lasagna soup. It’s lasagna, but in soup form! It has all the best parts of lasagna: noodles, cheese, meat, and a tangy tomato based soup. It’s way faster than layering a lasagna but you get all the flavor.
- Chicken congee. Chicken congee is the best base - it’s so creamy and comforting and it goes with anything. Make a huge pot and enjoy it with side dishes or on it’s own, it’s a simple dish that will fill you right up.
- Coconut curry chickpea stew. Super fast, fresh, and easy with a ton of flavor and protein from the chickpeas and kale. Plus, it’s a beautiful golden fall forward bowl of prettiness that tastes good too!
- Spicy kimchi soft tofu stew. Super soft and tender tofu with slices of pork belly in a spicy heart warming stew. The perfect fall food.
Fall Noodle Soups
Fall was made for slurping up steaming hot bowls of noodles. Double these recipes and you’ll be warm all season long.
- Pho. Full of comforting spices, slippery noodles, tender beef, and a rich, yet light broth, pho is perfect for warming up. It’s easier to make than you think, you just need to follow a few key steps! Read all about the most authentic pho you can make at home right here.
- Mayo ramen. This mayo ramen is here to stay: it’s easy, it’s rich, it’s almost just as good as heading out to a tonkotsu ramen shop. Let’s face it, it’s not 100% the same, but when it’s 4 in the morning and you’re craving ramen, mayo ramen is here for you. (pictured above)
- Wonton soup. If you’re looking for a bowl of fall comfort, you’ll find it in this wonton soup. Tender little pork meatballs wrapped in wonton wrappers floating in a light and tasty broth is my idea of heaven. Make big batch of wonton, freeze them, and have wonton soup anytime a craving hits.
- Hot pot at home. The best way to hang out in the fall is to gather your core people around you and have a little hot pot party. Mike and I do this all the time. We set up a little pot in the middle of the table, get all the Chinese hot pot materials and cook and chat the night away. It’s the best!
- Khao soi. A warm coconut curry noodle soup that will fill you up quick. The key to this recipe is using red curry paste - it’s a little cheat that makes your khao soi taste amazing and come together quickly.
- Sesame noodles. A fast and easy noodle dish that is way better than takeout and a little more grown up than peanut butter noodles. You only need 7 ingredients and about 5 minutes for these super slurpable noodles.
Fall vegetarian recipes
These cozy fall vegetarian recipes will fill you up and make you feel good.- Tteokbokki. These spicy korean rice cakes are just what I want to eat when the weather starts getting a little chilly: spicy carb-y, saucy food. The cook up quick and are so snacky. I love them with melted cheese on top too! (pictured above)
- Risotto. The creamiest of all the rices! Risotto is best in fall when you can hang out by the stove, stir, and breathe in all the delicious smells as your cooking. This risotto is so incredibly rich and flavorful, thanks to wild mushrooms and garlic.
- The best baked potatoes. Who says baked potatoes aren’t a meal? If you’ve had an excellent baked potato, you know, it’s even better than steak! Crispy, salty skins, fluffy insides, and piping hot so the butter melts right in to all the nooks and crannies. My favorite topping is broccoli and cheese :)
- Honeynut squash. Is it even fall if you don’t roast some squash? Honeynut squash is better than butternut - it’s just the right size, the skins are edible, and it is super sweet and tasty. Roast some up and serve them with pickled shallots, honey roasted walnuts, and a cooling cucumber yogurt sauce.
- Umami bomb tomato pasta. All you need are four pantry ingredients and a package of noodles for the coziest plate of pasta. This sauce is amazing - it’s crazy how much flavor you get.
- Spicy Korean ramen with tofu. If you love spice, this Korean ramen with tofu is for you. It’s a quick vegetarian kimchi stew recipe with noodles, tofu, and all the veggies so you can clean out your fridge. Super comforting and cozy.

I Am... Green Chile Sauce
Green chile sauce, along with red, are the backbones of New Mexican cuisine. The two flavorful chile sauces are used liberally, smothering and infusing all sorts of New Mexican dishes. If you’ve ever been to New Mexico, you’re familiar with the refrain: red, green or Christmas. They’re asking: red chile, green chile, or both? In the land of enchantment, there’s no wrong answer because red and green are both delicious. And, both sauces together, well, it’s the best of both worlds.
What is green chile?
Green chile is green chile sauce, although sometimes people call green chile peppers “green chile” as well. Note, it’s spelled “chile” as per the state constitution. Green chile can refer to green chile sauce, Hatch green chiles, or New Mexico green chiles.What is green chile sauce?
It’s a sauce created from roasted, unripened, fresh green chile pods. You roast fresh green chiles, peel off the skins, then chop and cook them into a sauce with onion, garlic, and stock (or water). There’s a bit of optional flour added as a thickener as well. It’s smoky, savory, and delicious!How to make green chile sauce
It’s incredibly easy for a huge flavor pay off.- Roast. Start off by roasting your green chiles. Place washed, dry peppers on a baking sheet and roast them in the oven until blistered. Place the hot peppers in a heat proof container with a lid and let them sweat so you can remove their skins. Read more about roasting peppers.
- Peel. Gently rub off the skins, trim off the stems, and deseeded and de-rib the chiles.
- Chop. Chop up the deseeded chiles in either a rough chop or fine dice, depending on what kind of texture you want your final sauce to have. Most green chile sauces have a 1/4 inch dice, but since you’re making your own, you can customize the size of the chopped chile.
- Sauté. Sauce diced onions in butter until soft, then sprinkle on flour and stir to cook and coat the onions. Mix in the chopped chile. Add the stock. Slowly stream in the chicken stock (or vegetable stock or water) while stirring.
- Simmer. Bring the sauce to a gentle simmer, stirring occasionally, until it thickens to your liking. Taste and season with salt and pepper then enjoy!
What are the best green chiles?
Hatch of course! They’re buttery, crisp, smoky, with just a hint of sweetness. Plus they come in mild to very hot so there’s a spice level for everyone. They’re famous for a reason and almost all of the green chile sauce in New Mexico contains Hatch grown green chiles. If you can’t get your hands on Hatch green chiles, try Anaheims.What can you make with green chile sauce?
- green chile chicken enchiladas
- green chile cheeseburgers
- chilaquiles
- green chile wonton
- chile rellenos
- green chile mac and cheese
- green chile chicken stew
- huevos rancheros
- green chile pork stew
- smothered burritos
- green chile cheese fries
- green chile tostadas
Green Chile Sauce
The greatest everything sauce: smoky, savory, and delicious.
- 2 tbsp butter
- 1 medium onion (finely diced)
- 3 cloves garlic (minced)
- 1 tbsp all purpose flour
- 1.5 cups green chile (roasted and chopped)
- 2 cups chicken stock (low sodium recommended)
In a saucepan, melt the butter over medium heat. Add the onion and garlic and cook until soft, but not brown, stirring occasionally, about 5 minutes.
Stir in the flour and cook for another 1-2 minutes, until the flour coats the onions.
Mix in the chile and immediately slowly stream in the chicken stock, stirring as you go.
Bring to a simmer and reduce the sauce for about 15 minutes, until slightly thick. Taste and season with salt and pepper. Use to smother anything and everything or in your favorite recipes with green chile sauce.

I Am... Chile Relleno
Cutting into a crispy chile relleno and having the melty cheese ooze out is a sure fire way to get your appetite going. It’s the ultimate comfort food: crispy, cheesy, saucy, with a little bit of heat to keep you going back for more. It’s even better when you cut off a bit and wrap it into a little fluffy tortilla blanket with beans for a chile relleno taco. I’m drooling…
What is chile relleno?
Chile relleno is Spanish for stuffed chile. Any stuffed chile can be a chile relleno but when most people think of them, they’re referring to a battered, deep-fried, roasted chile stuffed with meat or cheese served with warm sauce. If you want to go really deep, jalapeño poppers are a kind of chile relleno too!Are chile relleno Mexican or Tex-Mex?
They’re both! Chile relleno is a classic Mexican dish that originated in Puebla. In Mexico, chile relleno started life as a roasted green chile stuffed with meat, coated with batter, and deep fried. In the Southwest and New Mexico, chile relleno are usually made with roasted New Mexican green chiles stuffed with cheese, coated with an egg batter, then fried. Both are incredibly delicious. They can be meat or vegetarian and are incredibly customizable.How to make chile relleno
To be honest, making chile relleno is a journey. I think that’s why most people just like to eat them at restaurants and call it a day. But if you take the time and effort to make them at home, there’s so much happiness and satisfaction in frying up a completely customized chile relleno and enjoying it your way. Here’s how to do it:Roast the peppers
Place washed, dry peppers on a baking sheet and roast them in the oven until blistered. Place the hot peppers in a heat proof container with a lid and let them sweat so you can remove their skins. Read more about roasting peppers here.Make the sauce
Meanwhile, while the peppers are roasting, make your ranchero sauce by blending fired roasted tomatoes, roasted green chiles, onions, garlic, stock, oregano, and cumin. When the sauce is smooth, pour it into a sauce pan and let it simmer and reduce, concentrating the flavors and bringing out the sweetness of the tomatoes. Keep covered and warm on low.Stuff the peppers
By this time your peppers should have sweated and be cool enough to handle. Peel the peppers, gently rubbing off the blistered skins, keeping the peppers whole and intact. Cut open one side of the pepper. Seed if desired, then stuff the pepper with cheese, sealing it up with a toothpick to keep the cheese inside.Heat the oil
Heat 1-2 inches of oil a deep, heavy bottomed skillet over medium low heat.Make the batter
Separate the eggs: whites in one bowl and yolks in another. Use a mixer to beat the egg whites into stiff peaks. Whisk the egg yolks, then gently mix into the whites.Test the oil
Before you batter the peppers, make sure your oil is hot and ready. Turn the heat up to medium high and drop in a tiny bit of the egg batter. If the batter sizzles and floats to the top, it’s ready and it’s time to batter your peppers.Flour the peppers
Dip the stuffed peppers into flour, coating evenly all over, shaking off the excess. Batter the peppers. Dip the floured pepper into the batter, letting the excess drip off.Fry the peppers
Carefully add the pepper to the pan and fry for 1-2 minutes or until golden and crisp, flipping once. You can batter and fry more than one pepper at once, but be sure to not crowd the pan. Remove peppers that when golden and let drain on a wire rack while preparing the other peppers.Enjoy!
Spoon up some warm ranchero sauce onto a plate, place a relleno on top, finish with some cilantro, dig in and enjoy!The best chiles for chile relleno
- Hatch chiles - the ideal green chile for stuffing, it’s large, slim, and comes in everything from mild to hot. Hatch chiles are buttery, smoky, and delicious.
- Anaheim chiles - these are a great choice! They look very similar to Hatch because they’re green and slim. They’re mild in flavor and heat.
- Poblano chiles - the original chile for rellenos, poblanos are a large and wide, perfect for stuffing. They have a bit more heat compared to Anaheims, but can range from mild to spicy depending on how long they’ve ripened on the vine.
Do you need to seed the chiles?
It’s entirely up to you. If you like a bit of spice, leave the seeds and membrane inside the chile intact. If you want a milder relleno, carefully remove the seeds and membrane.Chile relleno sauce
There are a couple of different sauces you can go with for chile relleno. You can even use warmed up store bought salsa or enchilada sauce, it’s completely up to you. We serve ours with whichever sauce happens to be in the fridge. Just the other day we had an amazing green chile rellenos with pork chile verde. It was over the top green on green and amazing. Our go to sauce is ranchero sauce (aka ranchera sauce).- Ranchero sauce - this is the sauce you’ll most likely see when you order relleno at a Mexican restaurant in America. It’s a warm tomato sauce seasoned with onion, green chile, garlic, and cumin. It’s a bit smoky, mild, and delicious.
- Green chile sauce - A classic New Mexico sauce, green chile sauce uses roasted green chiles, onions, garlic, stock, and spices. It’s simmered with a bit of flour to thicken.
- Red chile sauce - The other classic New Mexican sauce, red chile uses dried red chiles, onions, garlic, and spices. It’s essentially what you might think of as enchilada sauce, the softened dried peppers and aromatics blendwith stock or water so it becomes smooth and velvety.
What kind of cheese
You can either use shredded or whole cheese that you cut into sticks to fit inside your peppers, both work. Here are some cheeses that melt well and are amazing in chile relleno:- Oaxaca - this is the string cheese of Mexico. It melts wonderfully and is perfect for relleno.
- Manchego - melty and mild in flavor.
- Chihuahua - from the state of Chihuahua, this cheese is similar to cheddar and likewise just as meltable.
- Asadero - a very melty, mild, white, creamy cheese.
- Monterey Jack - mild, soft, and great for melting.
How to serve
Spoon some warm sauce onto a plate. Add your crispy hot chile relleno. Top with a bit of chopped cilantro and crumbled queso fresco.Sides
If you want to make a chile relleno plate, serve it with Mexican rice, refried beans, shredded lettuce, guacamole, and some warm tortillas. Happy stuffing! xoxo stephChile Relleno Recipe
A deep-fried, crisp pepper filled with gooey cheese served with classic ranchero sauce.
- 4 large chile (Hatch or poblano preferred)
- 6 oz Oaxaca cheese
- 1/4 medium onion (chopped)
- 14.5 oz fire roasted tomatoes (~1 can)
- 1/2 cup chicken stock (or vegetable stock, no salt added preferred)
- 1 tsp oregano (Mexican preferred)
- 1/2 tsp ground cumin
- 2 large eggs (separated)
- 1/2 cup all purpose flour
- neutral oil (for frying)
- 2 tbsp fresh cilantro (chopped, optional)
- 2 tbsp queso fresco (crumbled, optional)
Lighty rub the chiles with a tiny bit of neutral oil and place on a rimmed baking sheet. Arrange your oven rack the highest it can go. Place the peppers in the oven and broil at 550°F for 4-8 minutes, flip, then roast for another 4-8 minutes. You want the peppers blistered, but not completely burnt. Remove the chiles from the oven and place in a heat proof container. Cover and let sweat for 10-15 minutes or until cool to the touch. Gently rub/slide off the skins.
Make a small slit and deseed if desired. Save one pepper for the ranchero sauce and stuff the remaining peppers by gently placing the cheese inside. Use toothpicks to seal them.
Combine the fire roasted tomatoes, chicken stock, oregano, cumin, and 1 of the roasted green peppers in a blender and blend until smooth.
Pour the sauce into a sauce pan and simmer over low heat, stirring occasionally, until the sauce has deepened in color and flavor. Keep warm while prepping and cooking the chile rellenos.
Make the batter: Separate the eggs into two bowls. Use a mixer to beat the whites into stiff peaks. Whisk the yolks then gently fold them into the egg whites.
Heat 1-2 inches of oil a deep, heavy bottomed skillet over medium hight heat to 350°F. If you don’t have a thermometer, make sure the oil is hot by adding a small dot of egg batter. If it sizzles and floats to the top, it’s hot.
Place the flour in a shallow bowl and gently coat the stuffed peppers, making sure they are completely floured. The flour will help the egg batter stick to the pepper.
Gently dip the floured pepper into the egg batter and immediately place into the hot oil. Repeat with another pepper. Fry for 1-2 minutes per side, or until golden and crisp, flipping once. Remove from the oil when golden and let drain on wire rack or paper towels. Repeat with the remaining peppers, cooking them in batches so the oil doesn’t loose too much heat.
To serve, spoon some warm ranchero sauce onto a plate and top with the crispy relleno. Finish with chopped cilantro and crumbled queso fresco if desired. Enjoy!

I Am... Homemade Salsa Verde
Homemade salsa verde and chips taste so much better than store bought! Homemade salsa verde has got to be one of the most versatile sauces out there. You can use it to enhance breakfast, lunch, or dinner and it’s the base of so many delicious dishes. Who doesn’t love green salsa?! I always, always go for salsa verde when presented with the choice of red or green. I just love the herbaceous brightness of it.
What is salsa verde?
There are so many kinds of salsa out there. After all, salsa means sauce and there are so many kinds of sauce out there. But, I must say, the three most common are salsa roja (red), salsa verde (green), and salsa fresca/pico de gallo (fresh). Today we’re talking about salsa verde, or green salsa. Salsa verde is a salsa made using tomatillos, a type of nightshade that looks like a green tomato, but isn’t.How to make salsa verde
This is one of the easiest salsas to make - there’s virtually no chopping. All you need to do is prep, roast, blend, and enjoy.- Prep the tomatillos and aromatics. Remove the husks from the tomatillos and give them a rinse so they’re not sticky. Pat them dry. Wash and dry your green chiles. Lightly coat the tomatillos and chiles with a neutral oil and place them on a baking sheet.
- Roast the tomatillos and peppers in the oven until soft and caramelized. Stem the peppers in a bowl with a lid and then remove the skins.
- Pop the tomatillos, peppers, onion, garlic, cilantro, garlic, and lime juice in a blender and pulse.
- Taste, season with salt and enjoy!
Is salsa verde spicy?
The beauty of salsa verde – and all salsas, really – is that you can make them as spicy or mild as you want by adjusting the amount of chiles you put in them. If you want a bit of spice but not too much heat, be sure to remove the ribs and pith (the white parts inside the pepper), that’s where most of the spice is. This salsa verde is completely customizable because you’re going to chose which green chile peppers you want to use.Which peppers for salsa verde?
Personally we LOVE Hatch chile salsa verde the smokiness of Hatch chiles pairs perfectly with tomatillos. You can also use jalapeños, poblanos, serrano, or Anaheim. From spiciest to mildest, it goes: 🔥🔥🔥🔥🔥 Hatch (they go from mild to extra hot) 🔥🔥🔥🔥 Serrano 🔥🔥🔥 Jalapeño 🔥🔥 Poblano 🔥 AnaheimWhat are tomatillos?
Tomatillos are a staple in Mexican cooking. They come covered in a papery husk on the outside with a firm round green fruit on the inside. Eaten raw and cooked, they’re used in a variety of dishes, most well known in salsa verde. They’re also used in stews, soups, and other sauces. Tomatillos have a sweet and tangy, earthy, and slightly acidic. They’re perfect for salsa.How to choose tomatillos
Choose bright green tomatillos with an tight, intact green husk that covers the fruit with just the bottom of the husk slightly split open. Tomatillos should be firm. Smaller tomatillos tend to be more ripe and sweet. You can find tomatillos in the grocery store, usually near the jalapeños.How to prep tomatillos
Remove the papery husks by pulling them away from the fruit and twisting at the stem. Rinse them under cool water until they’re no longer sticky. Pat them dry and they’re ready to use.Do you need to remove the skins from tomatillos?
Nope! The skins on tomatillos are thin and edible so you don’t need to peel them. Just be sure to remove the husks.How to roast tomatillos in the oven
- Preheat the broiler.
- Prep the tomatillos by removing the papery husks, rinsing, and drying well.
- Lightly coat the tomatillos in oil.
- Place on a parchment or foil lined baking sheet and broil for 10-15 minutes until soft and lightly blackened, flipping as needed.
How to pan-roast tomatillos on the stove
- Prep the tomatillos by removing the papery husks, rinsing, and drying well.
- Heat a heavy bottom skillet over high heat.
- Add a touch of oil to the skillet and add the tomatillos and sear over high heat, flipping as needed, until the tomatillos are soft and lightly blistered.
How to air fry tomatillos
De-husk, wash, and dry the tomatillos. Cut them in half and add to a parchment paper or foil lined basket of your air fryer. Air fry at 400°F for 10 minutes or until brown and lightly blistered.What to do with salsa verde
- enjoy them with homemade tortilla chips
- make chili verde
- make enchiladas
- use as salsa for tacos
- make green chilaquiles
- enjoy on top of cilantro lime rice
- make hot honey chicken
- have it with nachos
Tomatillo Salsa Verde
Who doesn’t love green salsa?
- 1 lb tomatillos (dehusked and cleaned)
- 2 green chiles (of choice)
- 1/4 onion (chopped)
- 3 cloves garlic
- 1 cup fresh cilantro (roughly chopped)
- 1/2 lime (juice only)
Set your oven to broil. Remove the outer casings from the tomatillos. Wash and throughly dry the tomatillos and green chiles.
Lightly coat the chiles and tomatillos with a neutral oil and place them in a roasting dish. Roast for 10-15 minutes or until the tomatillos are soft and the peppers are blistered, flipping as needed.
Carefully move the chiles to a bowl and cover with a plate or plastic wrap to let steam for 10 minutes. Rub the skins off the peppers, stem and seed (if you want a less spicy salsa).
Place the peppers, with the roasted tomatillos, onion, garlic, and cilantro into a blender. Purée, taste, and season with salt.
Enjoy!

I Am... Cilantro Lime Rice
If you’re anything like me, you love cilantro lime rice. Along with tasting amazing on its own, it goes with everything and is a great side dish. If you’ve ever had the Chipotle cilantro lime rice, you know how addictive it is. It can go in burritos, in bowls, or on a combination plate. The best part about this recipe is that it comes together so easily. It’s definitely perfect for a weeknight dinner or meal prep. I think of cilantro lime rice as the bright, tart, refreshing cousin to arroz rojo or tomato tinged Mexican rice. If you’re a rice lover, you’ll want to make this recipe, stat.
What is cilantro lime rice?
Cilantro lime rice is fluffy long grain rice with cilantro and lime. It sounds simple, but like all delicious and good recipes, the dish is so much more than the parts. Cilantro lime rice is fresh and bright, fluffy, and full of herby cilantro flavor. It goes especially well with Mexican food and surprisingly great with Asian food too!The secret to making amazing cilantro lime rice
There are 3 secrets to making amazing cilantro lime rice:- First, toast the rice. Cooking raw rice in a bit of butter or olive oil brings out a bit of nuttiness. Toasting adds an especially deeper rice flavor.
- Second, use fresh limes. Use fresh limes for the lime juice and don’t forget the zest. Cooking the rice with lime zest lets the lime oil infuse the rice. Moreover, fresh juice adds just the right amount of tart.
- Third, add a bay leaf. A bay leaf adds a rich flavor to classic Mexican dishes. If you have them, use a Mexican bay leaf, otherwise, any bay leaf will work instead. Most recipes for cilantro lime rice skip out on this crucial step. Without a doubt, don’t sleep on the bay leaf - it’s what makes this homemade cilantro lime rice stand out from the rest.
Cilantro lime rice ingredients
- rice: classic long grain white rice is what is best - it’s fluffy and loose. You can get American long grain white rice, Jasmine, or basmati. I prefer American long grain white rice for this dish. More on rice choice below.
- neutral oil or butter: we’re going to toast the grains of rice to make them taste slightly nutty and even more like rice. You can use butter for a slightly richer taste or a neutral oil.
- bay leaves: Mexican bay leaves (pictured below) are indispensable to Mexican food. They add a mild avocado herby flavor and are that “can’t quite put your finger on it flavor” that gives well made Mexican food its authentic flavor. Mexican bay leaves are slightly more mellow than your classic American bay leaf. You can buy Mexican bay leaves in the Mexican aisle at the grocery store or online.
- lime juice and zest: fresh is best and we’re going to use both the zest and juice for the ultimate bright and fresh lime flavor.
- cilantro: fresh green flecks of cilantro add a huge hit of herbaceous flavor. We’re going for maximum cilantro flavor with 1/2 cup of loosely packed, freshly chopped leaves and tender stems.
- salt: you need salt to bring out the flavors of the rice, lime, and cilantro. I start with 1/4 teaspoon when cooking, then taste and as more if needed. Everyone’s salt preference is different, so make sure to season to taste.
- bonus: if you’re not vegetarian, use a low sodium chicken stock to cook your rice instead of water. It will infuse each grain of rice with a light chicken flavor.
How to make cilantro lime rice
- Rinse. The key to fluffy, distinct grains of rice is rinsing off any starch that might be on the outside. To begin, wash the rice in a fine mesh strainer in the sink, rinsing with cold tap water and swirling the grains with your hands. Drain the rice well.
- Toast. After that, heat up 1 tbsp neutral oil or butter until warm in a saucepan or sauce pot with a tightly fitting lid,. Add the drained rice and toast over medium high, stirring occasionally, until the grains look translucent and turn slightly golden. When the rice is translucent, stir in the minced garlic and toast for another minute.
- Cook. Add water, lime zest, a bay leaf, and salt to the pot. Then, bring the pot to a boil over high heat and when bubbly, cover with a lid, then turn the heat down the lowest it can go. Cook for 18 minutes, covered.
- Steam. When the 18 minutes are up, remove the pot, with the lid on, from the heat and let sit and steam for another 10 minutes with the lid on.
- Fluff. Finally, remove the lid and bay leaf and fluff up the rice, using a rice paddle or silicone spatula to gently scoop and mix up rice, moving the grains around the pot, fluffing, and aerating to remove any lumps.
- Season. Add the lime juice and cilantro and toss gently to incorporate. Taste and season with extra salt if needed. Enjoy!
Cilantro lime rice in the rice cooker
The main difference between stove top and rice cooker cilantro lime rice is the rice to water ratio. For a rice cooker, you need 1 cup of water for 1 cup of rice.- Start off by rinsing your rice in a fine sieve, then drain well.
- Skip out on toasting the rice – rice cookers don’t get hot enough. If you want to toast your rice, do it on the stove in a pan, then add it to the rice cooker pot.
- Otherwise, add 1 cup of rice along with 1 cup water, 1 clove minced garlic, 1 tbsp oil, lime zest from 1 lime, 1 bay leaf, and a 1/4 tsp salt.
- Cook the rice and when it’s done, open the rice cooker, and remove the bay leaf. Then, fluff the rice with the lime juice and cilantro. Enjoy!
Cilantro lime rice in the Instant Pot
The main difference between stove top and Instant Pot cilantro lime rice is the rice to water ratio. You only need 1 cup of water for 1 cup of rice.- First off, rinse your rice in a fine sieve, then drain well.
- Then, turn the instant pot on sauté high and toast the rice in the oil, stirring occasionally, until lightly golden. Add the garlic and cook for 1 minute, stirring.
- After that, add 1 cup water, lime zest from 1 lime, 1 bay leaf, and a 1/4 tsp salt. Cook on high pressure for 3 minutes then natural release for 10 minutes.
- When the 10 minutes are up, vent the pot, remove the bay leaf, and fluff the rice with the lime juice and cilantro. Enjoy!
Rice to water ratio
If you’re not a experienced rice maker, the number one question you probably have is: how much water do you need for 1 cup of rice. The common answer on the internet is 1 cup of rice to 2 cups of water. This is wrong! Believe me when I tell you a 1:2 ratio of rice to water is way too much water. In short, it will make your rice mushy, sticky, gummy, and clumpy. The more accurate ratio is 1:1.25. That is, 1 cup of rice to 1/4 cups of water. This ratio will give you al dente rice that is fluffy and distinct. Note, if you like your rice on the softer side you can increase the ratio to 1:1.5 or 1 cup of rice to 1.5 cups of water. If you’re making rice in a rice cooker or an Instant Pot, the water to rice ratio is 1:1, which means, 1 cup rice to 1 cup water.What kind of rice for cilantro lime rice?
The best rice to use is American long grain white rice. You can also use Jasmine or Basmati. The key is a long grain rice since long grain white rice comes out fluffy and dry with distinct grains. In essence, that’s exactly what we want for cilantro lime rice.Do you need to wash rice?
It’s not strictly necessary, but washing rice rinses off excess starch. In this case it’s a good thing because we want the individual grains of rice to be distinct and fluffy. In effect, giving the rice a rinse will make the rice cook up loose and fluffy. To rinse your rice, simply measure it out, place it in a fine mesh colander, and rinse it under running water in the sink. If you are worried about arsenic in your rice, rice from California has basically no arsenic.Can you eat cilantro stems?
Yes, absolutely! The stems have so much flavor and are as tender and delicious as the leaves. Contrary to popular belief, you don’t have to pick off individual cilantro leaves and get rid of every single stem, just be sure to trim off most of the ends of the stalk. The stems near the leaves are tender and have a lot of flavor.What to serve with cilantro lime rice
- Make a burrito bowl with a bed of rice and barbacoa, al pastor, carnitas, or birria
- Serve it as a side with chicken tinga tacos
- Enjoy with some sweet and smoky hot Hatch chile honey chicken
- Pair it with crispy chipotle chicken taquitos
- Spoon some into smoky, comforting tortilla soup
- Make a plate with chipotle wings and guacamole
Cilantro Lime Rice
If you’re a rice lover, you’ll want to make this recipe, stat.
- 1 tbsp neutral oil (or butter)
- 1 cup rice (long grain white, rinsed and drained)
- 1 clove garlic (minced)
- 1 lime (zested and juiced, separately)
- 1 bay leaf (Mexican preferred)
- 1/4 tsp salt (or to taste)
- 1/2 cup cilantro (chopped)
Heat the oil or butter in a medium sized sauce pan over medium high heat. Add the raw rice and toast, stirring, until the rice turns a light golden brown. Stir in the minced garlic and cook for 1 minute.
Add 1 and 1/4 cups water, the lime zest, bay leaf, and salt to the sauce pan. Bring everything to a rolling boil, lightly stir to break up any clumps of rice that may have formed, then cover tightly. Turn the heat all the way down to low and simmer for 18 minutes.
After the 18 minutes are up, remove the pot from the heat. Leave the lid on for another 10 minutes. When the 10 minutes are up, remove the lid and bay leaf.
Gently fluff the rice. Stir in the lime juice and toss with the freshly chopped cilantro. Taste and season with more salt, if needed, and enjoy!
If you want a bit more flavor in your rice and you’re not vegetarian, use low sodium chicken stock instead of water when cooking the rice.

I Am... Cinnamon Toast
Cinnamon toast is the best breakfast food out there, period. I love cinnamon sugar things in all their forms but I especially love the comfort and coziness of cinnamon toast. Soft, yet crisp toast slathered with buttery cinnamon sugar fills a deep void in my soul. Everything just feels alright whenever I eat cinnamon toast, no matter what. There’s something about cinnamon, butter, sugar and the contrast between toast’s golden brown outsides and fluffy, soft insides. I love the magic of toasting bread. I feel like toast is on a completely different level than plain old bread. I almost feel bad for bread and it’s lack of crispy edges. When I see loaves of bread, I’m forever thinking, "Imma toast you and you’re going to be so much more than what you are." Toasting is to bread what going to the gym is for people. They/you go into the toaster/gym: pale, fluffy, and kinda doughy. They/you emerge: hard bodied, golden, toned and firm. Everyone wins! Ultimate deliciousness. And of course, it's the toast version of hot girl summer!
How to make cinnamon toast
There are so many ways to make cinnamon toast, it’s almost like I could write a dissertation on it. There’s bread choice, then cinnamon to sugar ratio, method, so many options! The four most common ways are:- Toasting first: Toasting, buttering, sprinkling on cinnamon-sugar.
- Toasting middle: buttering, toasting, sprinkling on cinnamon-sugar.
- Toasting last: buttering, sprinkling on cinnamon-sugar, toasting.
- Compound butter: Making cinnamon-sugar butter, buttering with cinnamon-sugar, toasting.
What is the best way to make cinnamon toast?
All toast is good toast but we still went ahead and did a double blind toast taste test because I love bracket competitions. The winner of the cooking method, in order of first to last place was:- pan toasted
- toaster oven
- oven
- air fryer
Cinnamon-sugar butter
For me, cinnamon toast needs cinnamon sugar butter. When you sprinkle cinnamon sugar on top of plain buttered toast, the cinnamon sugar stays on the surface. Clearly cinnamon sugar butter is superior because the butter helps the cinnamon sugar seep into every nook and cranny of the bread. Making cinnamon sugar butter is as simple as mixing together room temp butter with cinnamon and sugar, in a 4:4:1 ratio: 4 parts butter, 4 parts sugar, 1 part cinnamon sugar. In regular tablespoons, that’s 2 tbsp butter, 2 tbsp sugar, and 1/2 tbsp cinnamon. Once you have your cinnamon sugar butter, all you need to do is spread it from edge to edge of your bread of choice (I like shokupan, brioche, or challah) and then go ahead and toast it up.Pan-toasted cinnamon toast
This was the toast with a caramelized cinnamon top and perfect texture contrast between the crisp outsides and fluffy moist insides. To pan toast: Place in a cold non-stick frying pan and turn the heat to medium. Toast until the sugar melts and caramelizes, about 2-3 minutes. Flip and lightly toast the other side of the bread.Toaster oven cinnamon toast
This was moist and fluffy on the inside and light and crisp on the outside. To use a toaster oven: Place the cinnamon sugar coated bread in a toaster oven and toast on your desired doneness setting, or until the top of the toast is bubbly and caramelized.Oven baked toast
This is a slightly drier toast, because it spends so much time in the oven, perfect for those who hate soggy bread. To oven bake: Heat the oven to 350°F. Place the toast on a baking sheet and bake for 10 minutes, then broil for 1 minute until golden.Air fryer toast
A moist and somewhat dense toast, good for people who like it more pastry-like. To air fry: Preheat the air fryer to 400°F. Air fry the toast for 4-5 minutes or until golden and crisp.The best butter for cinnamon toast
When there are only four ingredients for your cinnamon toast, you better believe that every ingredient matters. Go for good butter. Unsalted or salted is up to preference. I prefer unsalted so I can add a bit of flaky salt on top of the toast if I feel like a burst of contrast. Kerrygold is a solid butter with slightly more fat content than regular butter (82% butterfat). My all time favorite butter is from Iceland, called Smjör and it is seriously the most amazing butter I have ever tasted (even though it’s only 80% butterfat). The milk used for Smjör are from special Iceland cows that are grass fed. It’s really amazing, so much so that I brought some home with me after our Iceland trip.What kind of cinnamon for cinnamon toast?
Not all cinnamons are created equal. There are two kinds of ground cinnamon in the world: Ceylon and cassia. And from there, there are different subtypes. Both are from the bark of trees but the way the bark is harvested and taste are vastly different. The most common is cassia cinnamon and that’s the one you probably know and love. It’s the one I love actually. There are three subtypes of cassia: Indonesian, Chinese, and Vietnamese/Saigon. From these three, I love Vietnamese cinnamon because it’s intensely fragrant and flavorful. Ceylon cinnamon is what people call “true cinnamon” and it’s not as common at regular grocery stores. It’s also a lot more mild, delicate, and subtle. It’s not the kind of thing you’re going to want to use on your supermarket bread for cinnamon toast, but if you’re looking for the ULTIMATE cinnamon experience, seek it out. You can find it easily online. Whew. It’s clear I really, really, really love cinnamon toast. If you made it this far, cinnamon hugs! xoxo steph Bonus: I also wanted to mention the viral NYT way: melting butter in a pan, adding the bread, sprinkling on cinnamon sugar, flipping, and sprinkling on more cinnamon sugar. This is also an amazing method!Cinnamon Toast
Cinnamon toast is the best breakfast food out there, period.
- 2 tbsp butter (room temp)
- 2 tbsp sugar
- 1/2 tbsp cinnamon
- 1/8 tsp vanilla extract (optional)
- 2 slices bread
Cream together the butter, sugar, cinnamon and vanilla.
Spread cinnamon butter mixture on the bread making sure to go all the way to the edges.
To toast: Toast until the cinnamon sugar mixture is bubbly and toasty.
To bake: Heat the oven to 350°F. Place the cinnamon toast on a baking sheet and bake for 10 minutes, then broil for 1 minute until golden.
To air fry: Preheat the air fryer to 400°F. Air fry the cinnamon toast for 4-5 minutes or until golden and crisp.
To pan fry: Place the cinnamon toast in a cold non-stick frying pan and turn the heat to medium. Toast until the sugar melts and caramelizes, about 2-3 minutes. Flip and lightly toast the other side of the bread.

I Am... Hot and Sour Soup
Hot and sour soup is a classic, popular, Chinese soup full of tofu, vegetables, and so much flavor. It’s usually served at the start of a Chinese meal, but it’s also super filling as a main. Are you a soup person? I LOVE soup. Especially soup with things in it. Forget simple broths, soup with fillings is where it’s at. And this hot and sour soup has ALL the fillings: umami rich mushrooms, soft tofu and silky egg ribbons all in glossy, satisfying bowl. This hot and sour soup will blow your mind.
What is hot and sour soup?
Hot and sour soup is a classic Chinese soup that’s savory, spicy, and just the right amount of tangy. It’s filled with mushrooms, tofu, and silky ribbons of egg. It’s both a take-out favorite and a staple at Beijing or Sichuan restaurants.What makes it hot and sour?
The hot, aka spice, comes from white pepper and the sour comes from Chinese black vinegar. That’s it! Two simple ingredients that combine into so much more. Add these two ingredients right before you serve so their aroma and flavor is at the forefront. As the person eating the soup, when you stir it you get a burst of delicious smells, prepping you for a flavor bomb. There are a ton of recipes out there that use hot sauce and white vinegar for the hot and sour, but if you want to be authentic, white pepper and Chinese black vinegar is the way to go.How to make hot and sour soup
- Rehydrate your mushrooms and marinate the pork. Start off by soaking some dried shiitake mushrooms in hot water and marinating slices of pork with a bit of shaoxing wine and salt.
- Simmer the soup. Bring chicken stock, soy sauce, ginger to a simmer and add in the marinated pork, shiitake mushrooms, and cubed tofu.
- Cornstarch slurry. When the soup is at a simmer, it’s time to thicken it with a cornstarch slurry. In a small bowl, whisk cornstarch with a bit of cold water and slowly stream into the simmering soup. Let it come back up to a simmer.
- Eggs. Once the soup is thick and bubbly, whisk in lightly beaten eggs to create silky, delicate egg ribbons.
- Season and serve. Stir in white pepper for the hot and vinegar for the sour. Enjoy!
The 3 key ingredients for hot and sour soup
Chinese black vinegar aka Chinkiang vinegar
Black vinegar, also known as Zhenjiang or Chinkiang vinegar is a rice based vinegar that is fruity, slightly sweet, malty, and just the bit reminiscent of balsamic. It adds acidity and sweetness and is a backbone in Chinese cooking. It’s used in cold appetizers (like this one!), braised proteins, and as a dipping sauce for dumplings. You can use it just as you would regular vinegar and it’ll add just a touch more complexity. It’s sold in the Asian aisle at most grocery stores, in your local Asian grocery store, or online. If you don’t have any, you can sub rice vinegar or regular white vinegar, but it won’t be quite the same.White pepper
White pepper is the same berry (yes, pepper is a berry!) as black pepper with it’s hull soaked off. Underneath the hull, the peppercorns are smooth and white. White pepper has a brighter, sharper, more floral herbaceous note than regular black pepper. Even though they come from the same plant, the flavor of white pepper is not at all like black pepper, so if you’re not a fan of how it tastes, you can season your hot and sour soup with a bit of hot chili oil or even just an abundance of freshly cracked black pepper. White pepper is sold in the spice aisle.Cornstarch
Cornstarch is what thickens the soup as well as giving it that glossy, glistening shine. A little bit of cornstarch whisks with cold water to create a slurry to add to the soup. Making a slurry ensures that the cornstarch won’t clump up when added to the hot soup.Hot and sour soup ingredients
- Pork - The pork in hot and sour soup is mainly a flavoring agent, there isn’t a huge amount of it compared to say, the amount of chicken in chicken noodle soup. The best cut of pork for hot and sour soup is a somewhat fatty cut, preferably shoulder or a well marbled chop, sliced thin, in strips.
- Dried shiitake mushrooms - They’re sold pretty much everywhere these days, in the Asian aisle at the grocery store or online and they’re very easy to use: rinse them off and soak in hot water for about 20-30 minutes and they become soft and pliable.
- Tofu - I used a medium tofu here but you can go ahead and use your favorite kind of tofu. I’ve even seen hot and sour soups with two types of tofu. Really, it’s up to you! Soft tofu does have a tendency to break up a bit though, so if you’re looking for distinct square of tofu, go with medium or firm.
- Eggs - When you swirl lightly beaten eggs into the simmering hot and sour soup and they become delicate, golden silky egg ribbon swirls. Hot and sour soup just isn’t hot and sour soup without egg ribbons.
- Soy sauce, ginger, sugar - These are the main flavoring agents, aside from the white pepper and black vinegar. More on soy sauce below.
Dried mushrooms
Shiitake mushrooms have a huge amount of flavor and umami. They’re one of those things that keep almost indefinitely in the pantry and are perfect for pulling out when you want to give your food a boost umami. But, if you don’t want to go the dried shiitake mushroom route, you can always go with fresh shiitakes, which won’t have as much of a concentrated flavor. Other fresh mushrooms you can consider are: white, crimini, portobello, king, oyster, trumpet, enoki, shimeiji.Soy sauce
The soy sauce adds umami and color, the ginger adds warmth, and the sugar (which is optional) adds just a touch of sweetness to balance out the sour. Please try and get a good naturally brewed soy sauce - it will make such a huge difference in flavor Some brands to consider: Lee Kum Kee, Amoy, and Pearl River Bridge.Optional Ingredients
If you’re wanting to make your hot and sour soup even more authentic, try adding in these ingredients:- Wood ear mushrooms - I absolutely LOVE wood ear mushrooms but realize that they can be a little difficult to find. While you can pretty much find dried shiitake mushrooms at your everyday grocery store, wood ear mushrooms are definitely a special trip to the Asian grocery store or online order. They are worth it though! Wood ear mushrooms add a delicious crunch. They’re very mild - some would say tasteless, but their texture is what is prized in Chinese cooking. They’re always sold dry and just need a quick soak in a bit of cold water to hydrate. They come whole or sliced, either work in this soup but if you get the whole ones, be sure to cut them into bite size pieces. Add them (after you’ve soaked them in water for 30 minutes) into the soup when you add the shiitake mushrooms.
- Bamboo shoots - bamboo shoots are pretty common in hot and sour soup, but I find them hit or miss depending on what kind of bamboo shoot quality you can find. If you do use them, julienne and add them along when you add the tofu. They add a pleasant crunch and mild nutty earthy flavor.
- Toasted sesame oil - if you want a lovely nutty finish, a little drizzle of toasted sesame oil will add a lovely toasty aroma.
Hot and Sour Soup
Hot and sour soup is a classic, popular, Chinese soup full of tofu, vegetables, and so much flavor.
- 8 dried shiitake mushrooms (rehydrated)
- 8 oz pork ( shoulder or a well marbled pork chop, sliced)
- 1 tsp shaoxing wine (optional)
- 1 tsp cornstarch
- 8 cups chicken stock (sodium free preferred)
- 2 tbsp soy sauce
- 1/2 inch ginger (julienned)
- 1/4 tsp sugar (optional)
- 8 oz tofu
- 1/4 cup cornstarch (whisked with equal parts water)
- 2 eggs (lightly beaten)
- 1-2 tbsp black vinegar
- 1/2-1 tsp ground white pepper
- green onions (sliced, to serve)
Rehydrate the shiitake mushrooms by covering with hot water. Let sit for 20-30 minutes, then drain, cut off the tough tip of the stem and slice.
While the mushrooms are rehydrating, marinate the sliced pork in a small bowl with the shaoxing wine, 1 teaspoon cornstarch, and a pinch of salt. Set aside.
In a large pot, add the chicken stock, soy sauce, ginger, and sugar. Bring to a simmer and add in the pork, shiitake mushrooms, and tofu. Simmer gently for 6-8 minutes.
In a small bowl, whisk together 1/4 cup cornstarch with 1/4 cup cold water until smooth. With the soup at a simmer, slowly stream in the cornstarch slurry while stirring. Let the soup come back up to a gentle simmer, until it thickens slightly.
Keep the soup at a simmer and use a ladle to stir in a circular motion while slowly drizzling in the lighten beaten egg.
Stir in the vinegar and white pepper and enjoy hot with sliced scallions. Serve with extra black vinegar and white pepper so you can adjust to taste while eating.

Latest Comment
“hi, yes to both! it might be a bit thin in a 13x9, so just be aware and keep an eye on it so it doesn’t over cook. If ...”Stephanie on Easiest Corn Pudding RecipePopular
 2015 Holiday Giveaway
  One-Pot Lemon Scallop Pea Spaghetti
  Beer Battered Onion Rings, Jalapeno Aioli
  2014 Holiday Gift Guide and a Giveaway
  Easy Gourmet Hot Wings and a Giveaway!
 The Ultimate Veggie Sandwich
  Vegan(!) Creamy Corn Soup Recipe
  Sunday Brunch: Grilled Cheese Eggs Benny
