I Am... Oyster Sauce
I love oyster sauce. It’s rich, thick, full of flavor, and adds a huge hit of deliciousness. Everyone knows about soy sauce, hoisin sauce, and fish sauce, but oyster sauce is slightly more mysterious. Does it have oysters in it? What is it used for? I’m here to answer all your pressing oyster sauce questions.
What is oyster sauce?
Oyster sauce (蚝油 háo yóu in Mandarin or ho yeow in Cantonese) is a thick savory sauce with a hint of caramel sweetness and umami. Lee Kum Sheung, an oyster chef, invented it in 1888 in China. It was a complete accident: he left a pot of oyster soup on a simmer and when he finally checked on it, it was a thick brown paste of caramelized sauce. He called it oyster sauce and the rest is history. Lee went on to start Lee Kum Kee, an incredibly successful Chinese sauce empire, and it all started with with a simple accidentally overcooked sauce.What does oyster sauce taste like?
Oyster sauce is sweet and salty, thick, and full of complexity. It reminds me of hints of the ocean and is full of umami and savoriness. It doesn’t taste super seafood-y, but it definitely adds an extra oomph to your dishes that you won’t be able to put your finger on. It’s best used to highlight other flavors.What is oyster sauce made of?
Oysters! Lee Kum Sheung priginally made the sauce by boiling down whole oysters with seasoning. These days it’s made from oyster extract along with sugar, salt, cornstarch, flour, and MSG.A note on MSG
MSG, or monosodium glutamate is completely safe and naturally occurring. If you love tomatoes, cheese, meat, dairy, corn, or nuts, you love MSG. MSG is the the pure salt version of glutamic acid, which is found in so many foods and made simply by fermenting things like sugar beets, sugarcane, and molasses. Think of it like yogurt, but instead of the fermentation making the end result sour, the end result is umami. There is absolutely no chemical difference between the MSG found in food and chemical MSG. The FDA recognizes MSG as perfectly safe.How to use
Oyster sauce is incredibly versatile. It’s basically an all purpose seasoning sauce. You can use it pretty much everywhere and it’s a key ingredient in Chinese cooking. A little goes a long way, so start off with a teaspoon or two and go from there. You can use it:- In stir fries - its velvety thick texture adds flavor and a beautiful gloss to stir fried dishes like vegetables, noodles, or meats.
- In braises or stews - add a teaspoon or two to enhance any long simmered dish.
- Straight from the bottle - drizzle it onto cooked vegetables or use it to marinate or brush onto grilled and barbecued meats.
Recipes with oyster sauce
- Beef and broccoli chow mein
- Gai lan aka Chinese broccoli
- Easy meat sauce noodles aka zha jiang mian
- Thai basil chicken
- Saucy veggie stir fry
- Chinese sticky rice
- Lemongrass beef
- Indonesian mie goreng fried noodles
- Garlicky lobster noodles
Vegetarian oyster sauce
If you’re vegetarian or allergic to shellfish, a vegetarian version that uses mushrooms instead of oysters is available. It has the same color and a similar texture to the real deal. The mushrooms give it a meaty, umami flavor. If you’re looking for Lee Kum Kee brand, they don’t call it vegetarian oyster sauce, instead it’s labeled as Vegetarian Stir-Fry Sauce.Is it the same as Hoisin sauce?
Oyster and hoisin sauces look the same but they are vastly different in flavor. Oyster sauce is saltier and less sweet and with a thinner texture. On the other hand, soy bean based hoisin sauce is thicker and much sweeter.Where to buy oyster sauce
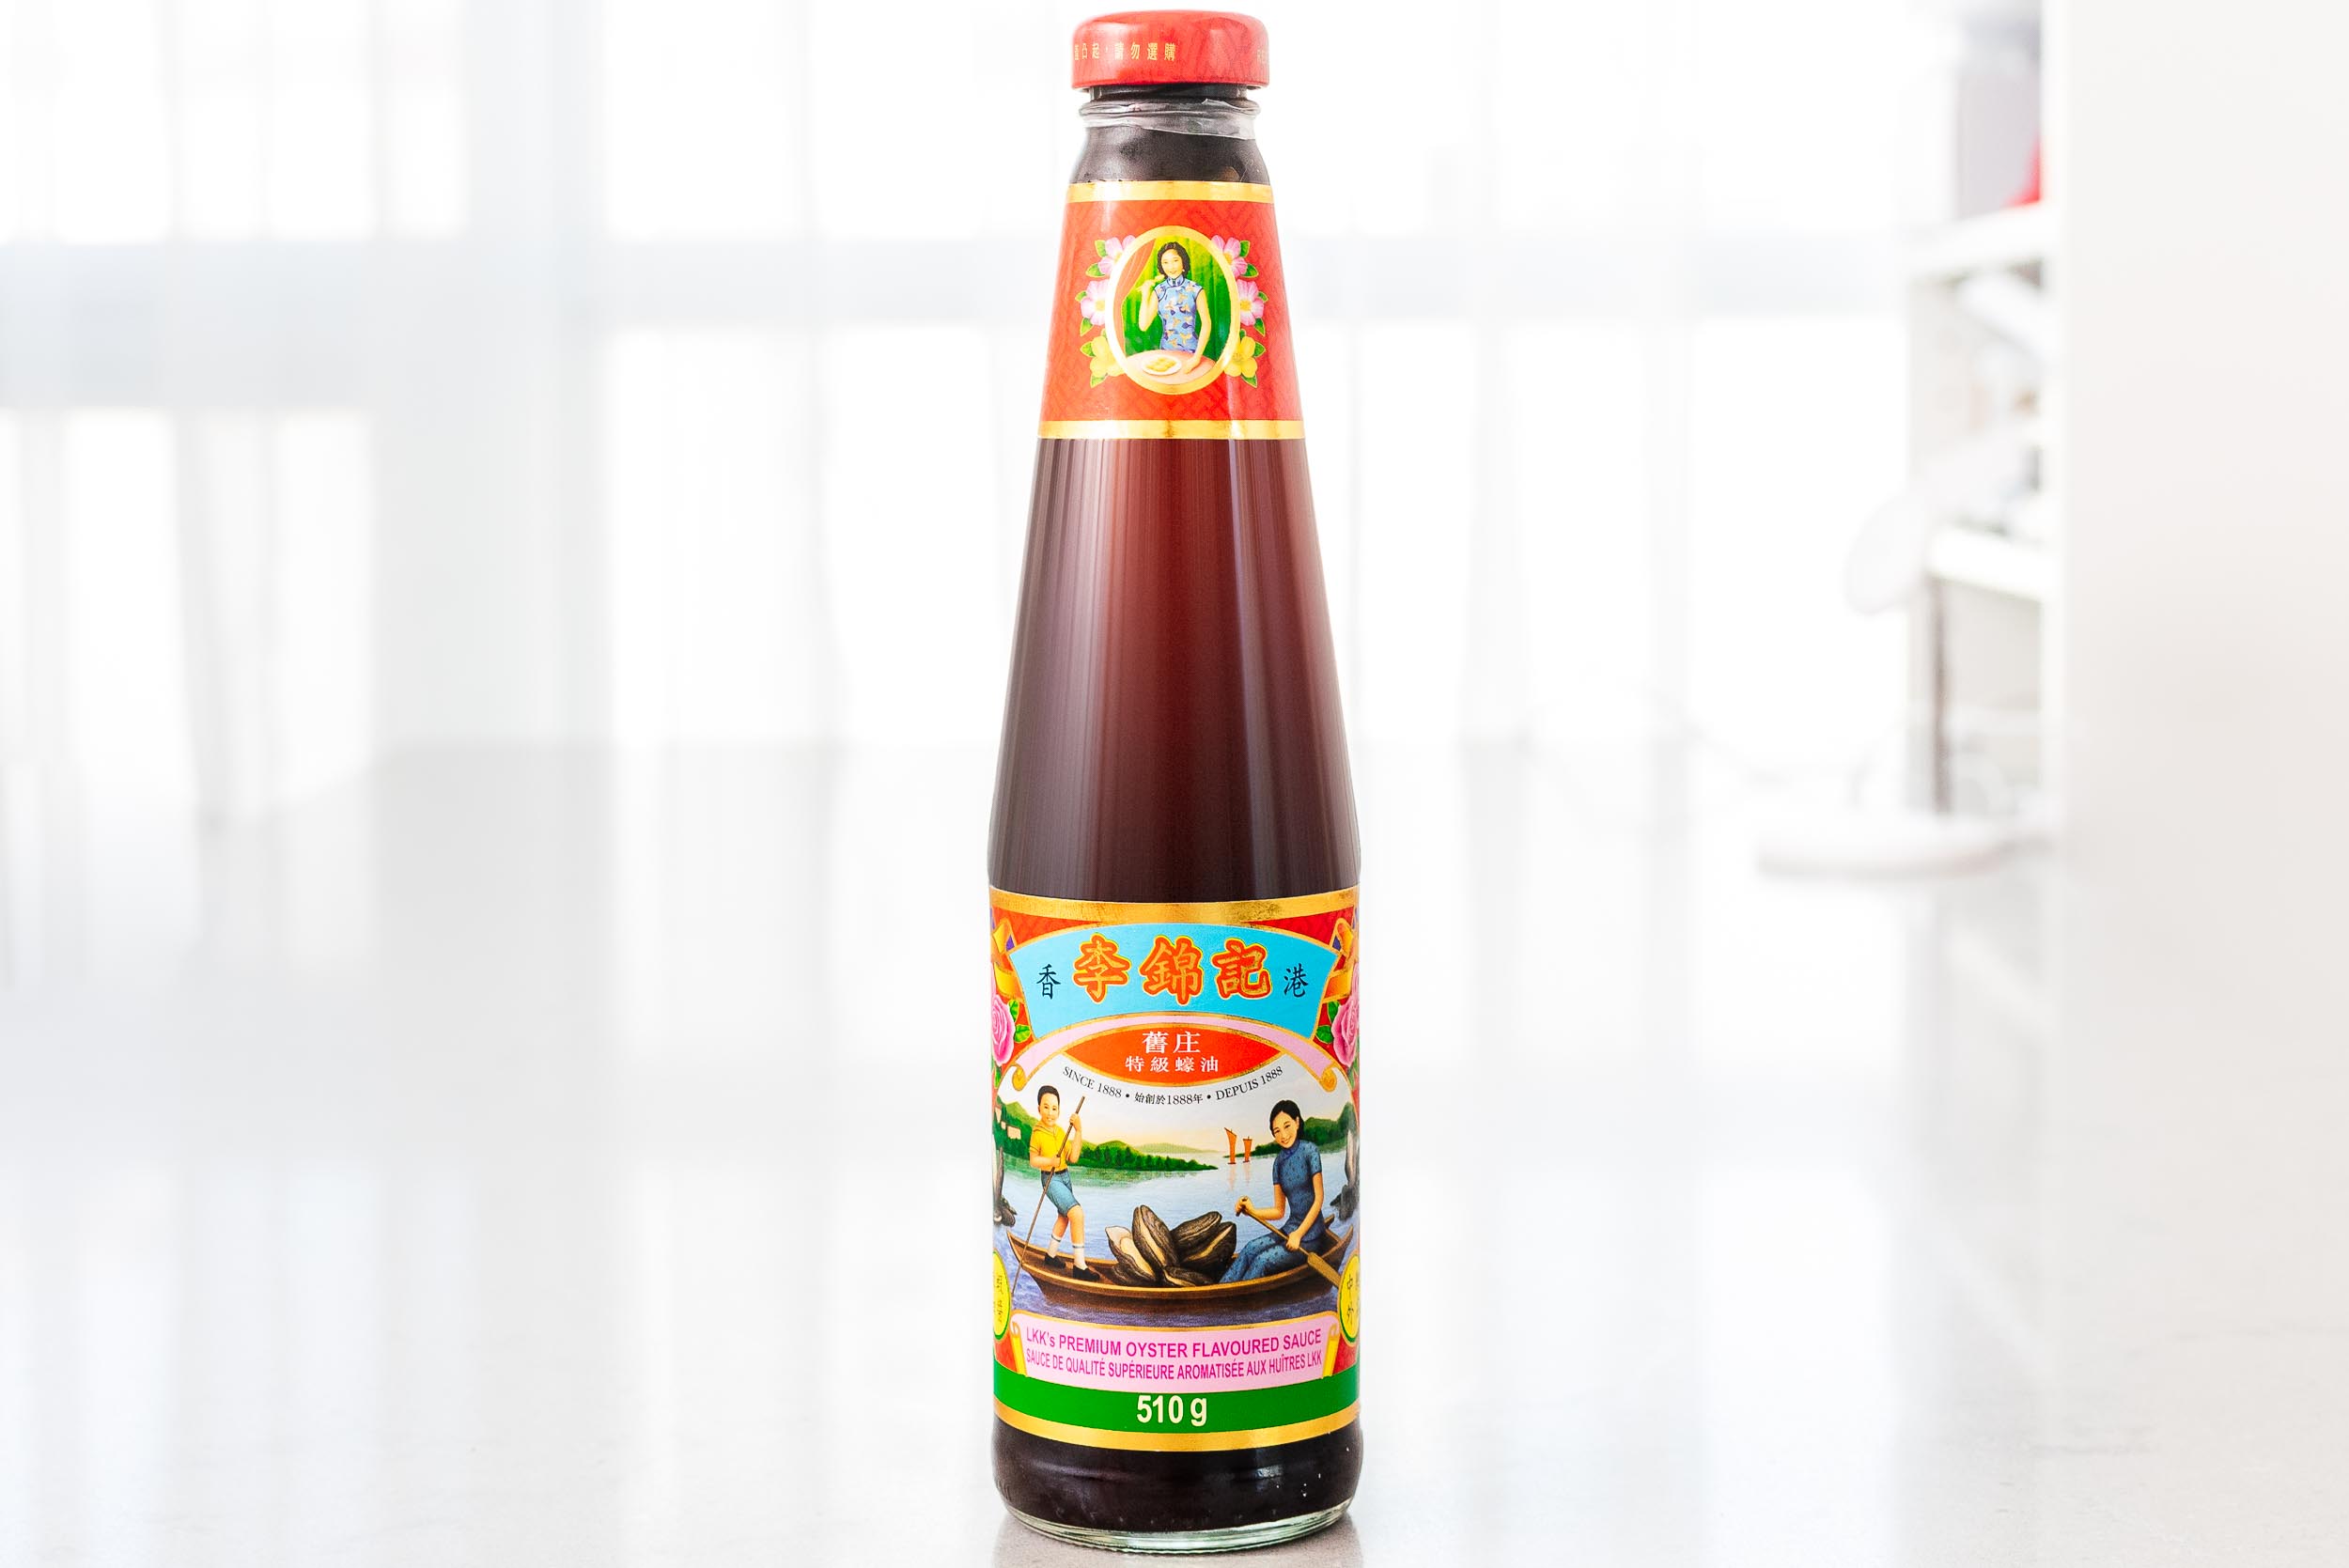
It's available in the Asian aisle of pretty much every grocery store. If you see the Lee Kum Kee bottle with the two people in boats, go for that one. Basically, it’s the premium version which lists oysters as its first ingredient, unlike the one with the red panda label which has oysters listed further down the list. The premium oysters sauce packs more of a punch and the one with the panda is slightly more mild. You can also purchase it easily online.How to store
After you open it, keep it in the fridge. It should keep for up to a year.Oyster sauce substitutes
To be honest, there aren’t any sauces out there that is a one-to-one substitute, flavor-wise. If you’re looking for the dark caramel coloring portion of the sauce, use dark soy sauce mixed with a tiny bit of fish sauce. It won't be quite the same (and definitely doesn't have the same texture) but it's a decent replacement for the coloring and umami. To be honest, the commercial version is really affordable, tasty, and lasts forever in the fridge. Order a bottle on amazon and you’re set. If you’re worried about the oyster flavor, try the Lee Kum Kee bottle with the panda on it or the Vegetarian Stir Fry sauce to ease into it.Oyster Sauce Recipe
If you can't find the real deal
- 1/2 lb shucked oysters (with liquid)
- 1 tbsp water
- 1/2 tsp salt
- 4 tbsp light soy sauce
- 2 tbsp dark soy sauce
- 1 tbsp sugar
Chop the oysters into small pieces and place them in a sauce pan, along with the juices and 1 tbsp water. Bring to a boil over high heat, stirring occasionally.
When the oyster water mix comes to a boil, reduce the heat to medium-low and simmer to reduce the liquid.
Remove the heat from the pan and strain out the oysters, pressing to squeeze out the liquids.
Stir in the salt, soy sauces, and sugar. Simmer for another 10 minutes to thicken and reduce, stirring occasionally. Let cool and use immediately. Sauce will keep in a air tight container in the fridge for 1 week.
I Am... Air Fryer Donuts
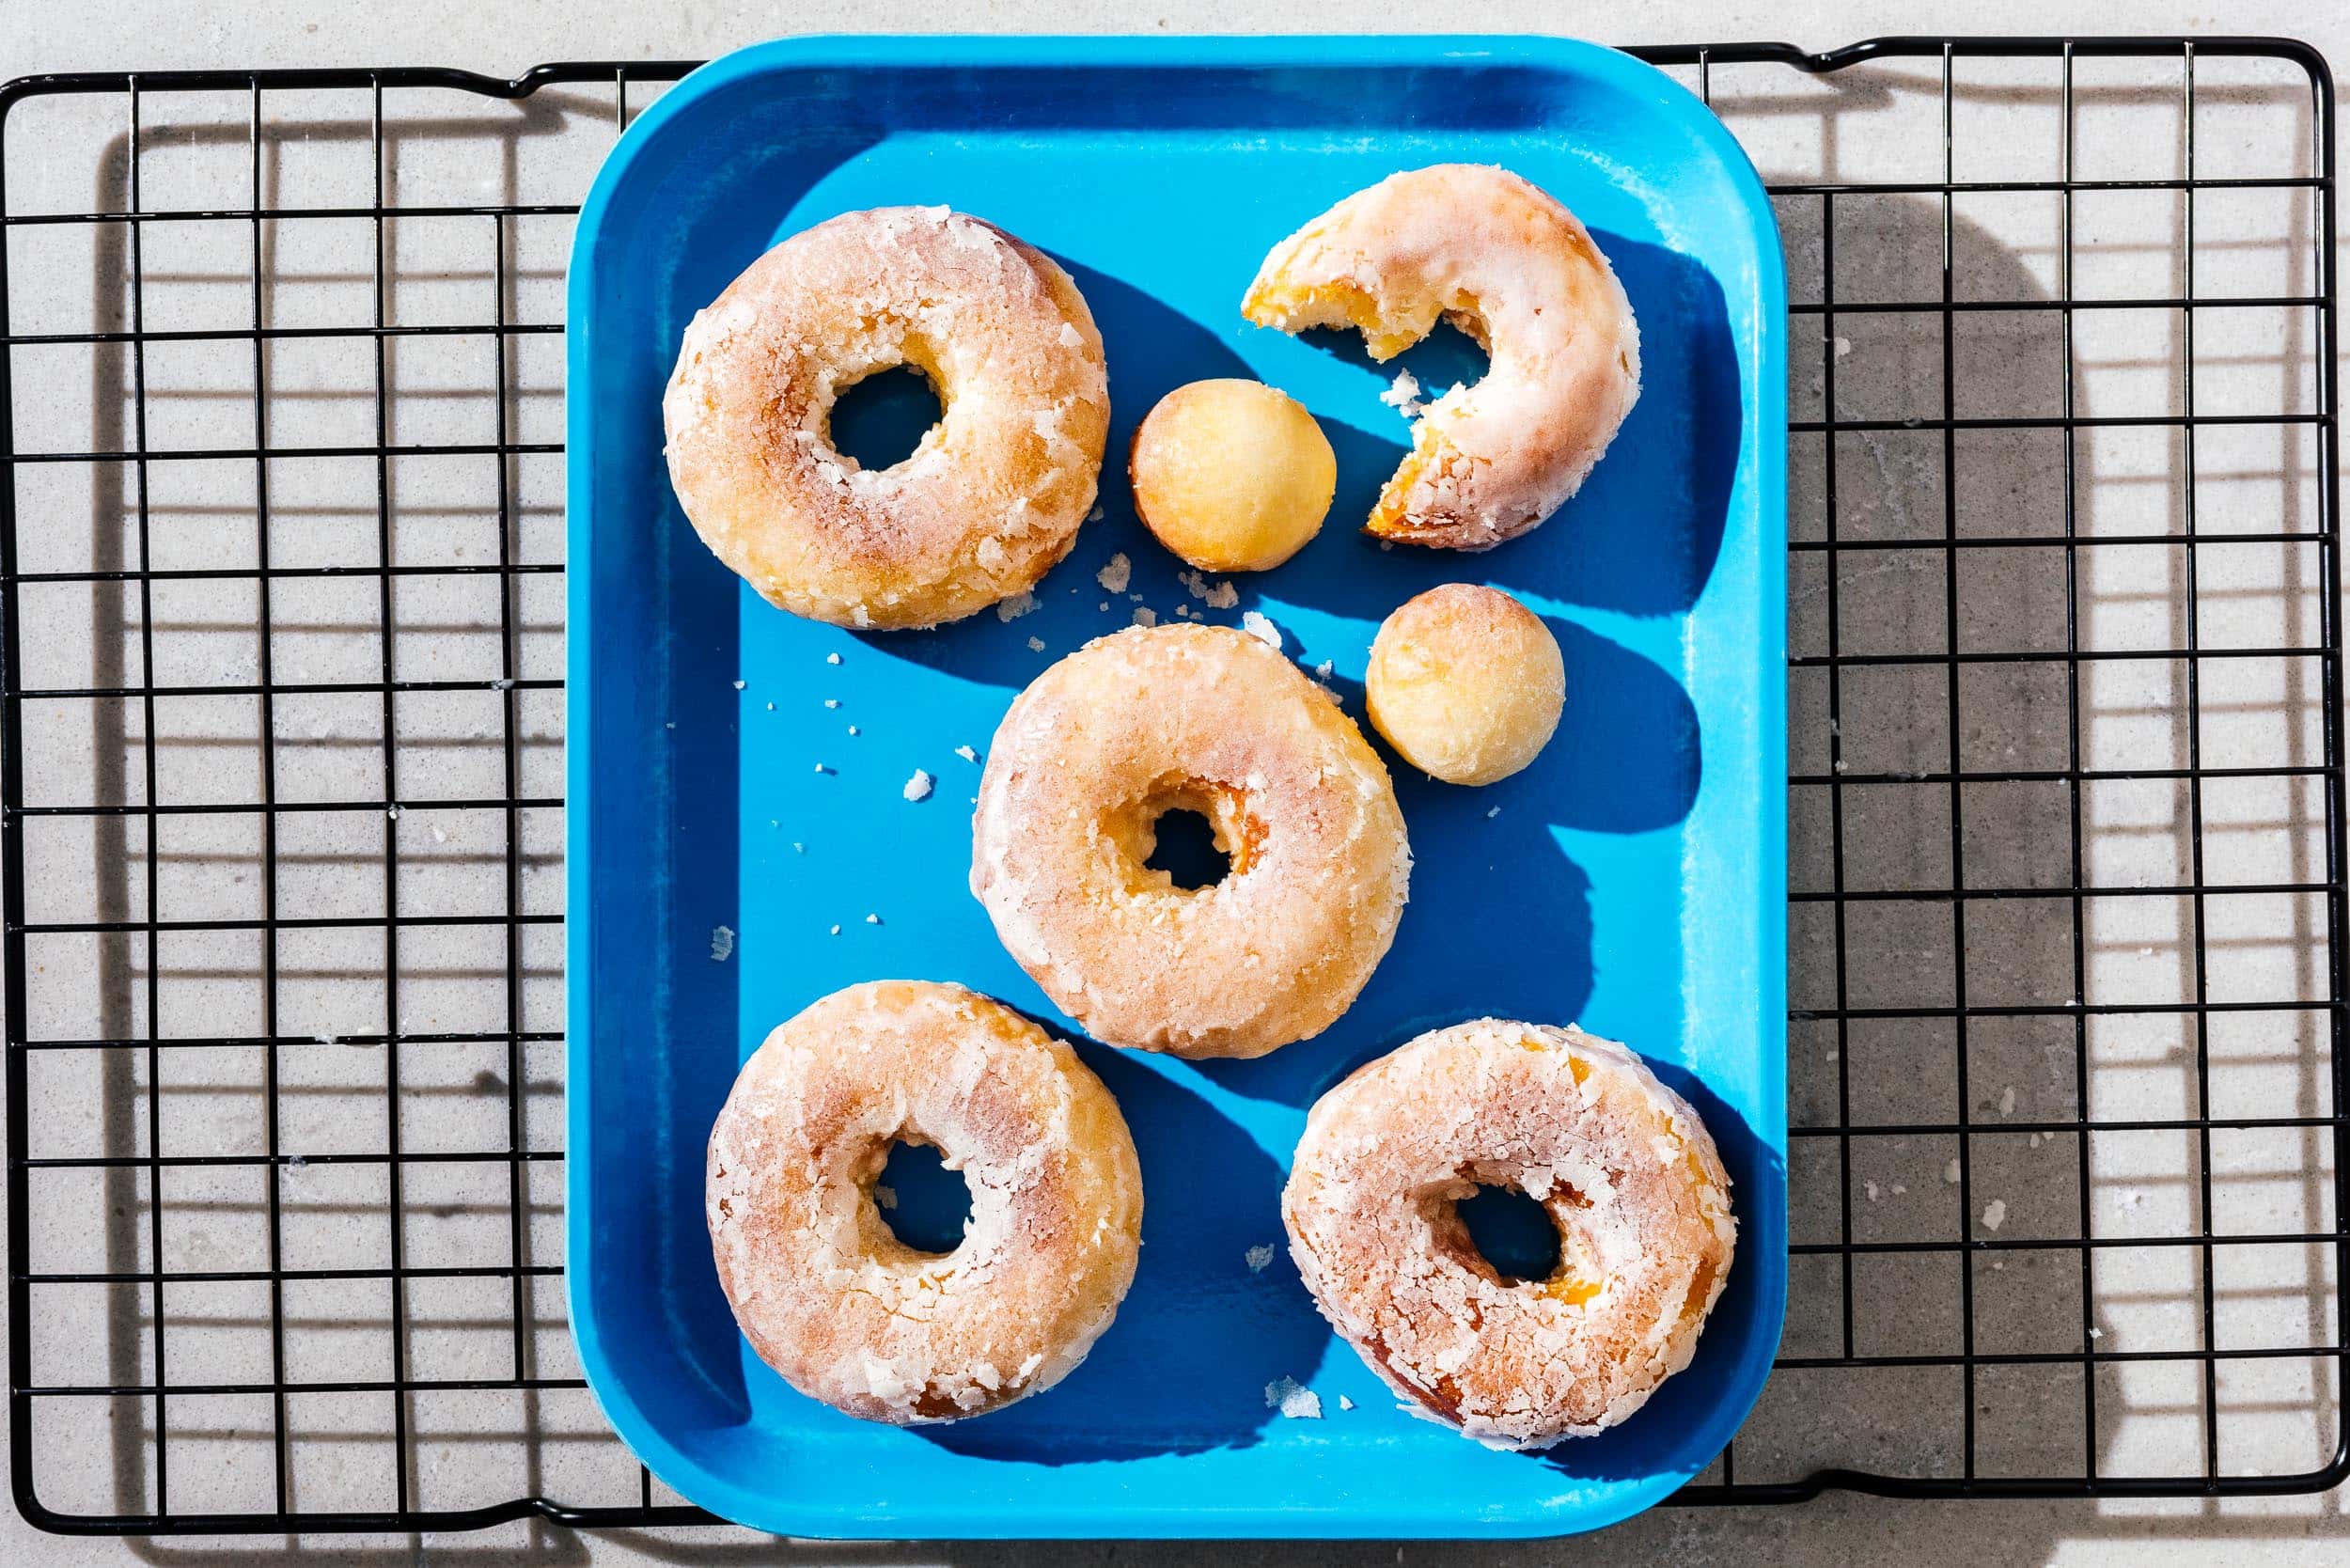
Fluffy, soft, pillowy, air fryer donuts are a thing and they are amazing. If you have an air fryer, you know all about the temptation to make everything in it. It’s kind of funny because all an air fryer really is, is a tiny convection oven with lots of hot air blowing around. Technically, if you have a convection oven, you have a giant air fryer. But there’s something about an air fryer that just seems magic. And what’s even more magic is that you can fry donuts in it.
Air fryer donuts are the real deal
These yeasted air fryer donuts taste just like deep fried donuts and are way better than baked. You don’t need to break out the deep fry oil. They’re just like the regular yeasted donuts you know and love, but made easier in the air fryer. You can glaze them, like I did, or you can dip them in cinnamon sugar. Either way, these air fryer donuts are the perfect sweet treat.Biscuit vs Yeast Donuts
There are a bunch of biscuit donut recipes out there, but the truth is, if you air fry biscuit dough and coat it in glaze, it’s still a biscuit, not a doughnut. Yeast donuts are fluffier, softer, and taste more like the kind of donut you can get at a really good donuterie. Making yeast donuts takes a little more time (mostly hands off) but it’s so worth it.How to make air fryer donuts
- Mix. In the bowl of a stand mixer, mix together melted butter, milk, egg, and yeast.
- Stir. To the yeast mixture, add flour, sugar, and a touch of salt, then stir everything together until it comes into a shaggy ball.
- Knead. From there, knead the dough on high, using the dough hook, for 3-5 minutes, until the dough is smooth and elastic. If you don’t have a stand mixer, you can knead everything by hand for about 10 minutes.
- Proof. Gather the dough into a ball and let it rise, covered, in a lightly oiled bowl, until doubled, about 1 hour.
- Cut. Tip the dough out onto a lightly floured surface and roll it out about 1 inch thick and then cut the doughnuts. Place the cut donuts on a parchment paper lined baking sheet and brush with melted butter.
- Rise. Let the donuts rise, covered, until puffy and doubled.
- Air fry. Preheat the air fryer to 350°F, then air fry the donuts for 3 minutes.
- Glaze. Mix together melted butter, vanilla, milk and powdered sugar to make a glaze and dip the donuts in the glaze while they’re still warm.
- Enjoy. Pat yourself on the back for making homemade donuts and enjoy!
Ingredients
Air fryer donuts have all the same ingredients that regular yeasted donuts have:- yeast - it’s what gives our donuts a fluffy, cloud-like bite. I buy yeast in a jar and keep it in the fridge to keep it fresh. You can also buy it in envelopes. This recipe uses active dry yeast and instant yeast interchangeably.
- milk - I use 2% milk just because it’s what I always have in the fridge, but any milk will work here, even milk alternatives. The milk gives the donuts a nice creamy flavor note.
- butter - melted butter is going to add fat into to the dough to make it rich and velvety.
- egg - we need just 1/2 an egg as a binder. See below for how to measure half an egg, or double the recipe if you want to use the whole egg.
- flour - all purpose flour is what makes up the bulk of our donuts.
- sugar - you can’t have donuts without sugar! Just regular granulated here.
- salt - just a pinch of salt to bring out the flavors of the doughnut.
If you don’t have a donut cutter
A good professional donut cutter is not too expensive and there’s even really really cheap ones that you can get, but if you don’t have a donut cutter, you also can use two differently sized round cookie cutters. Just use the smaller one to cut out the donut hole in the middle.Which air fryer do you have?
If you’re wondering which air-fryer we have, it’s this one. I don’t know if it’s the best on the market because it’s the only one we’ve used, but it works great. It’s quiet and easy to clean and really big (which is good because you can put a lot of food in it and bad because it takes up a lot of room in our place).Kitchen scale
Donuts are very forgiving so you don't need a kitchen scale for this recipe. Even though the measurements are in grams first, the rough traditional measurements are also given. But, if you're going to be baking consistently, you should really consider investing in a kitchen scale. A kitchen scale is an inexpensive tool that will give you accuracy and make your life so much sweeter.Tips and tricks
- To measure out 1/2 egg: whisk it up, then measure out 1.5 tbsp or weigh out 27 grams. You can scramble up the other bit of egg for a snack :)
- Don’t roll out the dough too thin: you want it to be about 1 inch thick.
- Make donut holes: if you have small round cutter, just cut out a bunch of tiny 1 inch rounds for donut holes. They’re super cute and so easy to pop into your mouth.
- Use the scraps: combine the scraps together, wrap them in plastic wrap and let them rest for about 10 minutes so you can roll the dough out easily and make more donuts.
- Leave some space between the donuts: when air frying, the donuts need a little bit of room to grow.
Other air fryer snacks to make
- Air Fryer Oreos
- Air Fryer Popcorn Cheese Puffs (Keto friendly!)
Air Fryer Donuts
These yeasted air fryer donuts taste just like deep fried donuts and are way better than baked.
- 60 g milk (1/4 cup - whole milk preferred)
- 20 g butter (2 tbsp + 2 tsp - melted)
- 27 g egg (1.5 tbsp - half a large egg)
- 3.5 g active dry yeast (1 + 1/8 tsp - or instant rise yeast)
- 140 g all purpose flour (1 cup + 1.5 tbsp)
- 20 g sugar (1.5 tbsp)
- 1.5 g salt (1/4 tsp)
Glaze
- 1 cup powdered sugar
- 5 tbsp butter
- 1.5 tbsp milk
- 1/2 tsp vanilla extract
Stir together the milk, melted butter, egg, and yeast in the bowl of a stand mixer. Add the flour, sugar, and salt and stir until a shaggy dough comes together.
Knead on high for 3-5 minutes or until the dough is smooth and incorporated. Alternatively, mix and knead by hand for about 10 minutes.
Gather the dough into a ball and place in a lightly oiled bowl and cover. Let rise for 2 hours, or until doubled.
Tip the dough out onto a lightly floured work surface and roll to about 1 inch thick. Cut into doughnuts, gathering the excess dough and cutting into doughnuts (or donut holes).
Place the doughnuts on a parchment paper lined baking sheet and brush with melted butter. Let rise for 45 minutes, or until doubled and puffy.
While the doughnuts are rising, make the glaze by mixing together the melted butter, milk, vanilla, and powdered sugar until smooth.
Preheat your air fryer to 350°F. Gently oil the basket and place the doughnuts, slightly spaced out, into the basket. Air fry for 3 minutes. They should will be golden brown and puffy.
Glaze the donuts immediately and enjoy!
Estimated nutrition doesn't include glazing.
I Am... Vietnamese Pizza
Have you heard of Vietnamese pizza aka bánh tráng nướng? I love watching those Youtube channels where they visit street food places and night markets. I miss travel in a big way and watching vlogs of people in other countries visiting cafes and street food stalls sort of scratches the itch. It’s not quite the same but I’ll take what I can get! Recently, I saw a video of someone in Vietnam having Vietnamese pizza. I asked Mike about it and he said it wasn’t a traditional dish – it’s one of those inventive street foods that makes use of rice paper. I LOVE rice paper. Give me something wrapped in rice paper and I’m there. So when I saw that the “pizza” was rice paper that was grilled up to a crisp, I was all in.
What is Vietnamese pizza?
Bánh tráng nướng, or Vietnamese pizza, is a popular Vietnamese street food made with rice paper, egg, sauces, and toppings. It originated in Da Lat, in Northern Vietnam. A sheet of rice paper toasts over coals until crisp, then is topped with egg, green onions, pork floss, dried shrimp, mayo, and sweet chili sauce or sriracha. The rice paper gets super crisp and everything comes together in a salty, sweet, savory delicious bite. Much like regular pizza, there are loads of variations, each street food vendor has a plethora of toppings to satisfy different tastes. In Vietnam, they fold over the rice paper OR serve it flat. On the internet I’ve seen people serve it up like a pizza, cut into wedges, but I think it tastes better when you fold it up so you have the crunchy crispy bits on both sides.Ingredients
- Rice paper - this is the base of our pizza. When you grill it it gets crispy and crunchy. It’s important that when you buy your rice paper, it’s 100% rice. North American rice papers tends to contain tapioca flour because it makes it super easy to roll without tearing. Tapioca doesn’t crisp up in the same way as rice paper does, so make sure you get rice paper that only has rice listed in the ingredients.
- Egg - instead of tomato sauce, Vietnamese pizza uses egg as a sauce/binder. The egg helps the toppings stick to the rice paper and prevents the rice paper from toasting too much. It also hydrates the rice paper a bit and contributes to the crispy chewy texture. In Vietnamese they tend to use quail eggs, I went with just regular eggs just because of ease.
- Toppings - here is where people get inventive. Classic street food offerings include green onions, dried shrimp, pork floss (crispy sweet-n-savory dried pork bits), sausages, corn, canned tuna, ham, crispy shallots, lemongrass,
- cheese – especially Laughing Cow cheese.
- Sauces - sriracha, Kewpie mayo, sweet chili sauce, hoisin, anything your heart desires. Usually you’ll see sweet chili sauce or sriracha and Kewpie mayo.
How to make Vietnamese pizza
- Toast. Add a sheet of rice paper to a dry pan and toast over very low heat.
- Egg. Add an egg on top and scramble it, spreading it evenly over the rice paper.
- Top. Sprinkle on green onions and any other toppings you desire.
- Crisp. Let the egg cook and the rice paper crisp up.
- Sauce. Drizzle on a bit of mayo and sweet chili sauce or sriracha.
- Eat. Enjoy hot, open face, or folded over like they do in Vietnam.
Vietnamese pizza toppings
- Egg - they use quail eggs in Vietnam because they’re small and cheaper than chicken eggs. They also happen to have more yolk to whites so they lend extra savoriness and richness. If you have quail eggs, by all means, use them, but regular eggs work too.
- Green onions - these add freshness and bit of an onion-y bite. Sometimes people like to use green onion oil, but for ease, sliced green onions work great.
- Pork floss - sweet, savory, soft, and crispy all at the same time, pork floss is a classic popular Chinese topping used in Vietnamese pizza. It’s basically pork that’s been cooked with soy sauce and sugar until it’s dry and shreddable. You can buy it online or in Asian grocery stores.
- Dried shrimp - sweet and full of umami flavor, tiny dried shrimps common all over Asia to add a briny umami flavor and texture to a multitude of foods. To release their flavor, soak them in hot water, then simply sprinkle on the rice paper.
- Kewpie mayo - kewpie mayo adds an indispensable creaminess and richness.
- Sriracha or sweet chili sauce - If you like it hot, go with sriracha and if you want a bit more sweet with your heat, sweet chili sauce is the way to go. Drizzle to your heart’s content.
Substitutions
Vietnamese pizza is infinitely customizable so if you don’t have pork floss or dried shrimp, no worries at all. You can try tiny bits of ham, bacon, tuna, tofu, or even skip the protein all together. Personally, I like sautéing up a bit of ground pork best of all. I hope you give this Vietnamese pizza a try. I’m thinking of opening a Vietnamese pizza stand on my street corner I can live out my dreams of being a pro bánh tráng nướng maker LOL. xoxo stephVietnamese Pizza Recipe
Have you heard of Vietnamese pizza aka bánh tráng nướng?
- 1 sheet rice paper (see notes)
- 1 egg (lightly beaten)
- 1 tsp green onions (sliced)
- 1 tbsp toppings (see notes)
- 2 tsp kewpie mayo (or to taste)
- 2 tsp sriracha (or sweet chili sauce, to taste)
Add the rice paper to a dry pan over low heat. Add the lightly beaten egg on top, spreading it out to the edges.
Top with green onions and protein of choice. Let the egg cook and the rice paper crisp, moving the rice paper around if crisping unevenly.
When crispy and crunchy, finish with mayo and hot sauce to taste. Enjoy open or fold it up like they do in Vietnam. Enjoy hot!
On rice paper: North American rice papers tends to contain tapioca flour to make it easy to roll without tearing. Tapioca doesn’t crisp up in the same way as rice paper does, so make sure you get rice paper that only has rice listed in the ingredients.
Topping ideas: pork floss, dried shrimp, cooked ground pork, thinly sliced pork belly, or crispy bacon bits
Estimated Nutrition is based on 1 tbsp lean ground pork (0.5oz).
I Am... Chicken Bruschetta
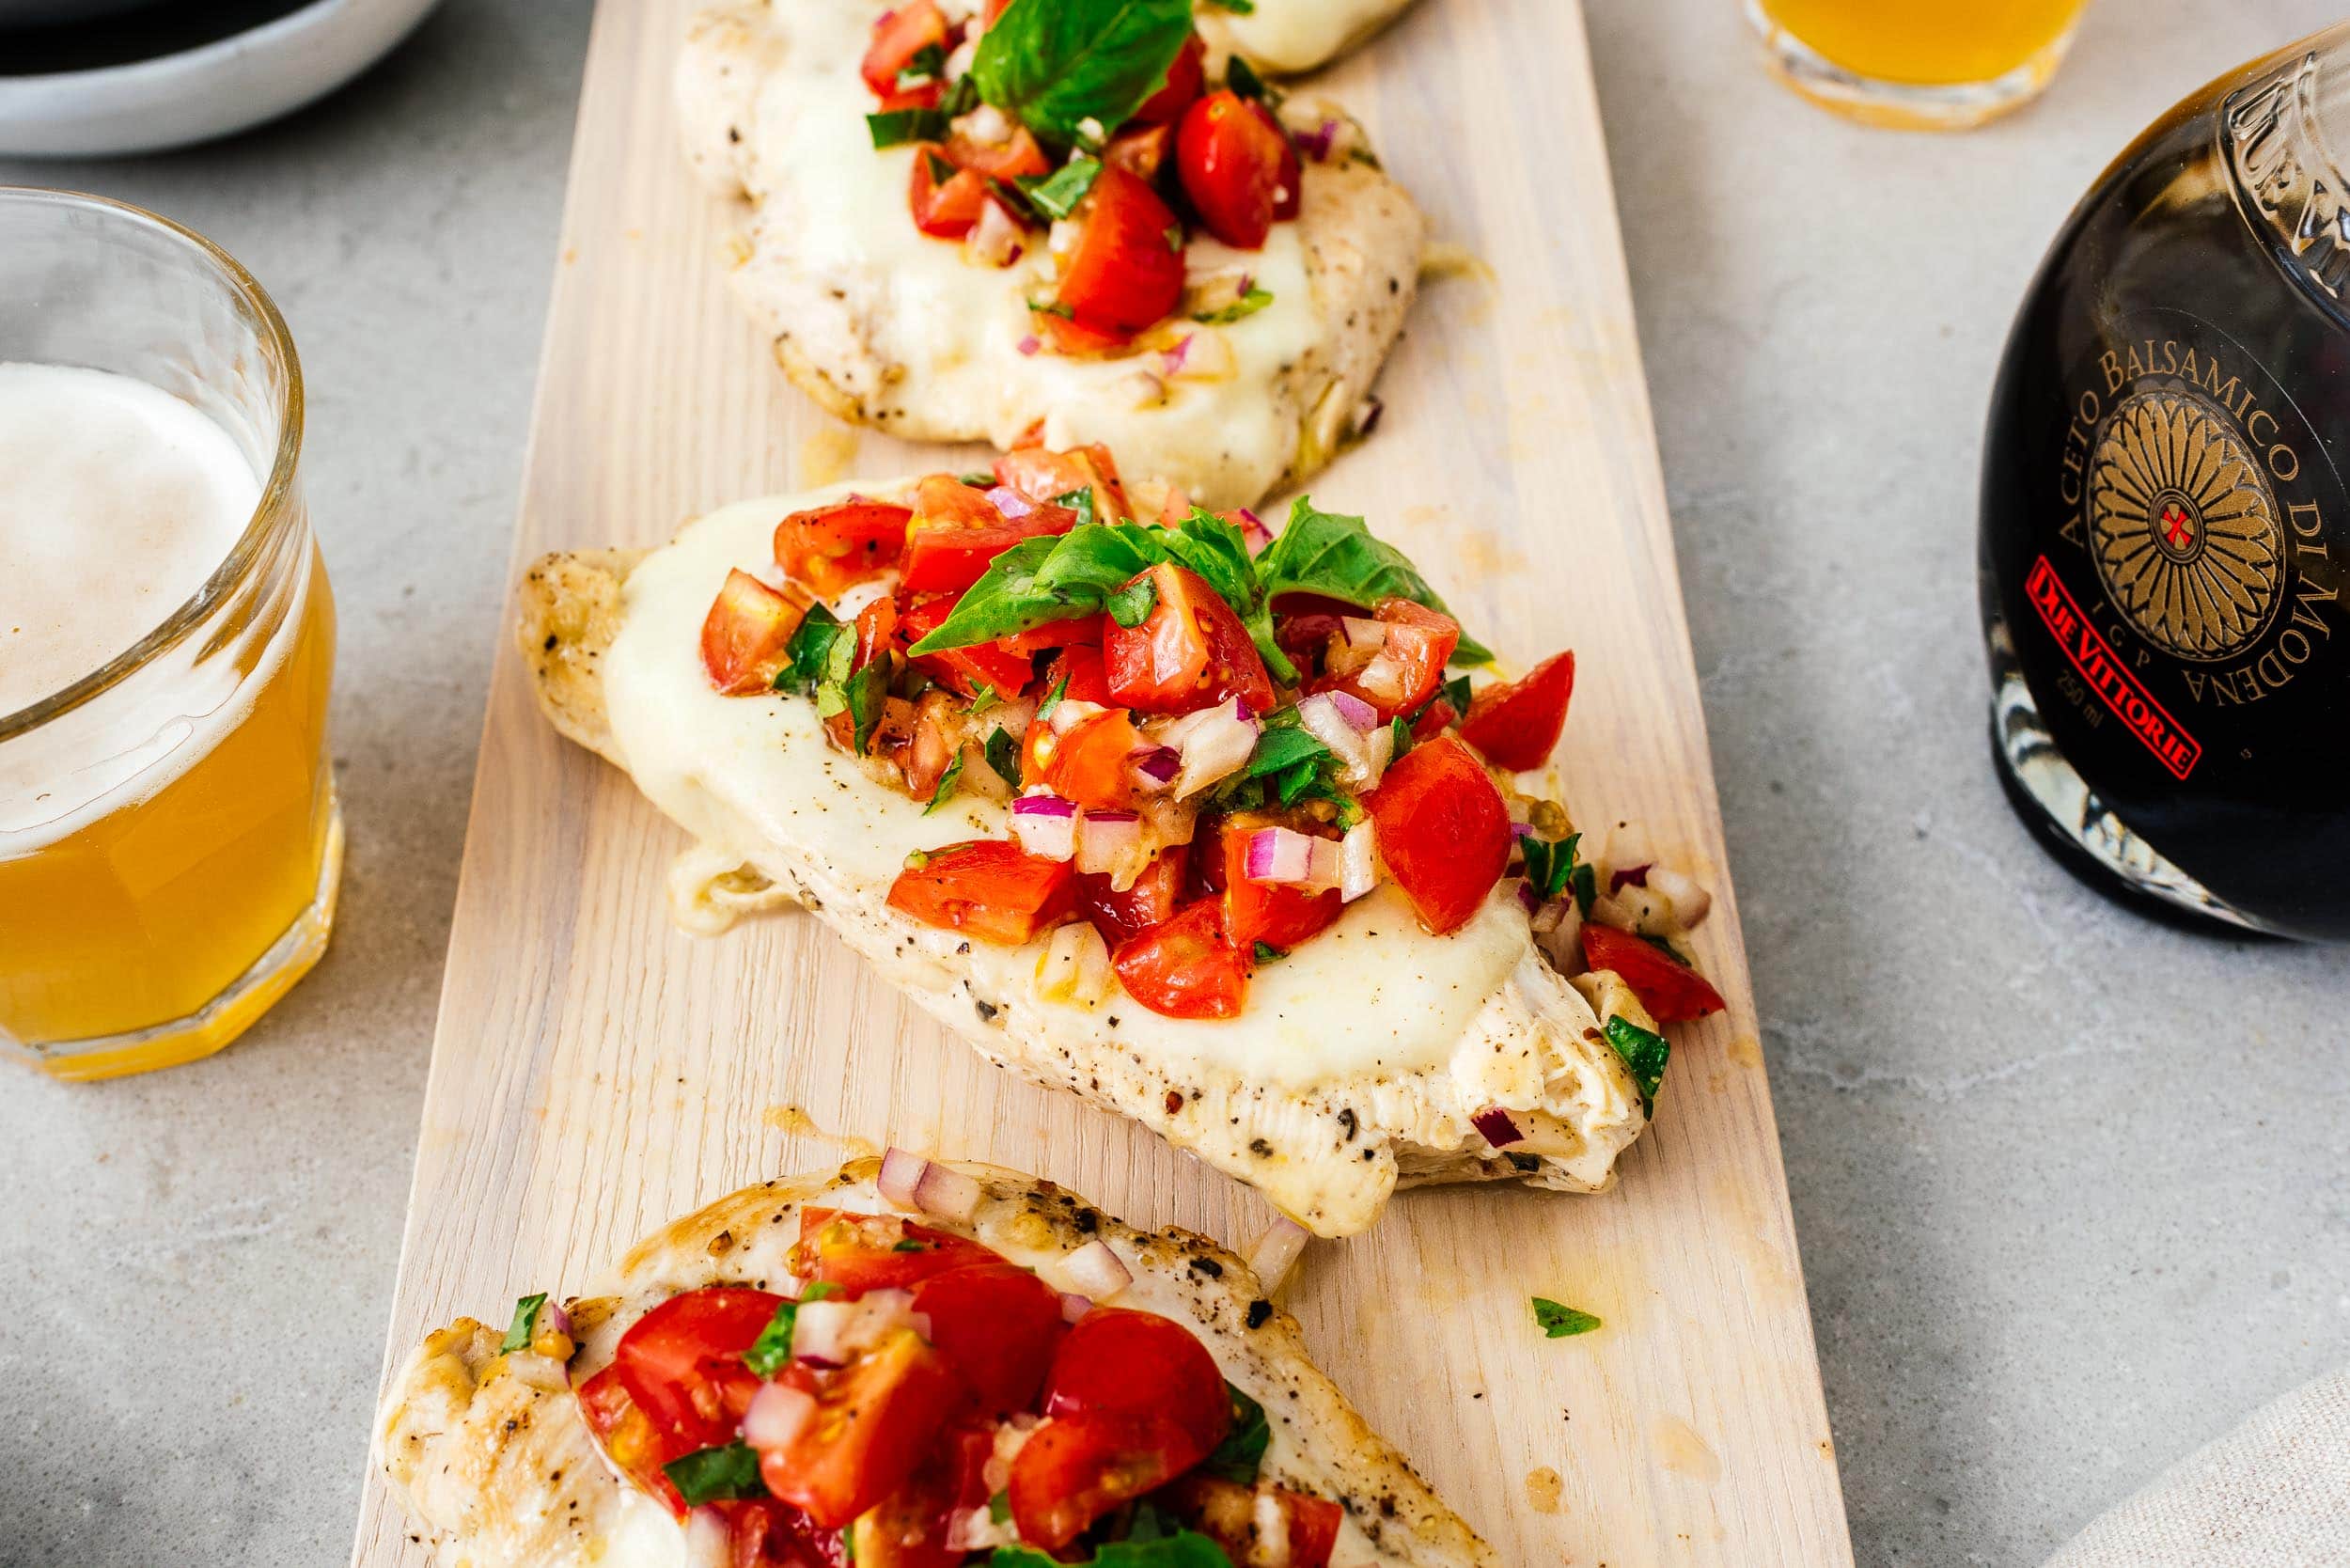
If you love bruschetta and want to eat it all the time, this chicken bruschetta is for you! Bruschetta in the summertime is a masterpiece. The tomatoes are sweet and juicy, the basil is plentiful, the balsamic is tart and delicious, and the toasty bread is amazing. I love classic tomato bruschetta topping so much that we’ve been eating chicken bruschetta on repeat. I know it’s kind of funny to call it bruschetta chicken when bruschetta means to toast, but I really just like saying brew-sketta!
What is chicken bruschetta?
It’s a low-carb, protein forward take on tomato bruschetta. Instead of toast, we’re going to pan sear garlicky chicken breasts, melt a bit of cheese, and finish them with a sweet and bright flavorful tomato-basil topping.What is bruschetta?
Bruschetta is grilled bread rubbed with garlic and finished with olive oil and salt. Bruschetta refers to the bread. They come in a variety of toppings, the most common being chopped tomatoes and basil.Where is bruschetta from?
It’s from Italy and is a classic Italian antipasto, or appetizer. Its deliciousness lies in its simplicity and quality ingredients.How to make chicken bruschetta
- Filet the chicken. Cut the chicken breast in half, horizontally to make two even, flat, filets.
- Marinate. Marinate the chicken in olive oil, garlic, and salt and pepper.
- Make the topping. While the chicken is marinating, halve the cherry tomatoes and mix with olive oil, garlic, basil, and red onion. Taste and season with salt and pepper.
- Cook. Heat up a pan over medium high heat and cook the chicken breast until golden and cooked through.
- Cheese. Turn off the heat, top the chicken breast with cheese, and cover with a lid to melt.
- Top. Remove the chicken from the pan and generously spoon on the tomato topping and enjoy!
How to pan fry chicken bruschetta
To pan fry the chicken, marinate as per the recipe, then heat a non stick pan over medium high heat and sear for 3-4 minutes per side, or until the chicken cooks through and reaches an internal temp of 165°F.How to grill chicken bruschetta
To grill the chicken, marinate as per the recipe, then grill, on an oiled grate over medium high heat for 3-4 minutes per side, or until the chicken cooks through and reaches an internal temp of 165°F.How to bake chicken bruschetta
To bake the chicken, marinate as per the recipe, then cook, in a single layer in an oven safe dish at 425°F bake for 20-25 minutes, or until the chicken cooks through and reaches an internal temp of 165°F.How to air fry chicken bruschetta
To air fry the chicken, marinate as per the recipe, then cook, in a single layer in the air fryer for 8-9 minutes, or until the chicken cooks through and reaches an internal temp of 165°F.Chicken bruschetta ingredients
This is a perfect simple recipe with only 7 ingredients.- chicken breast - boneless skinless chicken breasts work best here. They cook up quickly and you can filet them into thin pieces for even cooking.
- extra virgin olive oil - use the good stuff, especially when you drizzle on extra olive oil at the end to finish. Extra virgin olive oil has so much delicious flavor and it pairs perfectly with tomatoes. Marinating the chicken in olive oil and garlic makes it extra juicy and flavorful.
- tomatoes - bright, tart, and sweet, I like using cherry tomatoes, but you can use whatever is in season at the store. I find that cherry tomatoes are the most consistent in quality because they’re grown in hothouses but in the summer heirloom tomatoes, chopped up, are the way to go.
- garlic and red onions - a bunch of garlic adds a huge amount of flavor and the raw red onions add just the right amount of sharp bite.
- basil - the more the merrier! Fresh basil and tomatoes are a match made in heaven.
- cheese - I like a bit of mozzarella cheese smothering the chicken, but it’s entirely up to you – these taste amazing without as well.
What kind of chicken?
I prefer using boneless, skinless chicken breasts in this case because they’re easy to halve into thin cutlets that cook quickly and evenly. Thighs take a bit longer and they have a slightly more awkward shape that doesn’t lie as flat as breast. Of course, they’re super flavorful and if you want to use thighs, you totally can, just make sure to adjust the cooking time.How do you cut tomatoes for bruschetta?
I like using cherry tomatoes because they’re so sweet and are very consistent in quality. I typically just slice them in half but sometimes I will quarter them. There are a bunch of hacks out there on how to cut cherry tomatoes, but really, how to do it is, one by one, just grab them and slice them in half.How to serve
You can serve chicken bruschetta on it’s own, with salad on the side, or on top of a rice pilaf, pasta, or zoodles. You can even serve it with a side of toasty bread 😉What to serve with chicken bruschetta
- cucumber avocado salad
- kale salad
- crunchy almond broccoli salad
- garlicky herb pasta
- red wine spaghetti
- brown butter parmesan noodles
- eggplant and tomato pasta
Chicken Bruschetta
If you love bruschetta and want to eat it all the time, this chicken bruschetta is for you!
- 2 boneless skinless chicken breasts
- 4 tbsp extra virgin olive oil
- 4 cloves garlic (minced)
- 1 pint cherry tomatoes (halved)
- 1/4 red onion (sliced)
- 1/4 cup fresh basil (sliced)
- 4 slices mozzarella cheese
- balsamic vinegar (as desired)
Slice the chicken breasts in half horizontally to make 4 filets. Season with salt and pepper and marinate with 2 tbsp of the olive oil and half of the minced garlic. Let temper in a cool spot while you prepare the tomato topping.
Cut the cherry tomatoes in half and finely dice the red onion. Toss with 2 tbsp olive oil, the remaining garlic, and the basil. Taste and season with salt and pepper. Set aside.
Sear the chicken breast in a non-stick pan over medium high heat until brown and cooked through, about 3-4 minutes per side. Turn off the heat, top with the slices of cheese, and cover to let the cheese melt.
When the cheese is melty, plate the chicken, topping with the tomato mix. Drizzle on extra olive oil and balsamic vinegar, if desired. Enjoy!
I Am... Tiktok Cowboy Caviar
It’s chips and dip season and cowboy caviar is here to stay! If you’re obsessed with the Tiktok green goddess salad and want an alternative salad to eat with tortilla chips, this is for you. Any salad that disguises itself as dip scooped up with tortilla chips is a yes in my books and cowboy caviar is my new favorite.
What is cowboy caviar?
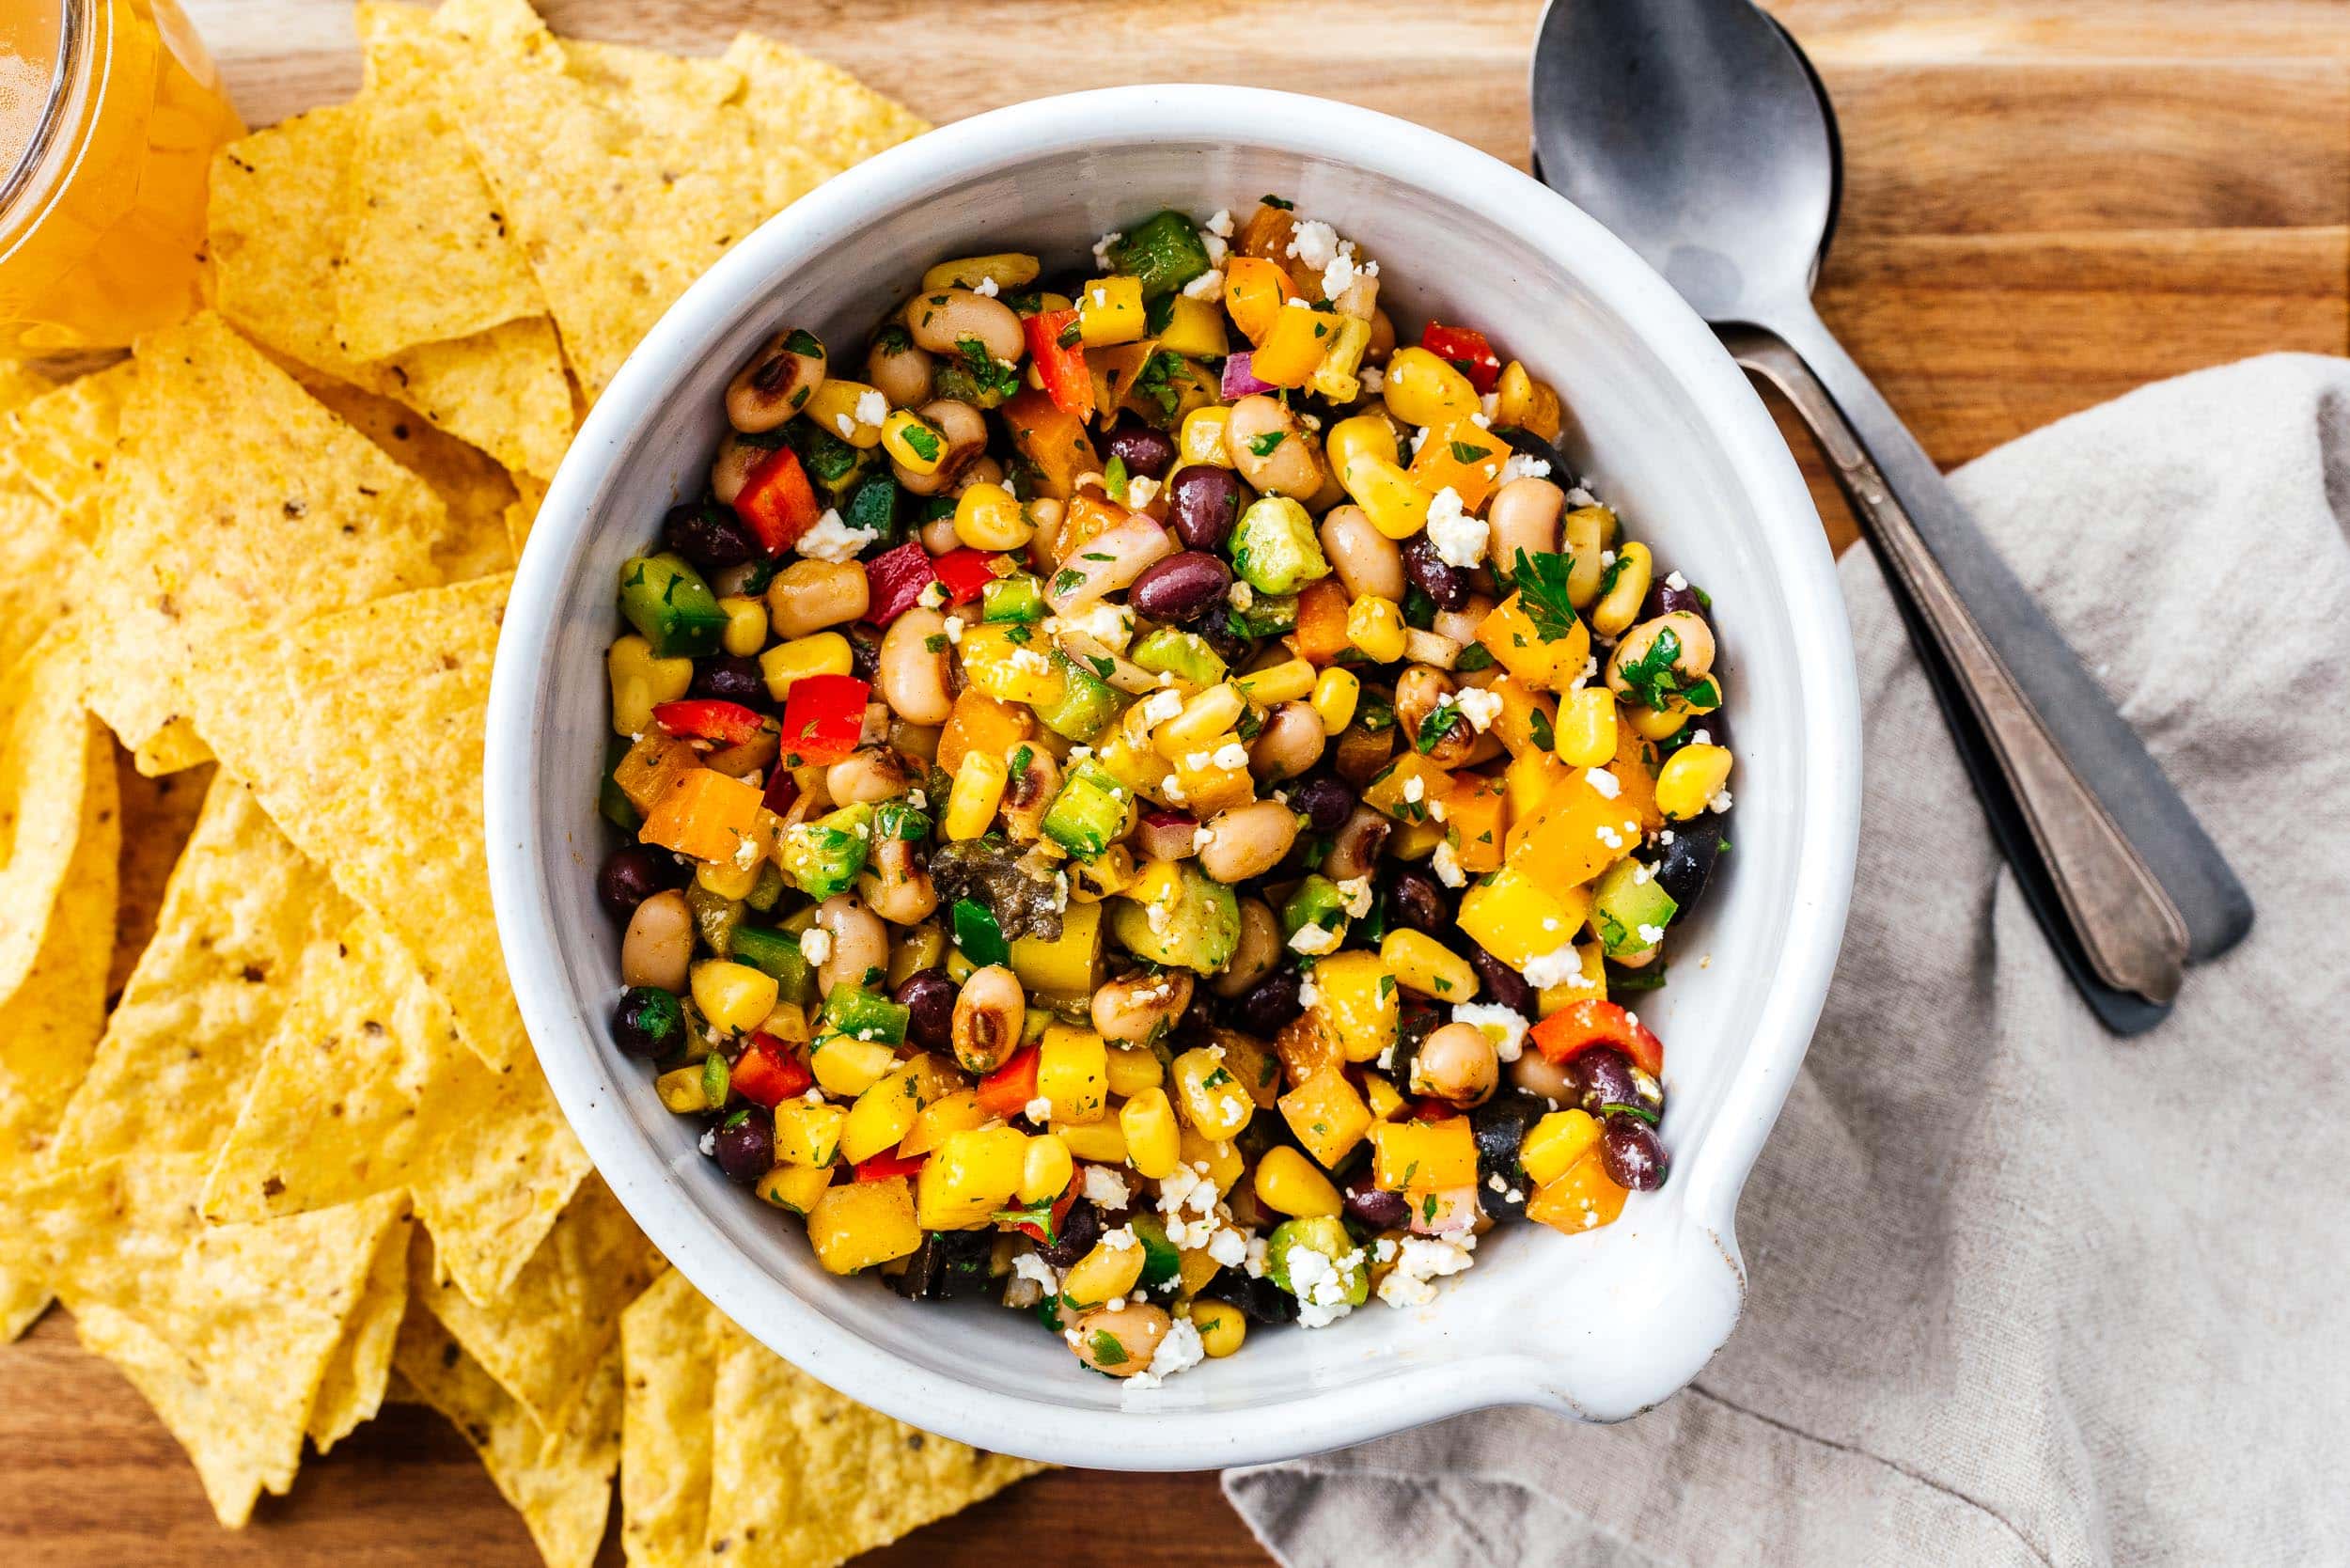
Cowboy caviar, also known as Texas caviar, is a salad made from beans, black eyed peas, and diced vegetables dressed in a zippy tangy vinaigrette and eaten with tortilla chips. You can even eat it as a salad or scoop it up with chips as a dip. It’s kind of a salsa identifying as a salad in the best way possible. Helen Corbitt is the inventor of cowboy caviar – she first made it in the 1940s in Dallas, Texas.Why is it called cowboy caviar?
Helen Corbitt called it Texas caviar in a tongue-in-cheek way because it’s an appetizer like caviar, but affordable and down to earth. It morphed from Texas caviar to cowboy caviar just because of word of mouth and possibly because it has alliteration going on and it’s cute to say.Where is cowboy caviar from?
It’s from Texas. Corbitt, the inventor, was originally from New York, but it was invented in Dallas, Texas and originally served on New Year’s Eve, hence the good luck black-eyed peas.Classic vs Tiktok versions
Tiktok cowboy caviar is trending all over my for you page and this recipe is essentially the one that’s on @brialem’s page. I feel like she is single-handedly introducing it to the masses. It’s always be popular in Texas, but now everyone’s making it. Her version is essentially the same as the classic version but with some distinct differences.- Classic cowboy caviar has: black beans, black eyed peas, bell peppers, red onion, corn, jalapeños, cilantro, and sometimes avocados.
- Tiktok cowboy caviar has: everything in classic edition but different kinds of beans (even chickpeas!) and no tomatoes. It also has the addition of black olives, sweet and spicy pickled jalapeños, diced mangos, and crumbled feta. Sometimes it has peaches or pineapples added in for a sweet and savory twist.
How to make cowboy caviar
- Make the dressing: Whisk together (or put everything in a jar and shake) lime juice, olive oil, white wine vinegar, spicy honey, sugar, and taco seasoning.
- Prep: Drain and rinse the black beans, black eye peas, olives, and corn. Dice the bell peppers, red onion, mango, avocado, and jalapeños. Try to make everything the size of your beans for a consistent bite. Chop the cilantro.
- Toss: Put all the ingredients in a large bowl and toss with the crumbled feta and dressing, making sure everything is evenly coated.
- Enjoy: Enjoy as is or with tortilla chips!
Cowboy caviar dressing
The dressing is tangy and delicious. It’s essentially a lime vinaigrette seasoned with taco spices like chili powder, cumin, oregano, paprika, garlic and onion powder. For ease we’re going to use taco seasoning.Preparing in advance
Since cowboy caviar is hearty and doesn’t have any leafy vegetables, it holds well in the fridge for up to 3-5 days. Make sure to give it a stir to distribute the dressing evenly and add some freshly chopped cilantro to perk it up if needed. Note: If you’re using avocados, it’s best to dice them up and add them right before serving.How to serve cowboy caviar
- As a dip. Serve with chips! Serve it up with tortilla chips as an addictive dip. It’s a great appetizer for game day, picnics, parties, potlucks, bbqs, or even as a treat while you’re binge watching your favorite show.
- As a salad. It’s a complete salad with protein and veggies making it healthy, hearty, and filling. You can also use it as a topping on top of mixed greens, kale, lettuce, or just have it as is.
- In tacos or burritos. You can enjoy it inside tortillas as tacos or as a topping with your favorite burrito fillings, like barbacoa or chicken tinga.
- With eggs. Scoop it up on top of eggs or in omelette.
Tiktok Cowboy Caviar
It’s chips and dip season and cowboy caviar is here to stay!
- 1 can black beans (rinsed)
- 1 can black eyed peas (rinsed)
- 1 can black olives (sliced & drained)
- 1 can corn (drained)
- 4 bell peppers (diced, 1 each of red, yellow, orange and green preferred)
- 1 small red onion (diced)
- 1 mango (diced)
- 2 avocados (diced)
- 2 jalapeños (diced)
- 1 bunch fresh cilantro (chopped)
- 1 cup feta cheese (crumbled)
Dressing
- 3 limes (juice only)
- 1/4 cup olive oil
- 1/4 cup vinegar (white wine vinegar preferred)
- 2-4 tbsp honey (spicy honey preferred)
- 2 tbsp sugar
- 2 tbsp taco seasoning
- salt and freshly ground pepper (to taste)
Make the dressing: whisk together the lime juice, olive oil, white wine vinegar, spicy honey, sugar, and taco seasoning. Alternatively, add to a jar with a lid, shake well and set aside.
Rinse and drain the beans and olives and place in a large bowl. Drain the corn and add to the bowl.
Dice the peppers, red onion, onion, mango, jalapeños, and avocados. Chop the cilantro. Add everything, along with the feta, to the bowl with the beans.
Add the dressing and toss to coat. Taste and season with salt and pepper if needed. Enjoy!
If making this ahead, leave out the avocado and dice and add it to the salad right before you eat.
I Am... Red Wine Spaghetti Ubriachi
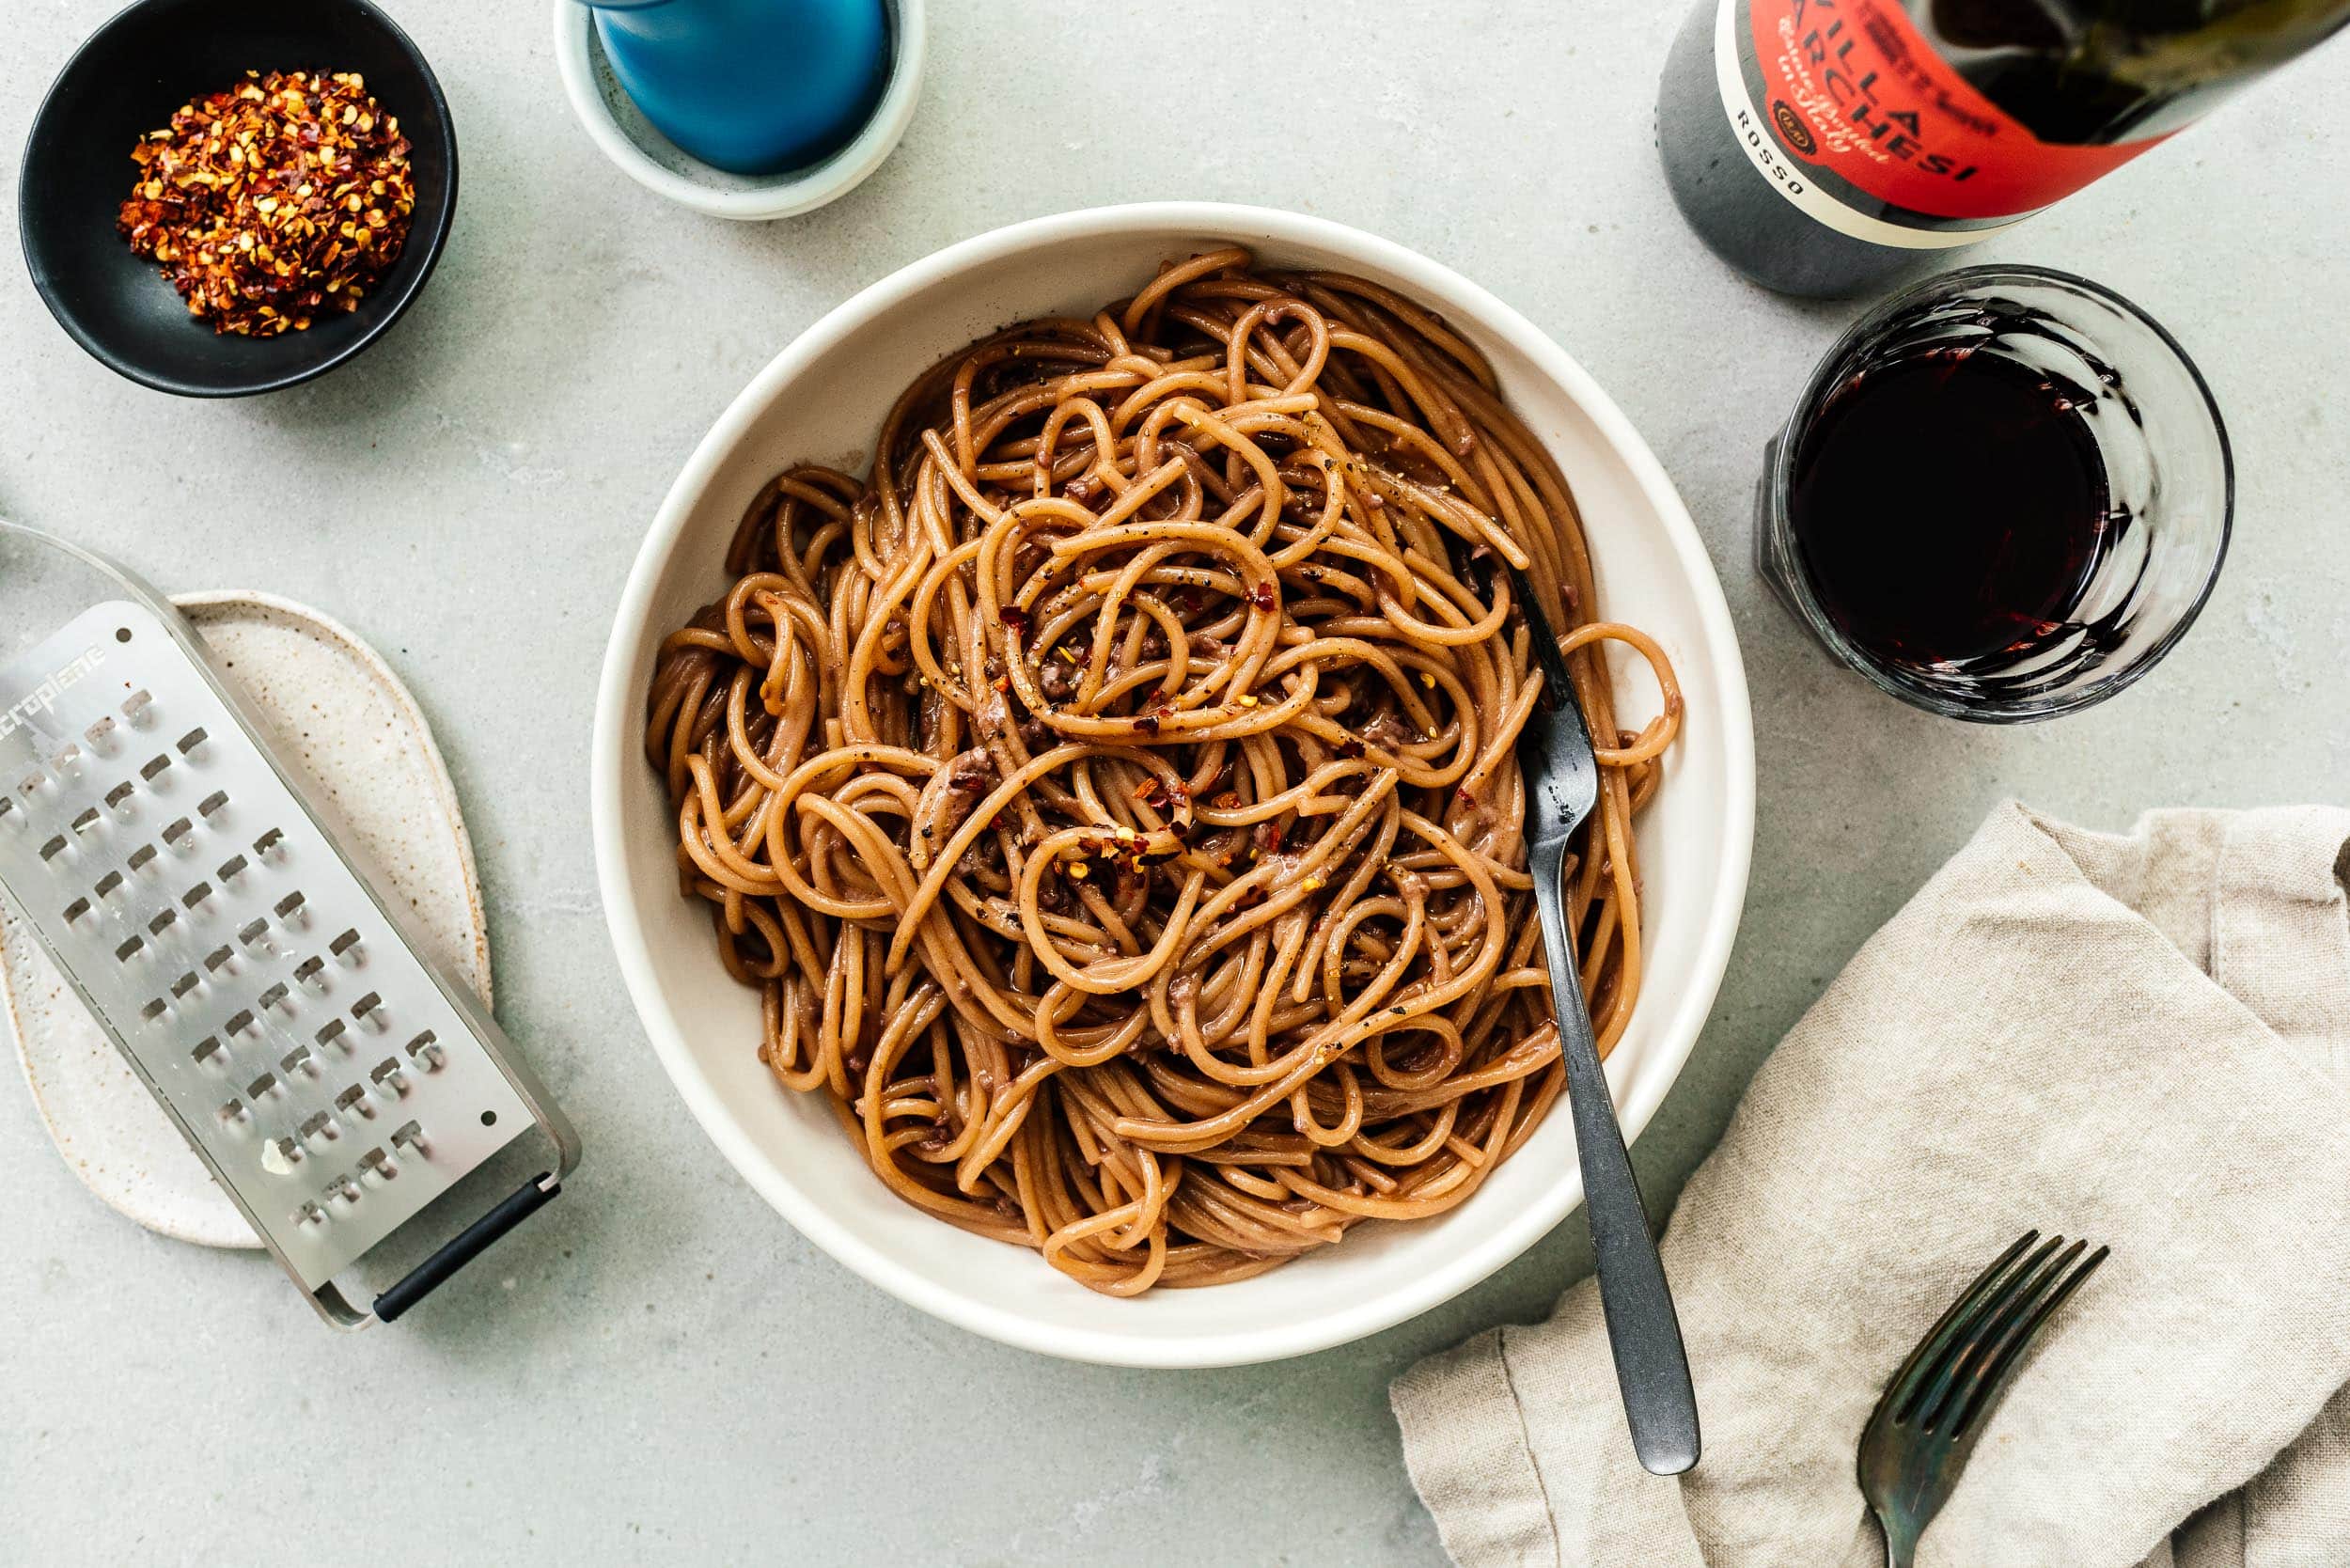
This red wine spaghetti is a classic: deeply flavorful garlicky pasta with a huge hit of robust red wine. Spaghetti ubriachi (as it’s also known) is rich and creamy, slightly tart, and absolutely addictive. On a recent trip to Montreal, one of our favorite things was spaghetti ubriachi or red wine spaghetti. In Italian, ubriachi means drunk, so essentially it’s drunken spaghetti or drunken noodles. It’s a classic Italian dish made with red wine, garlic, olive oil, butter, spaghetti, and parmigiano. It’s amazing!
What is ubriachi spaghetti?
Ubriachi spaghetti, also known as drunken spaghetti, is spaghetti tossed in a glossy burgundy butter sauce seasoned with garlic and red pepper flakes, and finished with a generous amount of finely grated parmesan. It’s rich, full of flavor, and supremely satisfying.What does red wine spaghetti taste like?
Red wine spaghetti is simple, yet rich, with an acidic kick from the wine. Think of it like an aglio e olio but with a hint of acidity (like the kind you taste in lemon pasta) and the warm richness of a good red wine thrown in. The butter adds a luscious creamy note, the crushed red peppers add a touch of spice, and the cheese adds umami and saltiness.Where is ubriachi spaghetti from?
Drunken spaghetti is a classic Tuscan dish from the Umbria region in Italy. When pasta cooks in wine, the noodles stain with a deep mahogany and left with a lightly sweet and tart, deep bold umami flavor.What kind of wine for ubriachi spaghetti?
In Tuscany, they use local red wine, such as something made with Sagrantino or Sangiovese grapes. Truly, any red wine that you enjoy drinking will work well for this dish, since you'll be reducing it down to nothingness. It doesn't need to be expensive, and in fact, the first time we had this dish, I asked our server what kind of wine they used for the sauce and he kindly asked the kitchen. It turned out to be a GIANT box of wine that was the cheapest they could find.How to make red wine spaghetti
Making red wine spaghetti is simple but show stopping. The deeply hued pasta fits in at any dinner party or even just as a special weeknight treat.- Warm the aromatics. In a large skillet, add olive oil, butter, garlic, and chili flakes. Gently warm the aromatics over medium heat, stirring, until the garlic is soft but not brown and everything smells amazing.
- Reduce the wine. Add the wine to the aromatics, turn up the heat and reduce it down into a slightly thickened sauce. You’re aiming to reduce by two thirds, so make a note of how high the wine comes up in the pan.
- Cook the pasta. While the sauce is reducing, cook the pasta according to the package directions, 3 minutes shy of al dente because we’re going to finish cooking the pasta in the wine sauce so all the deliciousness soaks in.
- Finish the pasta in the wine. Use a pair of tongs and grab the pasta straight from the water into the pan with the wine sauce (once it’s sufficiently reduced). Add in some butter and a touch of soy sauce and bring everything up to a simmer. Cook the pasta until just al dente, tossing as needed, until the sauce is glossy and coats each strand of spaghetti.
- Cheese it up. Remove the pasta from the heat and add in the cheese to finish. Toss, letting the cheese melt and coat the spaghetti, loosening with a bit of starchy pasta water if needed.
- Plate. Swirl the spaghetti on a plate and finish with freshly cracked black pepper, more cheese, and a generous drizzle of really good olive oil. Enjoy!
Our red wine spaghetti
We strayed from the classic version a bit to make this even more umami forward and delicious. Our secret ingredient is soy sauce! It adds just the right amount of salt and umami and just gives everything and extra bit of oomph. There’s just a tiny bit, but it makes a huge difference in highlighting the salty umami of the parmesan.Red wine spaghetti ingredients
There are only 8 ingredients, making this a super simple dinner, shopping wise – it’s basically a pantry meal!- Olive oil - If you want to be fancy, go for two different kinds of olive oil, one that you use for cooking and one that you use for finishing. A cooking olive oil is more affordable than a super high end finishing oil. In this recipe you can use your standard cooking olive oil, we usually reach for something like Filippio Berio or California Olive Ranch, which are super wallet friendly and available at most grocery stores. You can finish your pasta with it too, but if you want a bit of extra luxury, go for a finishing olive oil. Finishing olive oils vary quite a bit in taste, from peppery and bold to fruity and mild, so it’s best to pick one that you love the flavor of.
- Garlic - 4 cloves of garlic add a mellow garlicky sweetness and background note. If you’re a garlic lover, feel free to add more.
- Chili flakes - Just a bit of chili flakes to bring out the warmth and heat.
- Butter - We’re going to use this to emulsify the wine into a beautiful glossy sauce. Go for an unsalted grass fed butter if you can, otherwise, the butter in the fridge works just fine.
- Spaghetti - This is pretty standard, you want to go for a dried spaghetti as opposed to a fresh pasta here because the pasta finishes cooking in the sauce and a dried spaghetti holds up better.
- Red wine - A nice-ish but not too nice bottle is what we’re looking for here, see notes above.
- Soy sauce - Just a tiny, sneaky bit of soy sauce to up the umami. We like using Yamasa.
- Parmesan - This has got to be the real stuff that you grate by yourself, none of the green bottle! Grab a nice hunk of Parmigiano Reggiano, your taste buds will thank you.
What to serve with red wine spaghetti
Serve this up with a bright and bracing kale salad and some sourdough focaccia or garlicky soft rolls for the ultimate in Italian comfort food. Hopefully a red wine night is in your future! xoxo stephRed Wine Spaghetti
Spaghetti ubriachi is rich and creamy, slightly tart, and absolutely addictive.
- 2 tbsp olive oil (plus extra to finish)
- 6 cloves garlic (finely minced)
- 1/4 tsp red pepper flakes (or more as desired)
- 4 tbsp butter
- 8 oz spaghetti
- 1.5 cups red wine
- 2 tsp soy sauce
- 1/4 cup Parmigiano Reggiano cheese (finely grated)
Add the olive oil, garlic, chili flakes, and 1 tbsp butter to a large skillet and heat over medium heat. Cook, stirring occasionally until the garlic is soft, but not brown, about 3 minutes.
Add the wine and increase the heat to medium high and bring to a rolling simmer until it starts to reduce.
While the sauce is cooking, cook the pasta 3 minutes shy of al dente. Pull the spaghetti straight from the cooking water using tongs and place it into the reduced wine sauce.
Add the remaining butter and and soy sauce bring to a simmer. Cook, stirring occasionally, until the sauce thickens and the pasta is glossy and well coated.
Remove the pasta from the heat and add the cheese, tossing to melt evenly. If needed, add pasta water 1 tablespoon at a time to help melt the cheese evenly.
Serve topped with freshly cracked pepper and a drizzle of finishing olive oil. Enjoy!
I Am... Pasta Salad
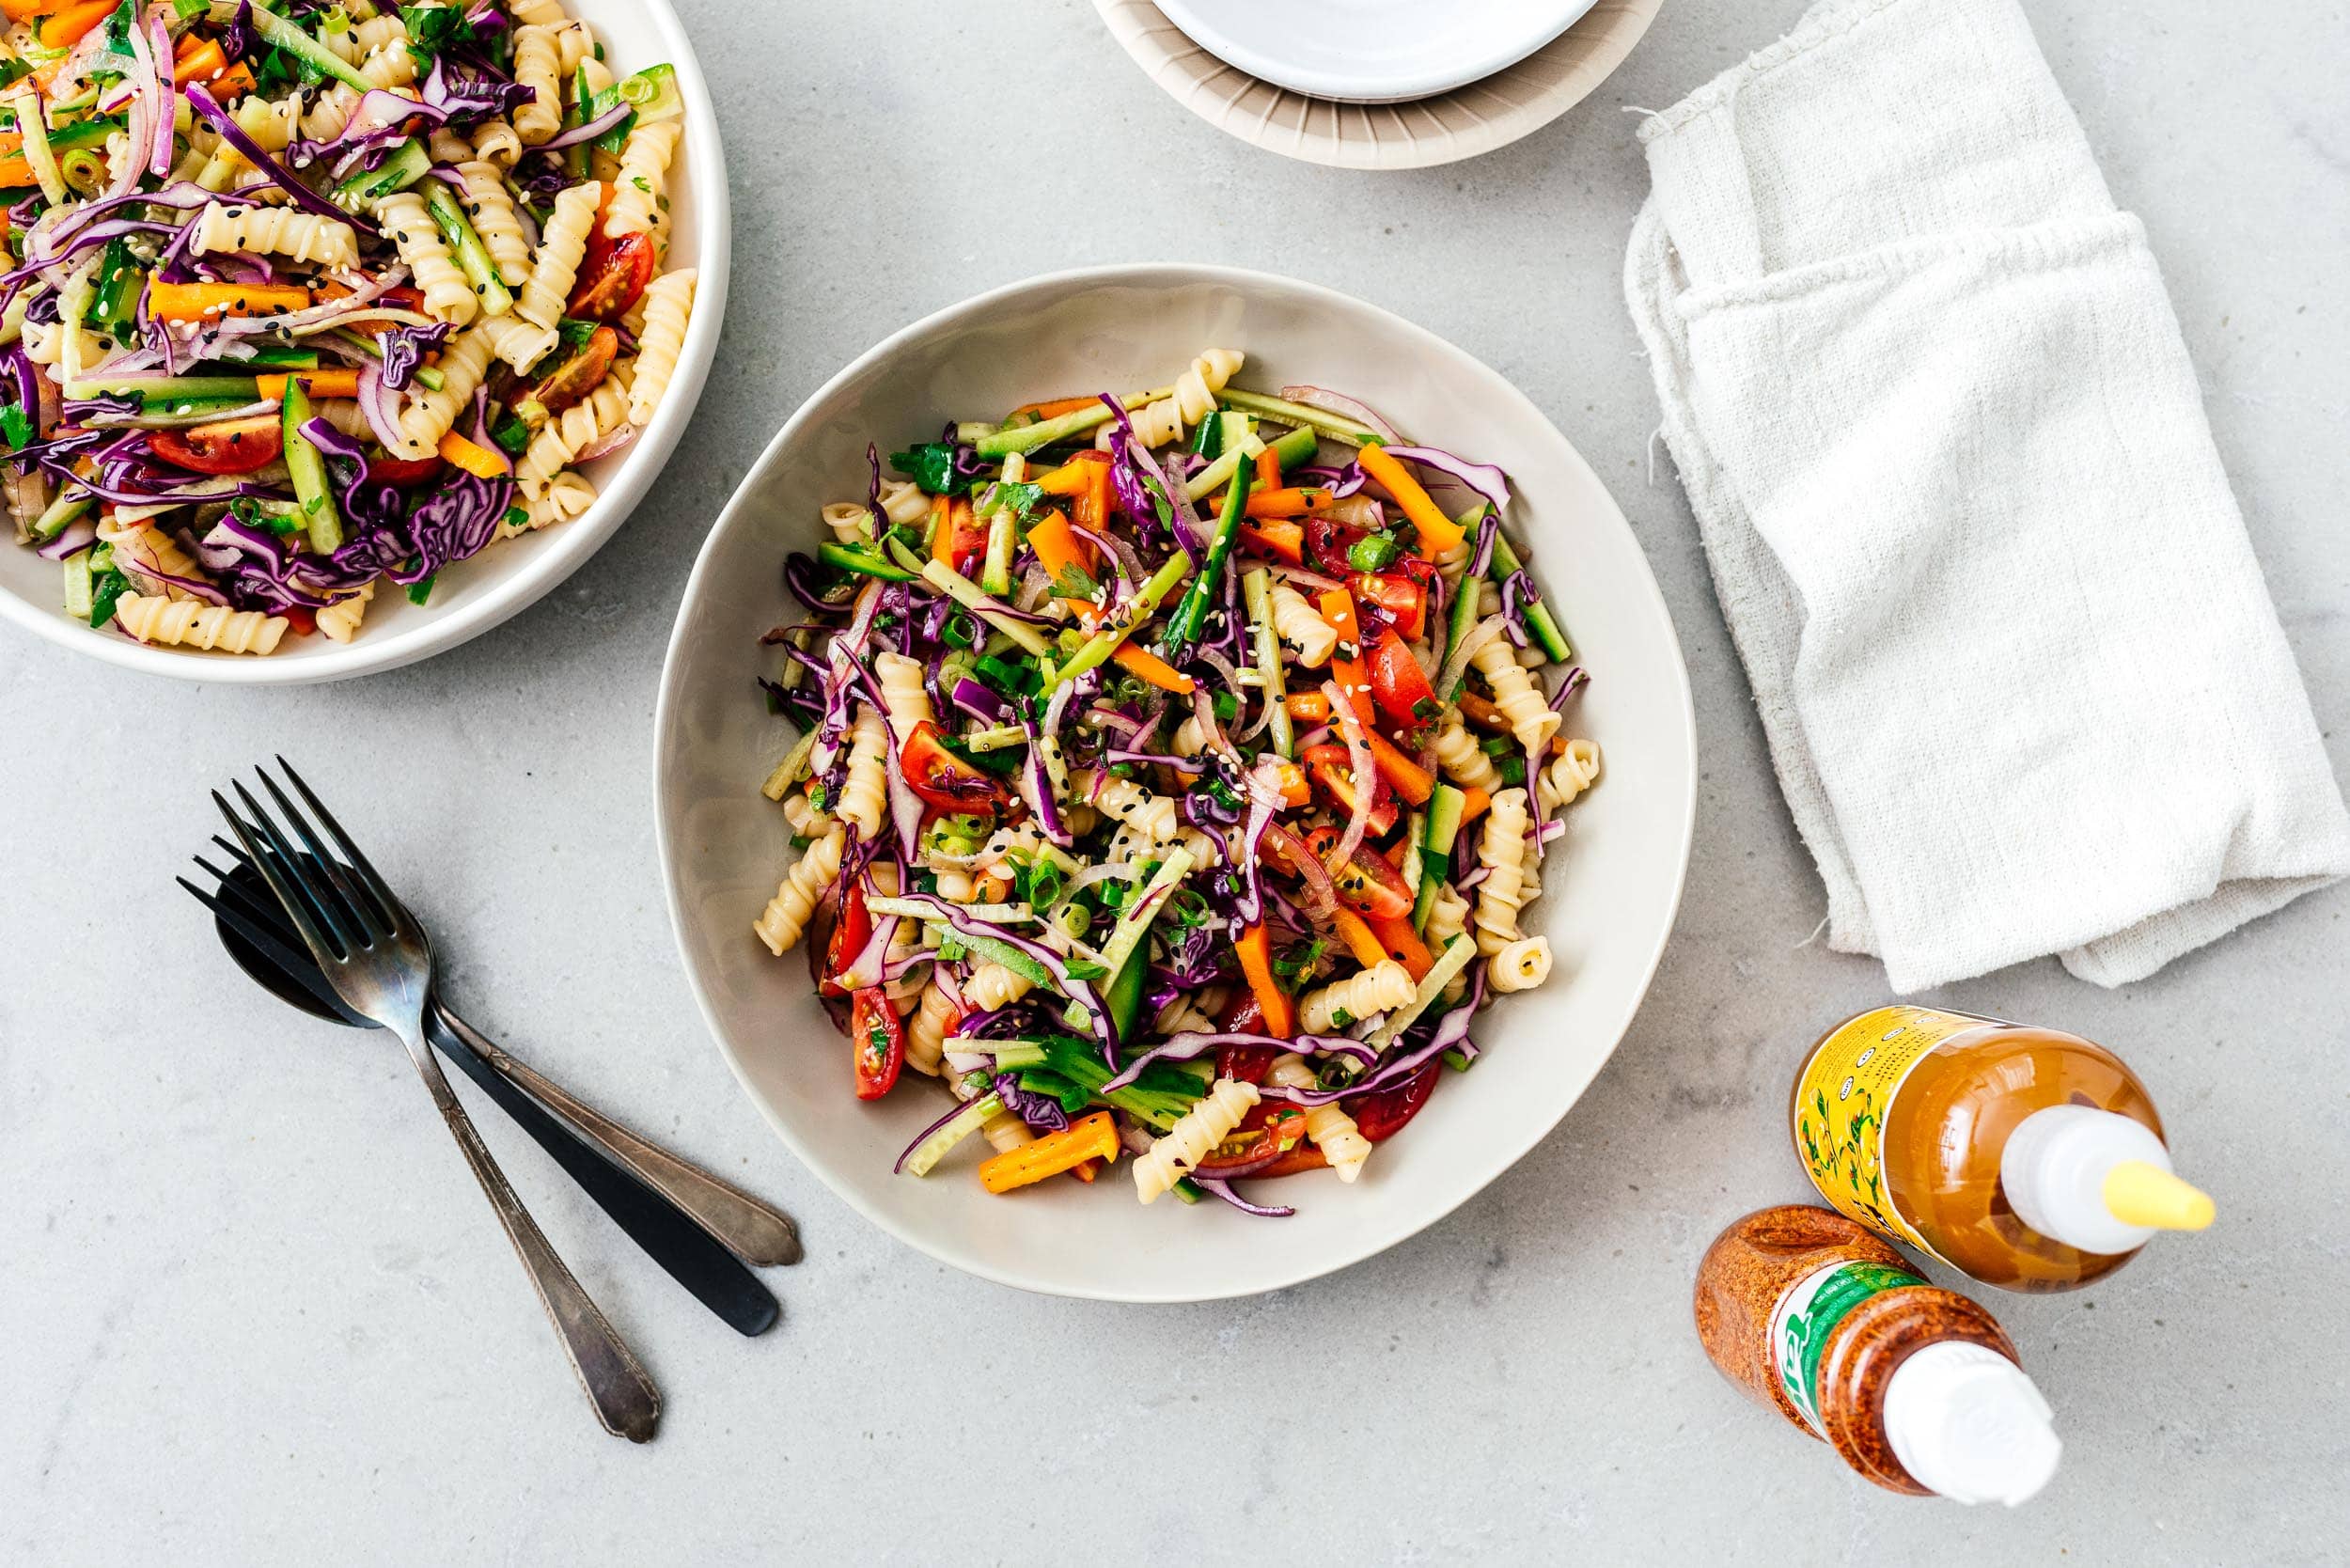
No barbecue, backyard get together, or summer outing is complete without pasta salad. I love the contrasting fresh flavors of pasta salad when digging into grilled food. It’s a match made in heaven. Squishy noodles, a tangy-savory dressing, crunchy vegetables, and a sprinkling of flavor means pasta salad is here to stay.
The best pasta salad dressing
There are two camps of pasta salad lovers: mayo lovers and mayo haters. I love mayo, especially kewpie mayo, but I am a fan of oil based dressings for pasta salad. Somehow they just feel fresher and more light. Plus oil based pasta salads hold up better when served both cold and at room temp, so it’s a win-win. This particular dressing is Japanese inspired with tangy rice vinegar, toasted sesame oil, and soy sauce. It’s light yet umami forward and tastes absolutely amazing. The toasted sesame oil is a little bit nutty, the rice vinegar is just the right amount of acid, and the soy sauce adds umami and salt. It’s really, really good.How to make pasta salad
- Make the dressing. Whisk together neutral oil, rice vinegar, toasted sesame oil, soy sauce, salt and pepper, and toasted sesame seeds. Taste and set aside.
- Cook the pasta. Bring a large pot of salted water up to a boil and cook the pasta according to the package directions. When it’s done, rinse it under cool water, loosening all of the noodles.
- Prep the vegetables. While the pasta is cooking, shred the cabbage, julienne the peppers and cucumber, slice the onions, halve the cherry tomatoes, roughly chop the cilantro, and thinly slice the green onions.
- Toss. Toss the rinsed and well drained pasta with 1/2 of the dressing, making sure each noodle is coated in sauce. Add the vegetables and toss with the remaining dressing.
- Garnish and serve. Finish off with extra cilantro, green onions, and toasted sesame seeds. Enjoy!
Should you rinse your pasta for pasta salad?
Yes. This is the only case EVER in which you should rinse your pasta. Usually we want the starchy coating that is on pasta after it cooks, but in the case of cold pasta salad, the starch causes gumminess and clumping. Lightly rinse the pasta under cool water to keep the pasta loose and separate, then drain well before dressing. Alternately, you can drain well and toss the pasta with a touch of oil, coating and loosening each piece. Personally, I like rinsing because it cools the pasta a bit and I don’t want the vegetables to wilt when I add them to the pasta.What is the best kind of pasta for pasta salad?
Dried pasta all the way! Save your fresh pasta for silky sauces or fresh seafood. Short pastas with lots of nooks and crannies are ideal for trapping dressing and herbs. Plus, they scoop up easily and are easy to eat. Try: fusilli, rotini, penne, orecchiette, bucati corti, farfalle, lumache, radiatori, cavatapi, gemelli, campanelle, or riccioli. There are so many fun short pasta shapes out there and all of them will work well in pasta salad.What kind of vegetables to add to pasta salad
The rule is, if the vegetable tastes good raw, it’s pretty much good to go in pasta salad. Just make sure you cut everything up into an appropriate sized so you don’t have giant piece of cucumber that you’re gnawing on. I like to julienne everything because that somehow makes the vegetables pair better with the pasta. No giant florets or chunks, everything should be delicate and bites sized. If you’re not a huge fan of raw vegetables, give them a quick blanch in boiling water then shock in cold water before adding to your pasta salad. Also, leafy greens (aside from kale) tend to wilt, so add them right before serving.Here are some veggies you can try:
- crunchy: bell peppers, carrots, broccoli, cauliflower, onions, celery, corn, peas,
- juicy: tomatoes, cucumbers
- leafy: kale, romaine, arugula, baby spinach, basil, mint
Can you make pasta salad in advance?
Yup, that’s one of the joys of pasta salad. You can definitely make it in advance – I recommend making it the day before or the morning of the day you’re planning on serving.Tips and tricks
- Cook the pasta tender. Make sure you’re cooking the pasta in a large pot of salted water according to the package directions. Since the pasta won’t continue cooking in sauce, you want to cook it perfectly, not too soft and not too toothsome, just tender enough. Usually there’s a range of time on the box, cook it to the higher side of the range.
- Avoid dry pasta salad. Pasta has a tendency to soak up dressing like a sponge. Keep some of the dressing for stirring into the salad right before you serve it so every item is flavorful, glossy, and lightly coated with dressing.
- Season. Make sure you taste your salad after it’s chilled. Cold food tends to taste muted, so give it a taste and adjust if needed.
- Texture. Textures make eating fun and are why people come back over and over again to a dish. A pasta salad without texture tends to be too soft. Add nuts and seeds, crunchy vegetables, fresh tender herbs, jammy eggs, soft cheese, crispy bread crumbs, or even crushed up chips or crackers. Add the garnish at the last minute, right before you serve so the crunchy things stay crunchy.
- Noodles. If you’re over pasta, why not try a cold noodle salad. Soba, rice noodles, and egg noodles work well, just make sure that you dress them well so they don’t stick together.
Pasta Salad
No barbecue, backyard get together, or summer outing is complete without pasta salad.
- 1/3 cups rice vinegar
- 1/3 cups neutral oil
- 1-2 tbsp soy sauce
- 2 tbsp toasted sesame oil
- salt and freshly ground pepper
- 1 tbsp toasted sesame seeds
- 6 oz pasta (short preferred)
- 2 cups red cabbage (thinly sliced)
- 1 red pepper (cored and sliced)
- 1 orange pepper (cored and sliced)
- 1 cucumber (deseeded and julienned)
- 1 pint cherry tomatoes (halved)
- 1/2 small red onion (thinly sliced)
- 1/3 cups fresh cilantro (roughly chopped)
- 1/3 cups green onions (sliced)
Whisk together the dressing and set aside.
Cook the pasta according to the package directions. When the pasta is ready, give it a quick rinse under cool running water, making sure that none of the pieces are sticking together. Drain well.
While the pasta is cooking, prep the vegetables.
Add the pasta to a large bowl and toss with 1/2 of the dressing, making sure to coat each piece of pasta.
At this point the pasta should be fairly cool. Add the vegetables, the remaining dressing, and toss to coat evenly. Enjoy!
I Am... Dark Soy Sauce
If you love eating and making Chinese food but are wondering why your home cooked meals don’t have the same color, depth, and flavor as restaurants or take out, I’m here to tell you! The secret ingredient is *dark* soy sauce. Soy sauce is a pretty common ingredient, and most home cooks are well versed with regular soy sauce, but do you know about dark soy sauce?
What is dark soy sauce?
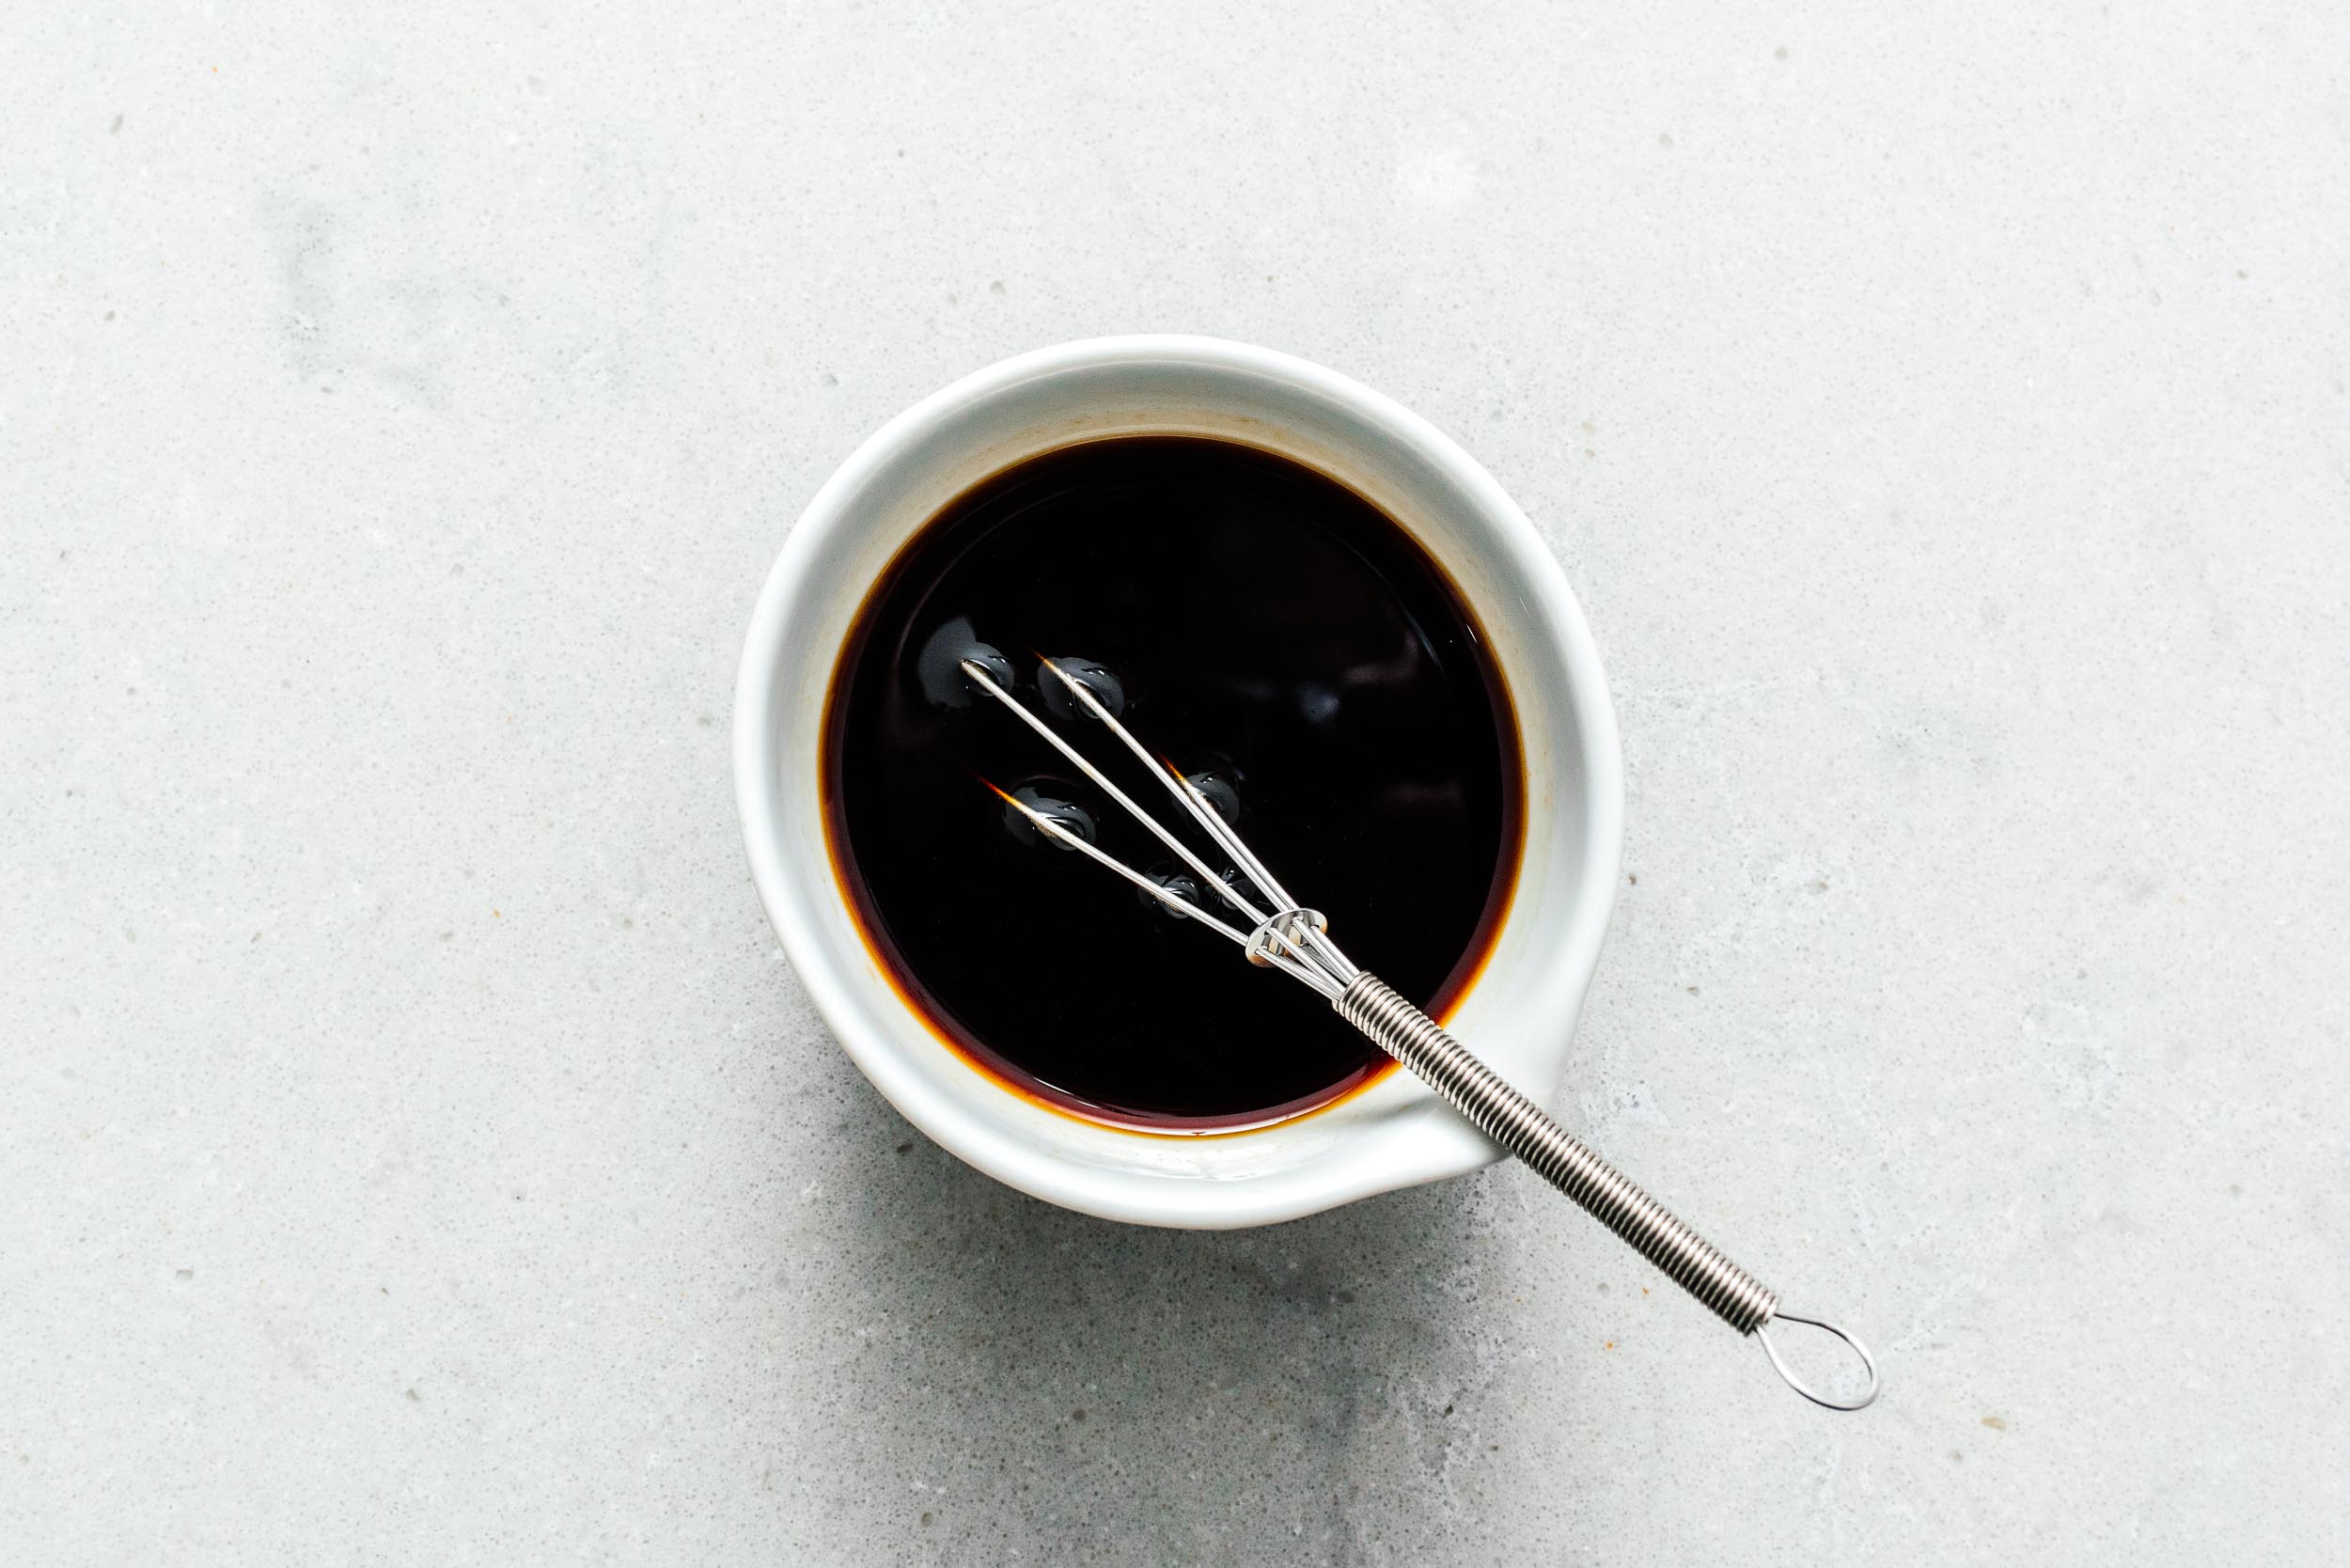
Dark soy sauce 老抽 or lǎo chōu is a thick, super opaque, slightly sweet soy sauce. Just like light or regular soy sauce, it’s for flavoring, but more so for adding that classic caramel color to a variety of dishes. It’s darker than regular soy sauce because it’s been aged longer.What is the difference between dark and light soy sauce?
- Light soy sauce, also just referred to as soy sauce, is light in color, almost a see through reddish brown, and thin in viscosity. It’s salty and delightful and essential to Chinese cooking. It’s used for seasoning as well as for dipping.
- Dark soy sauce is thicker, darker, and tastes slightly less salty then regular/light soy sauce. It’s almost black and has the look of soy sauce, but reduced. It is for flavor, but mainly for adding color to dishes. The color comes from a longer fermentation of the soy bean and there’s a very mild minute sweetness to it as well.
What is it sauce used for?
It's mainly used in braised dishes like: three cup chicken, stir fried noodles like bork belly and kale fried noodles, and tossed noodles, like lo mein. You only need a tiny bit, but it adds so much color and flavor!Brands
There are two main brands that we prefer: As a general rule, go for naturally brewed, “superior” or “premium” soy sauce.Where to buy
You can almost always find it in Asian grocery stores or online. Sometimes, a well stocked grocery store might have it in the International aisle.Dark soy sauce substitute
There's no real substitute for it but if you don’t have any dark soy sauce you can omit it or add a tiny bit more regular soy sauce. Your final dish won’t have the same color and flavor as intended, but it won’t ruin your dish. Warning: reducing regular soy sauce will not achieve the same effect.How to use
Most Chinese recipes call for a combination of light and dark soy sauces for a balance between flavor, color, and salt content. If you use just light soy sauce, your dish will be salty, but very light in color and not balanced in flavor. If you use just dark soy, your dish will end up strong tasting and be very dark. Use light soy sauce to add saltiness and add a bit of dark soy to bump up the umami and color.Recipes that use dark soy sauce:
- lo mein
- Beijing meat sauce noodles/zha jiang mian
- scallion noodles
- Chinese sticky rice
- Thai basil chicken
- Taiwanese 3 cup chicken
- Spicy chili oil noodles
I Am... Everything Bagel Seasoning
It’s super easy to make homemade everything bagel seasoning: only 5 ingredients and less than a minute of your time! Everyone loves everything bagel seasoning, am I right? I throw that stuff on everything like it’s going out of style. It’s that secret ingredient that you can add to anything to add flavor. I like to think of it like furikake - that magical Japanese seaweed seasoning mix that tastes amazing on rice and noodles. Essentially it’s the same thing, a mix of salt and spice that makes everything taste nice.
What is everything bagel seasoning?
Everything bagel seasoning is the seasoning that goes on the outside of everything bagels. Every bagel maker has their own mix but commonly they include poppy seeds, sesame seeds, onion flakes, garlic flakes, salt, pepper, and sometimes caraway seeds. Everything bagels are delicious because they well, they have everything! Everything bagels are so popular that the seasoning is now used on everything from croissants to rolls and even chips.How to make everything bagel seasoning
It’s super easy to go out and buy a jar of the stuff, but did you know that it’s almost just as easy to make it at home? All you do is mix together toasted sesame seeds, poppy seeds, dried garlic, dried onion, and salt. Boom, instant flavor. And so much cheaper!Everything bagel seasoning ingredients:
- Toasted sesame seeds - These are the best part of everything bagel seasoning. Nutty and toasty and warm. I like using a mix of black and white sesame seeds.
- Poppy seeds - Poppy seeds add a perfect little crunch with a hint of fruitiness.
- Dried garlic flakes - Garlic lovers unite because dried garlic flakes are intense little nuggets of flavor. Sometime they call this minced dehydrated garlic.
- Dried onion flakes - Sometimes called dehydrated minced onion, these little flakes are essentially onions, chopped up fine and dehydrated.
- Salt - I like using flaky sea salt but sometimes I omit it entirely and just salt my dish to taste. It’s really up to you, but if you are going to add salt I recommend a flaky sea salt or a smoked salt for extra flavor.
Garlic and onion flakes vs garlic and onion powder
If you can, seek out garlic flakes and onion flakes because they are not the same as garlic and onion powder. Garlic and onion powder are pulverized, powdered versions, whereas flakes are tiny dehydrated pieces. You could use the granulated versions but it won't the same look and feel, and you may need to use less than the recipe indicates because of their smaller size. You can find dehydrated garlic and onion flakes online and in the section near the salad dressings.
What does everything bagel taste like
Use everything bagel seasoning when you want to something to taste:- toasty
- nutty
- salty
- oniony
- garlicky
You can use everything bagel spice on:
Click the links for recipes and ideasRecipes with everything bagel spice:
- Everything bagel aglio e olio pasta
- pretzel bites
- Everything bagel rolls
- Everything bagel stir fried udon
- noodles
Everything Bagel Seasoning Recipe
You're only 5 ingredients away from toasty, nutty, salty, oniony, garlicky heaven.
- 1.5 tbsp toasted sesame seeds (see notes)
- 1 tbsp poppy seeds
- 1 tbsp dried minced garlic
- 1 tbsp dried minced onion
- 1 tsp flaky sea salt (or coarse salt)
Combine everything together in a small bowl. Use as is and store leftovers in an airtight container.
If you have some toasted black sesame seeds on hand, mix it up, it’ll make your everything bagel seasoning extra pretty.
I Am... Chilaquiles: Tortillas and Cheese and Salsa for Breakfast
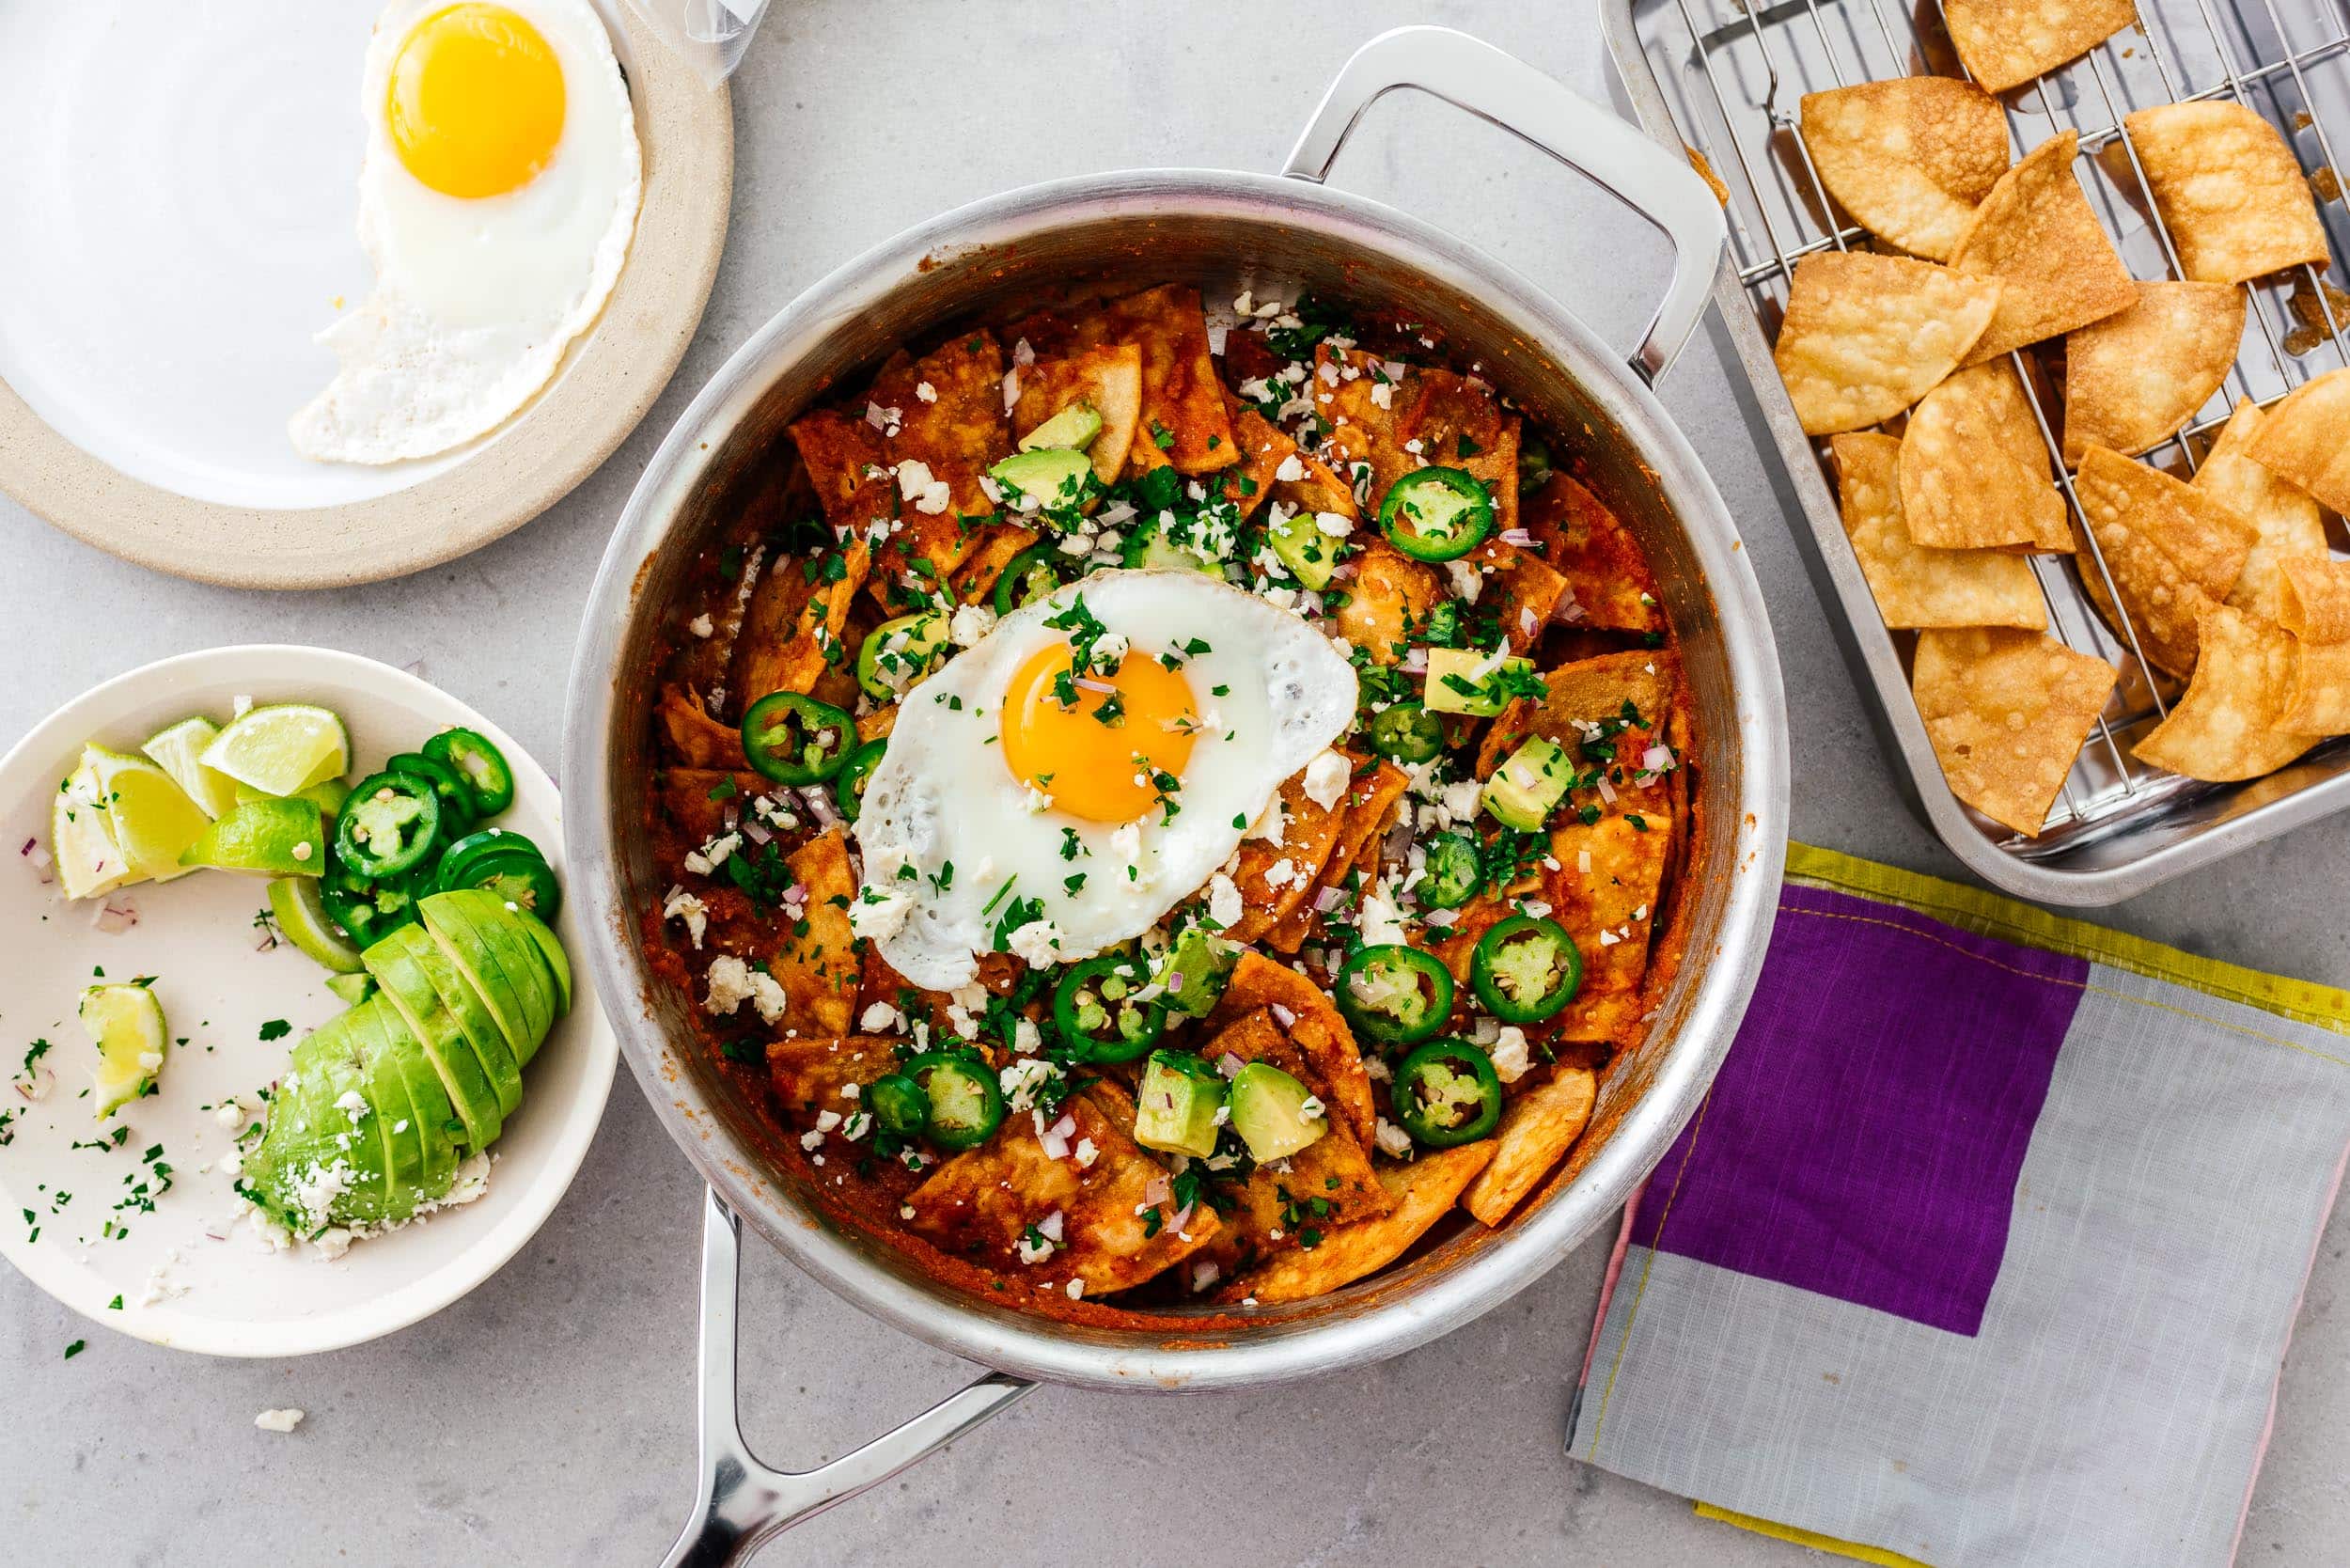
If you’re looking for a hearty, filling, super satisfying breakfast or brunch, chilaquiles is the answer. It’s true Mexican comfort food, the kind that will fill your belly and your heart. They can be for breakfast, lunch, dinner, or anytime in between. Chilaquiles make an excellent brunch dish and an all around comforting meal. I love them so, so much!
What are chilaquiles?
Like so many amazing foods – french toast, fried rice, croquettes – chilaquiles came about as way to use up leftover food, in this case, stale tortillas. Corn tortillas from last night’s taco feast find new life when fried into chips and coated with warm salsa until slightly soft on the outside with a bit of a bite on inside. At their simplest, chilaquiles are tortilla chips in sauce. Corn tortillas, cut into quarters and fried in oil become corn chips, which are then tossed in red or green salsa and simmered until the chips become slightly tender. Generally, chilaquiles come with diced onions, cilantro, cream, queso fresco or cojita, avocado, and sometimes eggs or protein on top.How do you say chilaquiles?
It’s “chee-lah-key-lees” The word comes from the word “chilaquilli” which means something covered in chili and greens.What do chilaquiles taste like?
Truly, they taste amazing. Crispy, crunchy, tender fried corn tortillas tossed in warm super savory salsa topped off with bright and refreshing herbs. They are a combination of rich flavors and contrasting textures making them a pleasure to eat. If you haven’t had them before, you might think: aren’t these just soggy, sad nachos? The answer is no! They are the best – comforting carbs that are a perfect contrast of tender and crisp in a smoky, savory sauce.Are chilaquiles crunchy or soft?
They are both! There are people who like their chilaquiles soft and there are people who like their chilaquiles crispy. If you’re a crisp lover, gently toss with sauce and serve immediately. If you’re a soft fan, let the chips simmer in the salsa for couple minutes longer, until they collapse into a tender pile of deliciousness.How to make chilaquiles
Chilaquiles can be as simple or as convoluted as you like. For the super simple, all you need is store bought chips and enchilada sauce. For a bit more of a satisfying meal, fry up your own tortilla chips and make your own roja salsa.- Fry the tortillas. Cut up old tortillas into wedges and fry them up in oil so they become chips. Alternately, you can use store bought tortilla chips, but look for the hearty kind.
- Make the sauce. Simmer together blended tomatoes, onion, garlic, chipotle in adobe, and Mexican oregano until thick and aromatic.
- Sauce the tortillas. Add the chips to the sauce, stirring to coat every chips.
- Top the tortillas. Plate the chips, topping with cilantro, onions, and fried eggs.
- Enjoy! That’s it!
Chilaquiles ingredients
- tortillas/tortilla chips - old corn tortillas fry up into the best chips, more on that below.
- salsa - salsa, or sauce, is what really makes chilaquiles shine. Everyone makes their chilaquiles sauce differently, but generally, the sauce is either tomatoes and seasonings or tomatillos and seasonings. More on chilaquiles sauce below.
- toppings - here’s where you can have fun customizing! Fried eggs, cilantro, onions, jalapeños, sliced radishes, carnitas, tinga, avocado, crema, cheese, it’s really up to you!
Store bought or homemade chips?
Homemade all the way! But if you must, you can definitely do store bought. The difference is that store bought tortilla chips are light and crispy - they don’t hold up as well when drenched and cooked in salsa. If you like your chilaquiles on the tender side, store bought chips might be for you. If you want a true chilaquiles experience, you must make your own chips. It’s really not that hard, you don’t even need to deep fry! The heft, heartiness, and crunch you get from a homemade fried tortilla chip is exactly what you need for chilaquiles. Old corn tortillas that are a bit dry fry up best and absorb less oil.How to make homemade tortilla chips
- Cut tortillas in to quarters and let them dry out slightly while you heat up your oil.
- In a pan, heat up 1/2 inch of neutral oil until hot and shimmery.
- Add the chips and fry, in batches, flipping, until lightly golden.
- Remove from the oil (they will continue to brown after removed) and lightly salt and drain on paper towels or a wire rack.
How to bake homemade tortilla chips
Preheat the oven to 400°F and brush your tortillas with oil on both sides. Cut the tortillas into quarters and lay them out evenly on a pan and bake, flipping the tortillas and rotating the pan as needed, until golden and crispy, about 5-10 minutes. Let cool completely so they harden up.How to make air fry tortilla chips
- Brush the tortillas with neutral oil on both sides (or lightly spray with cooking spray) and cut into quarters.
- Lay the tortillas in the basket of the air fryer and cook at 350°F for 3 minutes, then flip and cook for another 2-3 or until crisp and brown.
- Remove, lightly salt, and let cool.
Chilaquiles sauce
To be honest, everyone makes their chilaquiles sauce differently. Some people even go the store bought route. Really, chilaquiles are a no-fuss sort of meal so no one will judge you if you buy enchilada sauce and call it a day. Just make sure the sauce/salsa you’re using to coat your chips is one you love. Our chilaquiles salsa is super simple mix of fire roasted tomatoes, chipotle in adobo, onions, garlic, and Mexican oregano. Everything blends up and cooks down until it becomes rich and thick. You can thin it out with chicken stock if you like, but this way is the simplest red salsa ever. Sometimes I’ll pop in a dried red chili (after rehydrating it) to add an extra layer of smoke and spice.Red vs green chilaquiles
If you’ve eating in restaurants in the Southwest, you’ve most definitely heard them ask: red or green? Roja or verde sauce are the two main types of salsas/sauces. Sometimes you can even get Christmas or divorciados - chilaquiles with both types of sauce.- Chilaquiles verdes have a salsa consisting of tomatillos, onions, jalapeños, and cilantro.
- Chilaquiles rojos have a salsa consisting of tomatoes, onions, jalapeños, and garlic. Think of red enchilada sauce as opposed to a tomato salsa/pico de gallo situation.
Chilaquiles toppings
- eggs - this is one of the most common toppings and I hardly ever see chilaquiles served without. Sunny side up eggs are the default, but don’t sleep on soft scrambled eggs on top, the creaminess matches perfectly with the salsa covered chips.
- protein - you can go for shredded chicken, pork, or beef or eve use any leftover taco meats you have hanging out. Think: chicken tinga chilaquiles, barbacoa chilaquiles, carnitas chilaquiles, al pastor chilaquiles, or green chile pork chilaquiles
- pico de gallo - chop up 1 tomato, 1/2 small onion, and 1 jalapeño. Mix with freshly chopped cilantro, the juice of 1/2 a lime, and salt to taste. Let the flavors melt for 15 minutes before enjoying.
- avocado or guacamole - use your favorite guacamole recipe or simply top with sliced or diced avocado
- crema or sour cream - a little bit of crema or sour cream adds a rich tang and a cold contrast.
- cheese - cotija or queso fresco is best! I love the soft mildness of queso fresco or the salty bite of cotija.
- cilantro and onions - no Mexican dish is complete without fresh onions and cilantro for bite and herbaceousness.
Chilaquiles Recipe
Chilaquiles are a hearty, filling, super satisfying Mexican comfort food.
- 1/4 cup high heat oil (for frying)
- 12 corn tortillas (quartered)
- 15 oz fire roasted tomatoes (diced, ~1 can)
- 1/2 onion (diced)
- 2 cloves garlic (minced)
- 1 jalapeño (chopped, see notes)
- 1 tsp dried Mexican oregano
- 2 eggs (sunny side up)
- 1 avocado (sliced)
- 1 oz cotija cheese (crumbled, or more or less as desired)
- fresh cilantro (chopped)
Heat the oil in a large skillet over medium high heat until shimmery. Add the tortilla wedges in batches and cook, flipping as needed, until golden. Remove, drain, and lightly salt.
Place the tomatoes, onion, garlic, chipotle or jalapeño, and oregano in a blender and blend until smooth.
Pour the sauce into a large skillet and cook over medium high heat, stirring occasionally, until slightly thick 5-10 minutes. Taste and season with salt.
Add the chips to the sauce and stir carefully, coating all the chips, until the chips are slightly soft and heated through, 1-5 minutes depending on how crunchy you want your chips.
Top with fried eggs, avocado, cheese, and cilantro and enjoy immediately.
Replace the chopped jalapeno for one (or more) pepper from a can of chipotle peppers in adobo for an extra spicy, extra smoky taste.
It's not really recommended to use store-bought chips instead of making your own, but if you need to, go for the thickest chips you can find.
I Am... Buldak: The Spicy Chicken You Never Knew You Loved
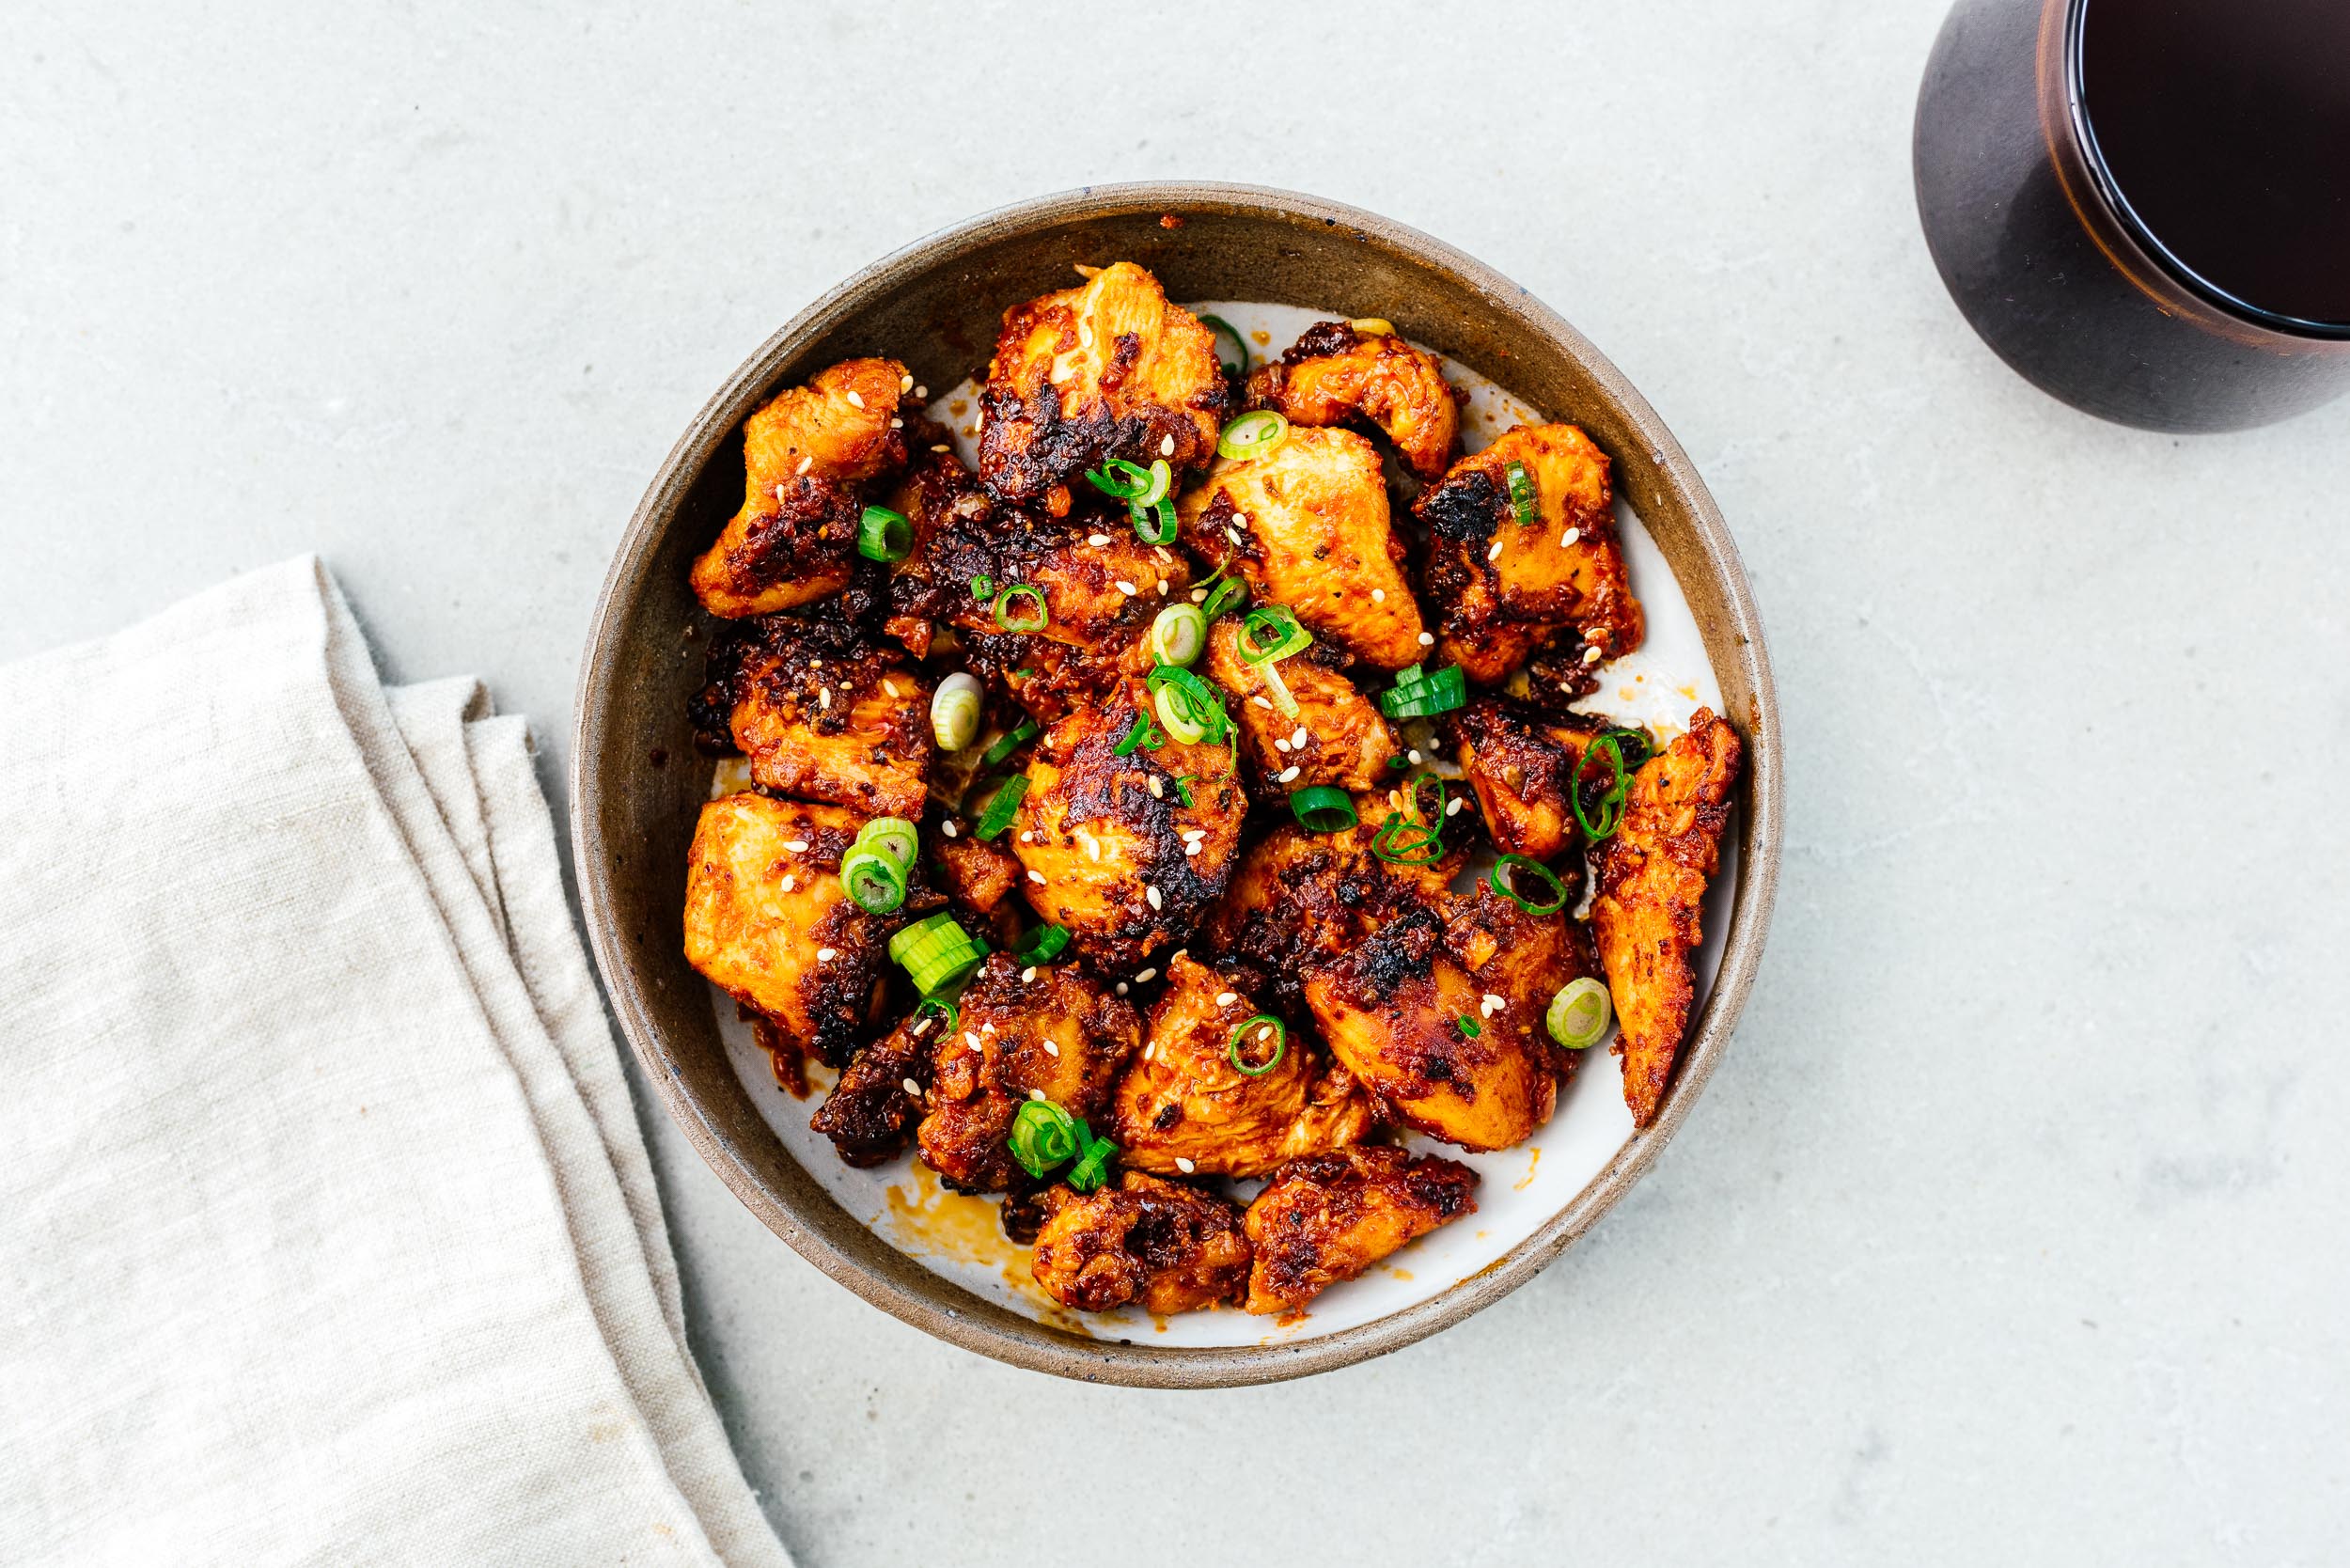
If you’re a fan of spicy food, buldak is for you. It’s fiery hot, spicy red, and so, so good. Think: juicy chunks of tender grilled chicken coated in a spicy sauce that is incredibly addictive. It’s one of my favorite things at Korean restaurants even though it’s so spicy I can’t stand it. I especially love it when it’s smothered in cheese.
What is buldak?
Buldak, aka fire chicken, is a spicy barbecued Korean chicken dish. “Bul” means fire and “dak” means chicken. Buldak is bite sized pieces of chicken doused in a spicy sauce made with gochugaru, gochujang, soy sauce, jocheong (rice syrup), garlic, and ginger. It’s a pretty new dish that became popular in the early 2000s both in part to buldak restaurants and Samyang buldak instant noodles.How spicy is buldak?
It’s pretty darn spicy! Every one’s spice tolerance is different but I will say that the spice of buldak is one that builds and builds. If you want a less spicy buldak, you can decrease the gochugaru and gochujang.What is buldak sauce?
Buldak sauce is the fiery red sauce that coats the chicken. It’s made up of:- gochugaru - Korean chili flakes bring smokiness and a bit of heat and crunch.
- gochujang - This is where the majority of the spice is coming from, especially if you use an extra spicy gochujang.
- soy sauce - soy sauce adds umami and saltiness. If you have Korean soy sauce, use that, otherwise the next best for this recipe is Japanese soy sauce.
- black pepper - freshly ground black pepper is actually spicy, especially if there’s a lot of it. It hits a different spicy note than the gochugaru and gochujang. Make sure it’s fresh, pre-ground black pepper looses it’s pep.
- jocheong (rice syrup) or sugar - a little bit of sweetness accentuates the spicy heat. Jocheong is a sweet, thick syrup made with rice and barley malt. It’s less sweet than sugar or honey and has a subtle malty flavor. You can buy it at Korean grocery stores or online. If you don’t have any at home, you can sub sugar or honey.
- garlic - fresh garlic adds the heat. If you a garlic lover, garlic is essential, add as many cloves as you can handle.
- ginger - a bit of fresh ginger adds a warm cozy heat and spice.
Gochujang vs gochugaru
If you’re not familiar with Korean food, you might not know what gochujang or gochugaru is.- Gochujang is a spicy Korean sauce. It’s savory, sweet, spicy thick fermented paste made from chili powder and sticky rice. It adds sweet and heat and a ton of flavor. Traditionally it comes in tubs, but these days you can find it in convenient squeeze bottles in the Asian aisle of literally any grocery store and online, of course.
- Gochugaru, on the other hand, are Korean chili flakes. Korean chili flakes are fruity, sweet, smoky, sun dried bright red flakes. They’re not too spicy and their heat is gentle and delicious. I always buy coarse gochugaru which looks like flaky sea salt. They usually come labeled with mild, medium, or hot, so you can buy them according to your spice preference.
How to make buldak chicken
- Make the sauce. Mix together the gochugaru, gochujang, soy sauce, rice syrup, oil, black pepper, ginger, and garlic.
- Marinate the chicken. Cut up the chicken into 1 inch bite size pieces and marinate for 1 hour.
- Cook the chicken. You can cook the chicken anyway you prefer: on the stove, baked, or in the air fryer. I like pan frying in a cast iron pan for some extra char. When the chicken is ready, top it off with some toasted sesame seeds and sliced green onions.
- Optional: Give it a cheese blanket by sprinkling on a generous amount of shredded mozzarella.
- Get your spice on 🥵
What kind of chicken
You can use either boneless chicken thighs or chicken breast. Typically boneless chicken doesn’t come with skin on but skin on chicken is amazing for this too. The only thing you need to note is that chicken breast will cook a lot faster than thighs. Make sure you cut the chicken into evenly sized pieces so they all cook evenly.Grilling vs pan fried vs oven baked vs air fryer
You can cook your chicken in the method you prefer. Grilling gives it the most authentic KBBQ feels, pan frying is simple and stills allows for charring, oven baked and air frying is hands off and easy.How to grill
Brush the grill with oil and grill the marinated chicken over medium heat, flipping as needed, until cooked through and slightly charred.How to pan fry
Heat a cast iron pan (or non stick if you prefer) over medium high heat and add a touch of neutral oil. Cook the marinated chicken, flipping as needed, until cooked through and charred.How to bake
Place the chicken out on a lightly oiled baking dish and cook in a 420°F preheated oven for 15-20 minutes for chicken breast and 20-30 minutes for chicken thighs, or until the internal temperature reaches 165°F and the juices run clear, stirring once, halfway.How to air fry
Oil the air fryer basket and lay in the marinated chicken in a single layer. Air fry at 400°F for 12-15 minutes or until the internal temperature reaches 165°F and the juices run clear, flipping halfway.Cheese buldak
Cheesy buldak is one of the greatest things in the world. The creaminess of the cheese counteracts the spice and the cheese pulls are phenomenal. I love mozza because it’s super stretchy and the mildness really helps with the spiciness of the chicken. To make cheese buldak, simply layer on shredded or sliced cheese on top of the chicken right after it comes out of the pan. The residual heat of the chicken will melt the cheese into a cozy, stretchy, perfect cheese pull blanket. If you want the cheese to be extra melty, you can pop it in under the broiler for a couple of minutes, too.What to serve with buldak chicken
- Have it as part of your KBBQ experience
- With buldak noodles for extra spice
- With tteokbokki for a street food feast
- As a topping with rabokki
- Corn cheese because no Korean feast is complete without (pictured below)
- On top of mac and kimcheese because cheese and buldak are fire together
Buldak Chicken
If you’re a fan of spicy food, buldak is for you.
- 1/4 cup gochugaru
- 2 tbsp gochujang
- 1/2 tbsp soy sauce
- 1 tbsp oil
- 1/4 tsp freshly ground black pepper
- 3 tbsp Korean rice syrup (see post, or sub with sugar or honey)
- 6 cloves garlic (minced)
- 1 tsp ginger (minced)
- 1 lb chicken (boneless, cut into cubes)
In a bowl, mix together the gochugaru, gochujang, soy sauce, oil, black pepper, rice syrup (or sugar or honey), garlic, and ginger until it comes together in a thick paste.
Marinate the chicken in the sauce for 1 hour.
Grill or pan fry the chicken over medium high heat, flipping as needed until cooked through, about 5-8 minutes, depending on size. Turn the heat down if it starts to char too much; the sweetness of the sauce can lend itself to burning.
Enjoy topped with toasted sesame seeds and sliced green onions.
I Am... Air Fryer Ranch Wings
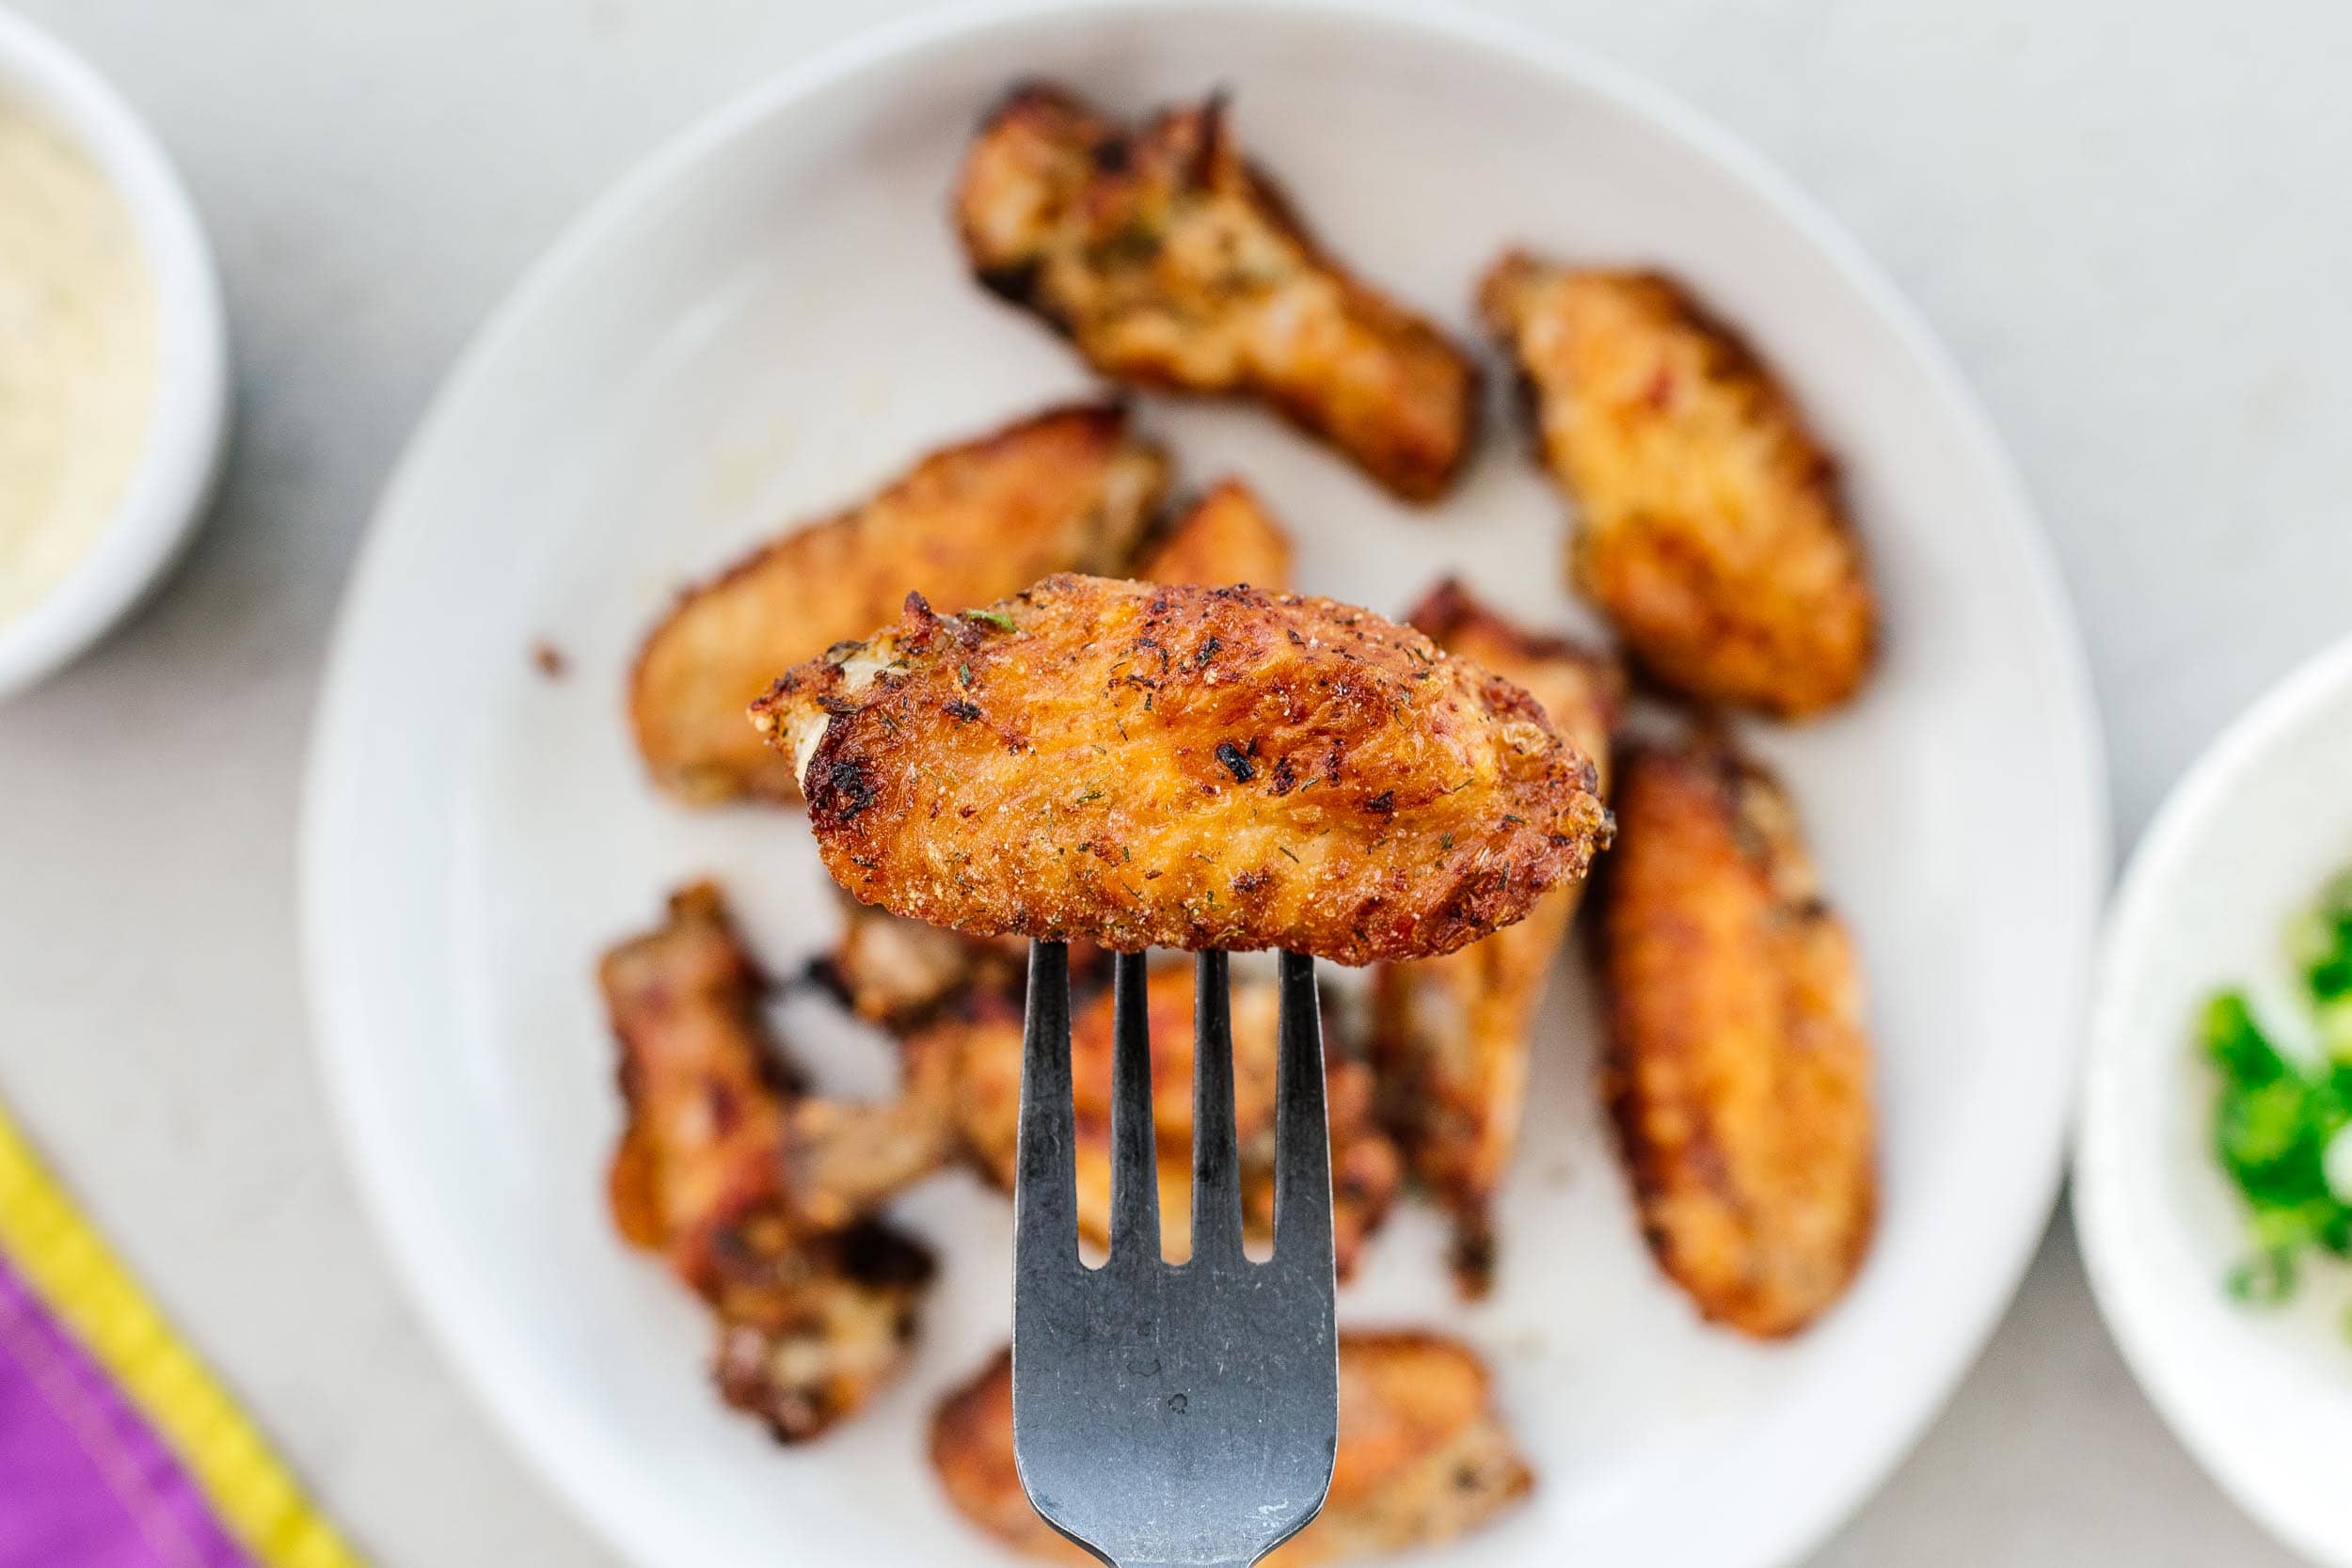
If you love dipping hot wings in ranch sauce you’re going to amazed at how good these air fryer ranch wings are. These ranch wings were the best wings I’ve made in the air fryer, no joke. They are juicy on the inside, golden and burnished on the outside and coated in finger licking ranch seasoning. They remind me of a naked buttermilk fried chicken sans breading. I didn’t dip them in ranch because they were perfect as is, but if you do choose the ranch dip route, you’re a ranch hero! These ranch wings are naked wings that are seasoned with ranch flavors, no breading or coating required. The buttermilk in the ranch seasoning perfectly browns in the air fryer and adds tang and tenderization. I love them because they’re crispy, juicy, and naked. Don’t get me wrong, I love a good crunchy coated wing, but there’s something about the simplicity of naked wings that is amazing. Especially when they’re ranch flavor. Think of ranch chips, but wings. Seriously good! Pro tip, dip them in hot sauce for a reverse wing experience.
The secret ingredient to golden air fryer wings
There are two secrets to this recipe. The first is baking powder and the second is buttermilk powder. They work in tandem to brown the wings and make them crispy and golden. Baking powder contains both and acid and base component and it’s the unique combo that helps raise the pH levels in the chicken, making the skin break down and allowing it to get more crispy and brown. Buttermilk powder tenderizes the chicken, which makes it extra juicy and also gives it a tangy, complex flavor.How to make air fryer ranch wings
- Lightly pat your chicken dry. Moisture is not your friend when you want a crispy chicken wing, so be sure to pat your wings dry with a paper towel.
- Lightly oil. Lightly oil the chicken by tossing it with oil or spraying it with spray oil. This will promote even browning.
- Coat the chicken. This is where the magic happens. Toss the wings in a large bowl with a bit of baking powder and ranch seasoning.
- Air fry. Lightly spray (or brush) the air fryer basket with oil. Arrange the wings in a single layer, with some space in between each wing. Space them out evenly on a rack in the air fryer - the middle and the upper part of the air fryer has the best circulation.
- Flip. Flip the wings and fry again.
- Remove the wings immediately so they don’t over cook and enjoy!
Ranch seasoning
You can easily make your own ranch seasoning or you can simply buy it at the store, it’s up to you. Personally, I love the ranch seasoning from Trader Joe’s. If you make it, all you need to do is mix together: 1/4 cup buttermilk powder, 1 tbsp garlic powder, specifically granulated garlic, 1 tbsp onion powder, 1 tbsp dried dill, 1 tbsp dried green onions, 1 tbsp dried chives, 1 tsp salt, 1 tbsp freshly ground pepper, 1/2 tsp sugar.Pro tips for cooking wings in the air fryer
- Dry the chicken with a paper towel as much as possible, the drier the chicken, the crispier
- Don’t crowd the air fryer
- Use tongs to flip your wings instead of shaking the basket
- It’s best to use air fryer racks and spread out the wings, the most even heat is near the top and middle of the air fryer, where the element is, so if you place your wings on a rack, nearer to the top, you’ll get more heat.
Other air fryer wings to make
- Just Plain Perfect Air Fryer Chicken Wings
- Air Fryer Vietnamese Wings
- The Crunchiest Asian Fried Chicken in an Air Fryer
- Pok Pok Style Fish Sauce Chicken Wings
- Korean Fried Chicken
Air Fryer Ranch Wings
- 1 lb chicken wings
- 1 tbsp neutral oil
- 2 tbsp ranch seasoning
- 1 tsp baking powder
Pat the chicken dry with paper towels and toss generously in oil, then mix the baking powder with the ranch seasoning and toss to coat the wings evenly.
Spray the air fryer basket with oil or lightly brush with a thin coat of oil. Arrange the chicken in a single layer and air fry at 400°F for 15 mins. When the 15 minutes is up, flip the chicken and air fry for another 5 minutes.
Remove the chicken immediately. Enjoy!



 2015 Holiday Giveaway
 One-Pot Lemon Scallop Pea Spaghetti
 Beer Battered Onion Rings, Jalapeno Aioli
 2014 Holiday Gift Guide and a Giveaway
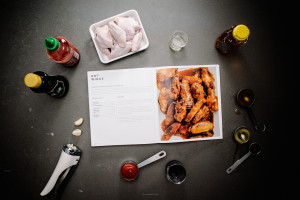 Easy Gourmet Hot Wings and a Giveaway!
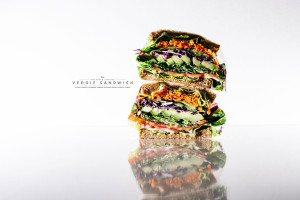 The Ultimate Veggie Sandwich
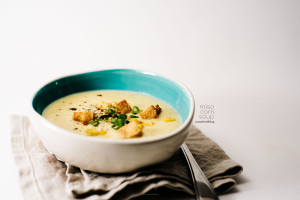 Vegan(!) Creamy Corn Soup Recipe
 Sunday Brunch: Grilled Cheese Eggs Benny